OpenShift AI Resources - 2
Create Data Connection
Navigate to the Data Science Project section of the OpenShift AI Console /Dashboard. Select the Ollama-model project.
-
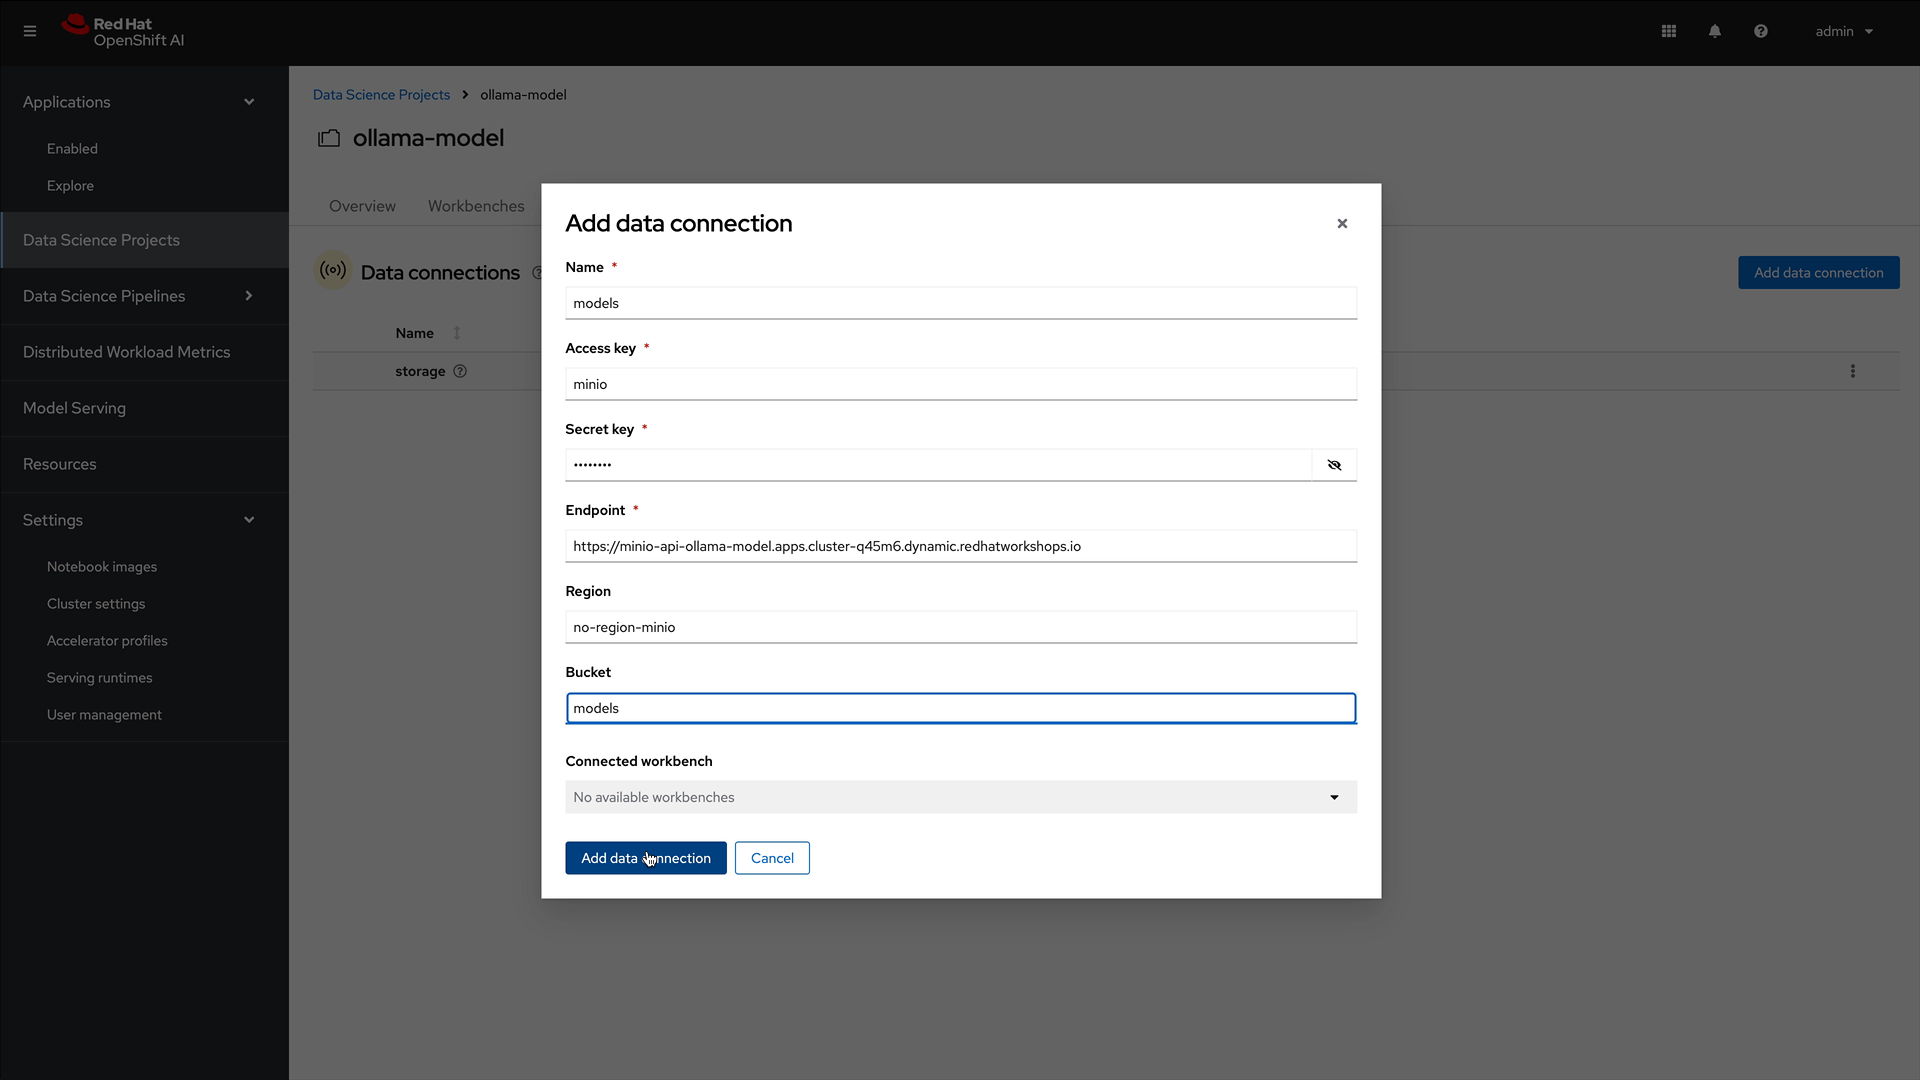
Select the Data Connection menu, followed by create data connection
-
Provide the following values:
-
Name: models
-
Access Key: use the minio_root_user value from previous section’s YAML file
-
Secret Key: use the minio_root_password value from previous section’s YAML File
-
Endpoint: use the MinIO API URL from the Routes page in Openshift Dashboard
-
Region: This is required for AWS storage & cannot be blank, set value to "no-region-minio"
-
Bucket: use the Minio Storage bucket name: models
-

Repeat the same process for the Storage data connection, using storage for the "Name" & "Bucket".
Creating a WorkBench
Navigate to the Data Science Project section of the OpenShift AI Console /Dashboard. Select the Ollama-model project.

-
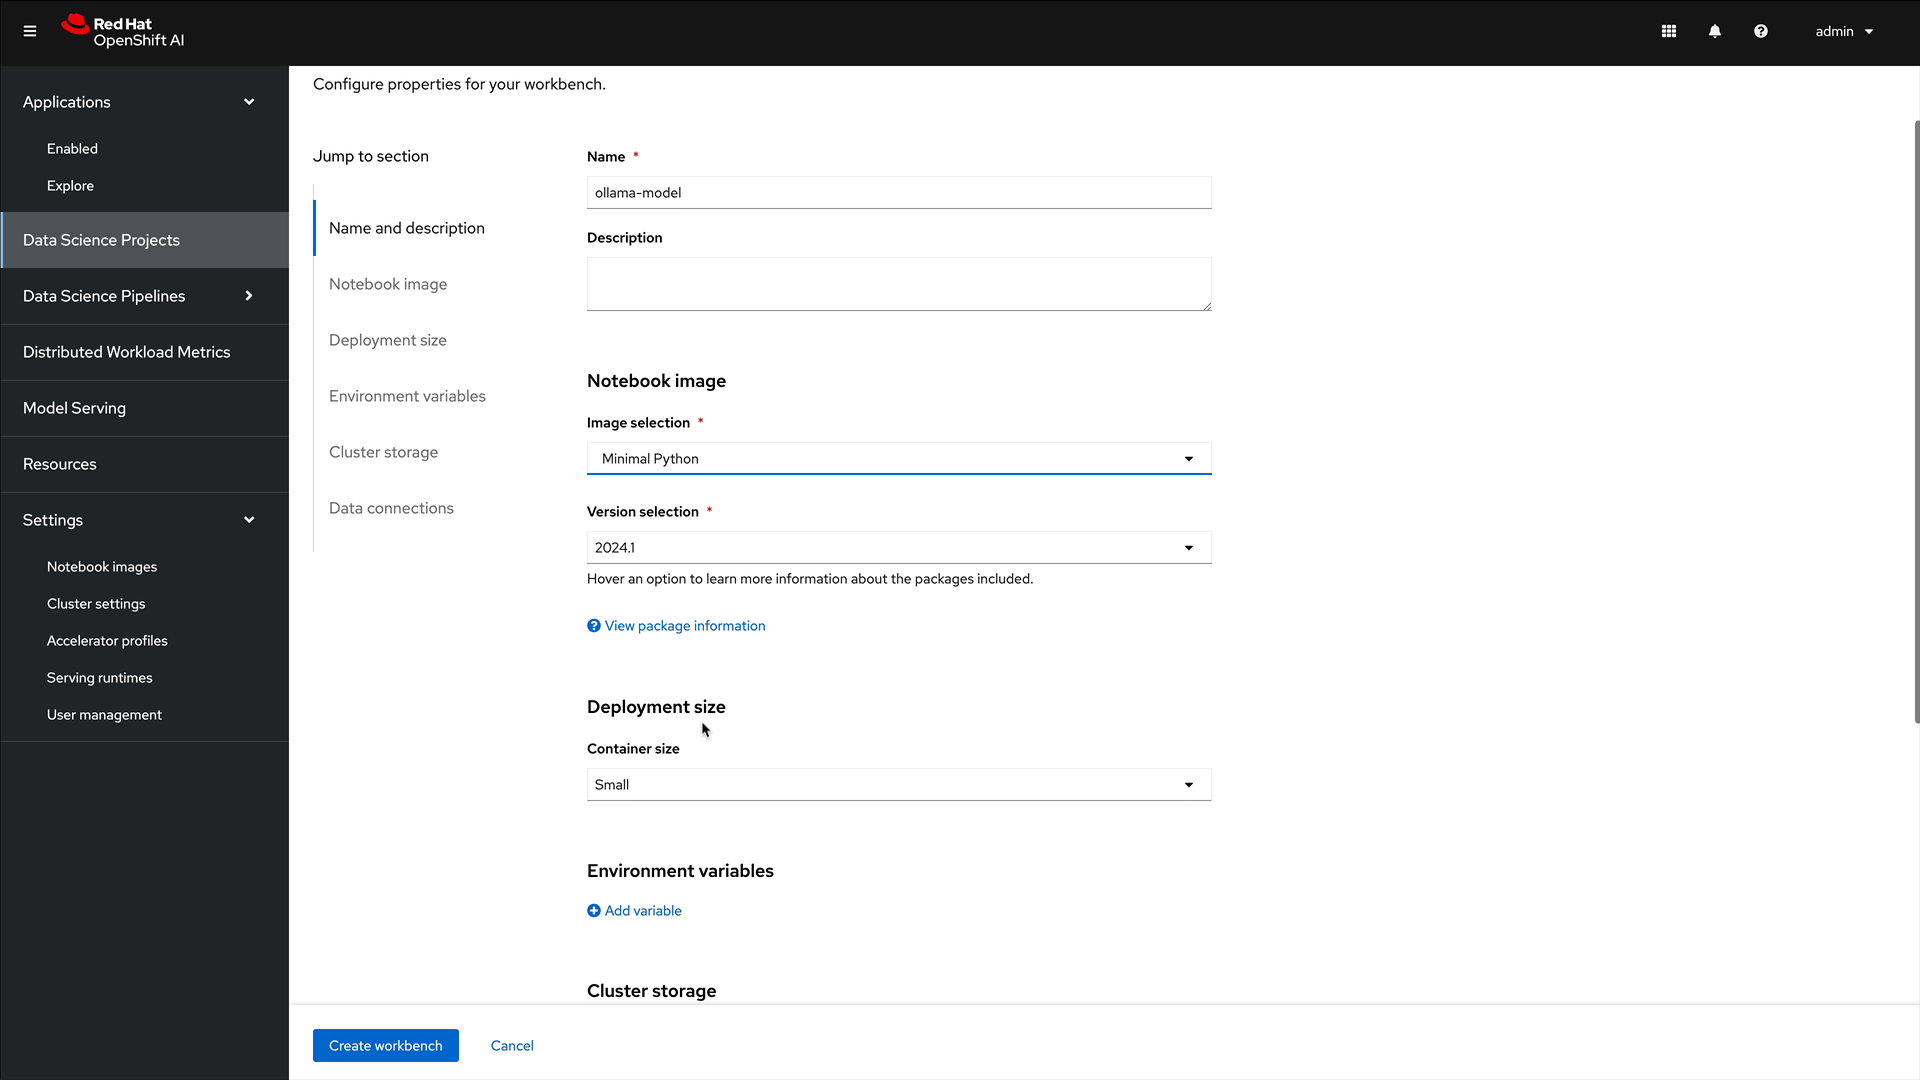
Select the WorkBench button, then click create workbench
-
Name:
ollama-model -
Notebook Image:
Minimal Python -
Leave the remaining options default.
-
Optionally, scroll to the bottom, check the
Use data connection box. -
Select storage from the dropdown to attach the storage bucket to the workbench.
-
-
Select the Create Workbench option.
| Depending on the notebook image selected, it can take between 2-20 minutes for the container image to be fully deployed. The Open Link will be available when our container is fully deployed. |
Creating The Model Server
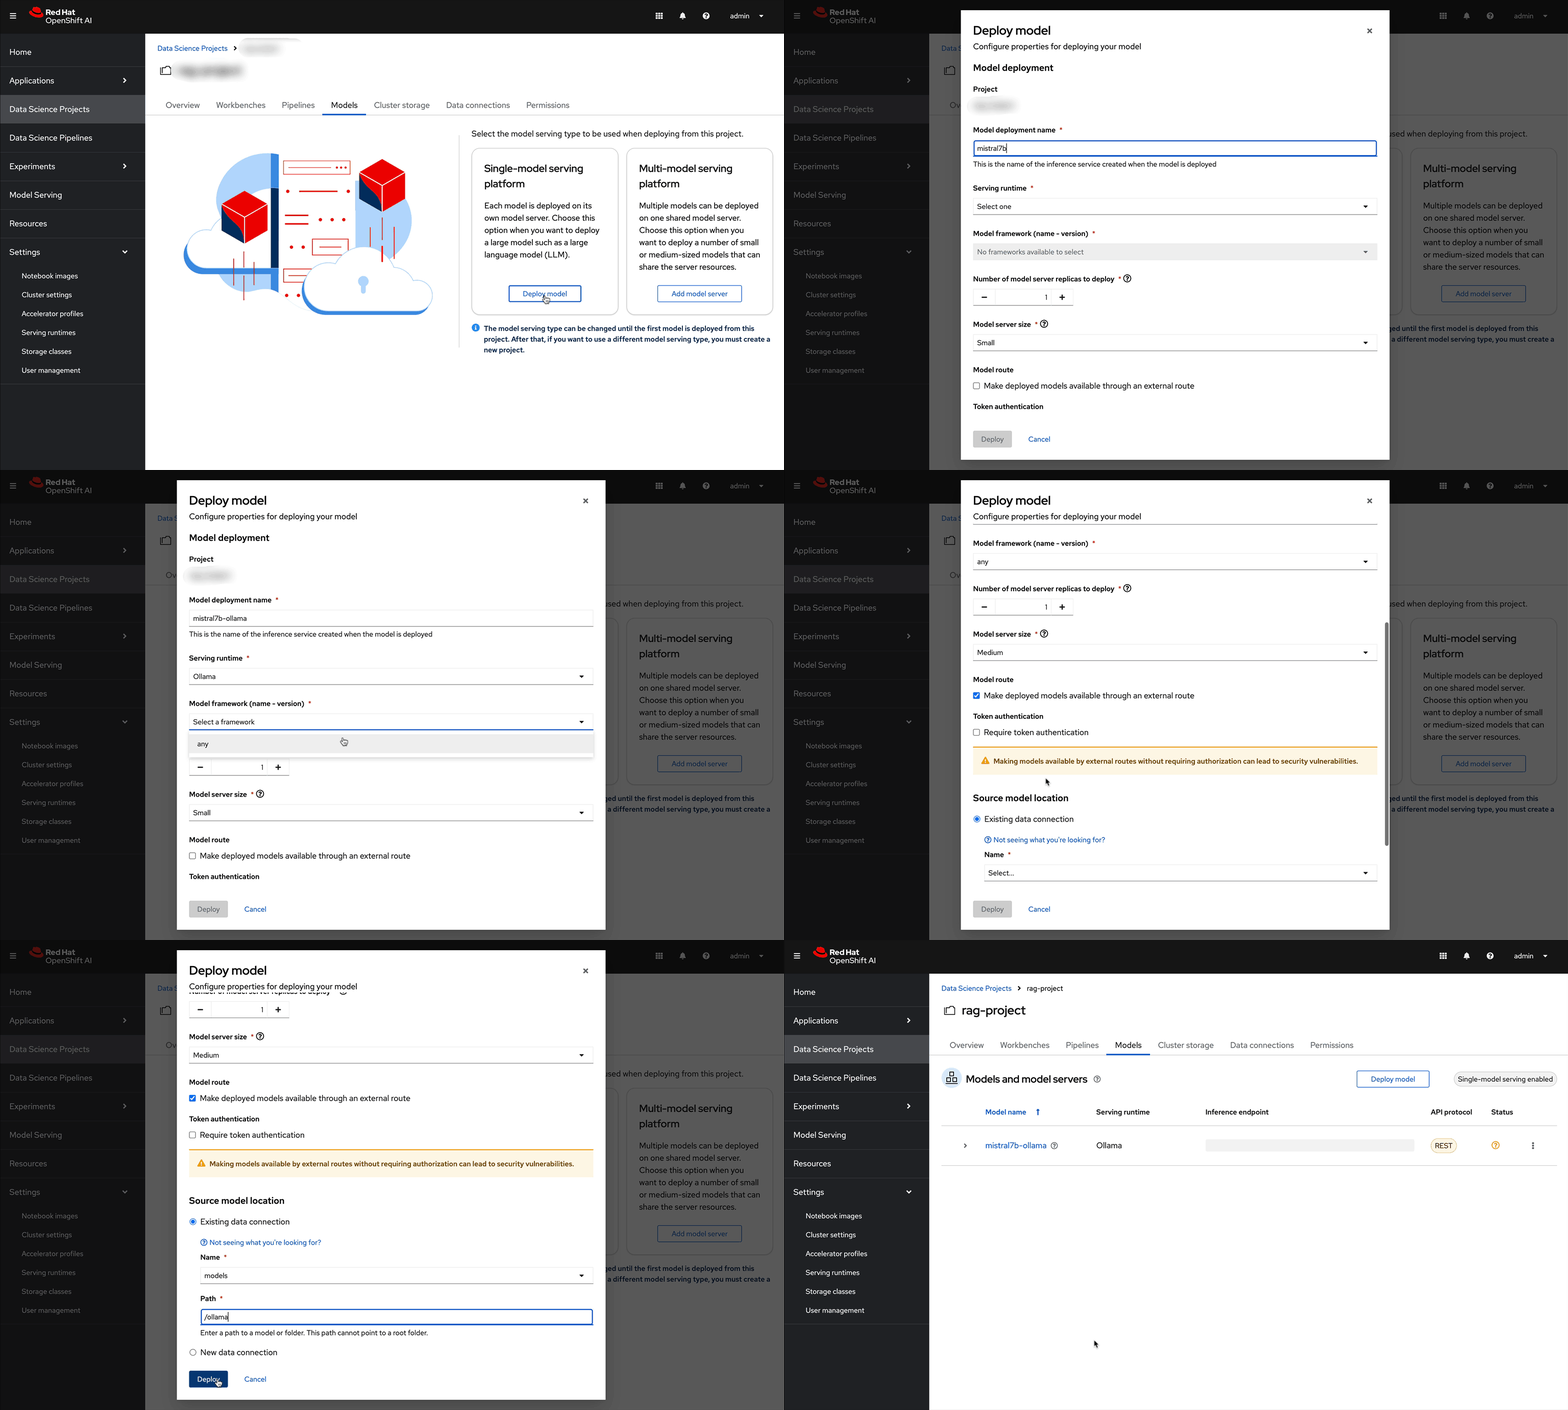
From the ollama-model WorkBench Dashboard in the ollama-model project, navigate to the Models section, and select Deploy Model from the Single Model Serving Platform Button.

Create the model server with the following values:
-
Model name:
ollama-mistral(differs from animated deployment, use this name) -
Serving Runtime:
Ollama -
Model framework:
Any -
Model Server Size:
Medium -
Model Route: Check the box to make models available via an external route.
-
Token Authentication: Uncheck the box that requires token authentication.
-
Model location data connection:
models -
Model location path:
/ollama
After clicking the Deploy button at the bottom of the form, the model is added to our Models & Model Server list. When the model is available, the inference endpoint will populate & the status will indicate a green checkmark.
We are now ready to interact with our newly deployed LLM Model. Join me in the next section to explore Mistral running on OpenShift AI using Jupyter Notebooks.