Configure Event-Driven to pass extra variables to Ansible Automation Platform
What is in this break-fix
In this section, you will configure Ansible Automation Platform to receive events from Event-Driven Ansible (Automation Decisions). After sending the curl command with the host parameters, you need to validate if the Job Template rh1-aap-extra-vars-eda will execute with the Event-Driven Ansible (Automation Decisions) event.
Let’s copy the files:
On node1 let’s list the files in the .ssh/ folder and view your public key.
ssh node1
ls -lha .ssh/
cat .ssh/n66g5key.pub # (Change to your ssh pub key)[lab-user@bastion ~]$ ssh node1 [ec2-user@node1 ~]$ ls -lha .ssh/ total 36K drwx------. 2 ec2-user ec2-user 157 Nov 26 14:23 . drwx------. 10 ec2-user ec2-user 4.0K Nov 26 14:05 .. -rw-------. 1 ec2-user ec2-user 3.1K Nov 26 13:21 authorized_keys -r--------. 1 ec2-user ec2-user 216 Nov 26 14:02 config -rw-------. 1 ec2-user ec2-user 2.6K Nov 26 13:47 id_rsa -rw-------. 1 ec2-user ec2-user 582 Nov 26 13:47 id_rsa.pub -rw-------. 1 ec2-user ec2-user 1.7K Nov 26 14:23 known_hosts -rw-------. 1 ec2-user ec2-user 913 Nov 26 14:21 known_hosts.old -r--------. 1 ec2-user ec2-user 2.6K Nov 26 14:22 n66g5key.pem -r--------. 1 ec2-user ec2-user 552 Nov 26 14:22 n66g5key.pub [ec2-user@node1 ~]$ cat .ssh/n66g5key.pub (Change to your ssh pub key)
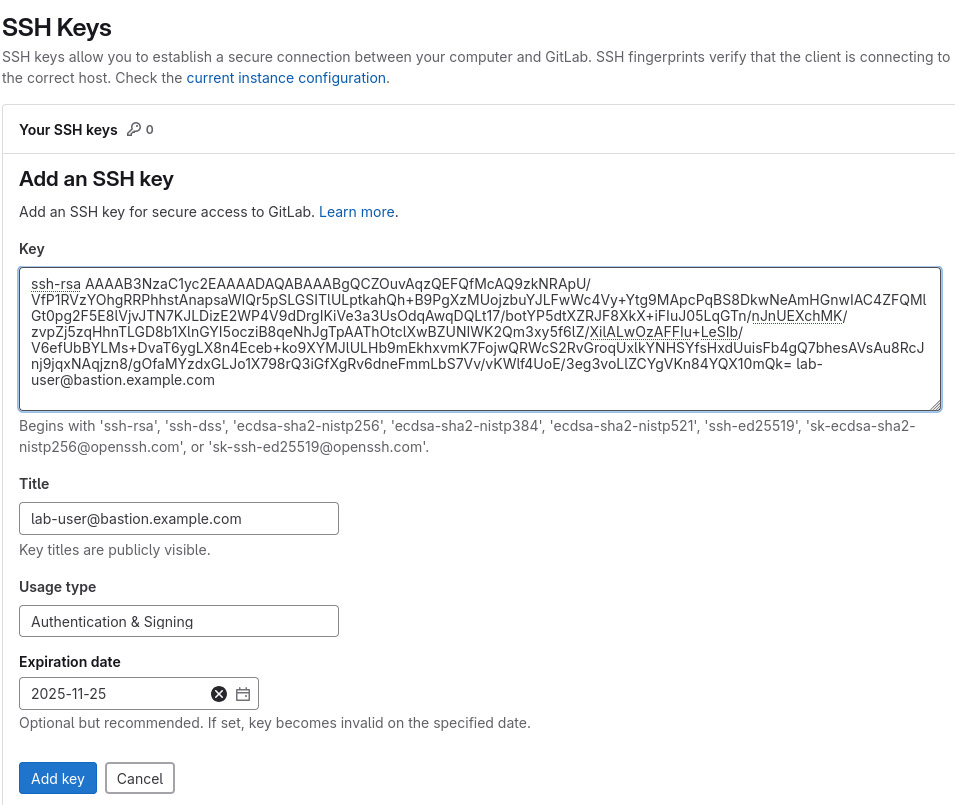
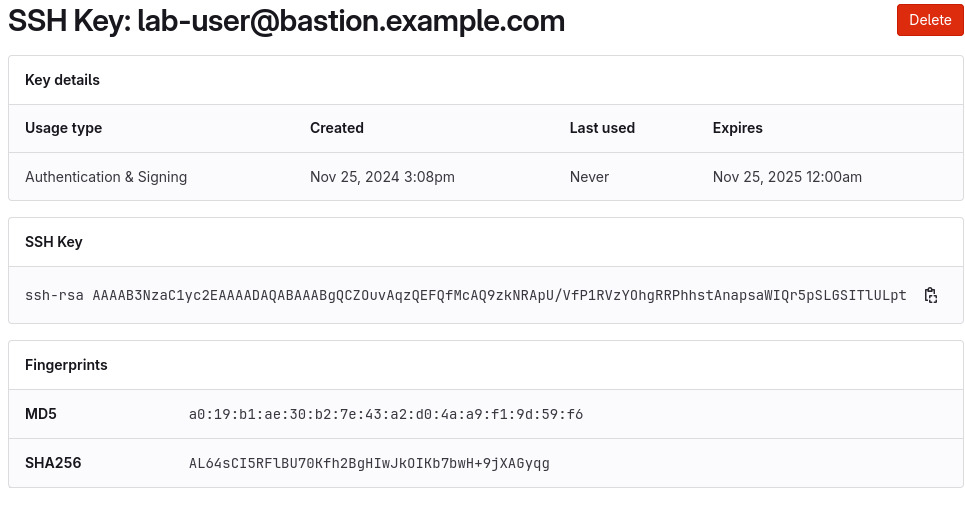
Copy the contents of the public key and add it to this link. To do this you will need to hold the Shift key, and then highlight the key and right click to copy.
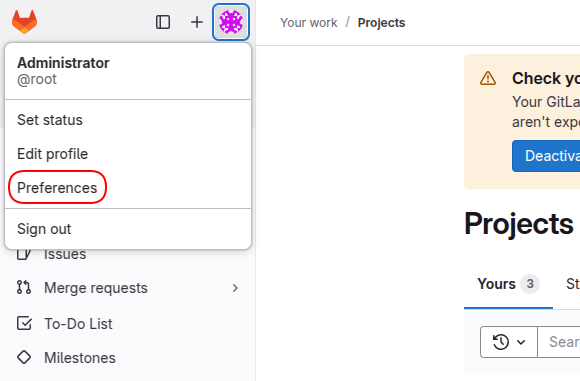
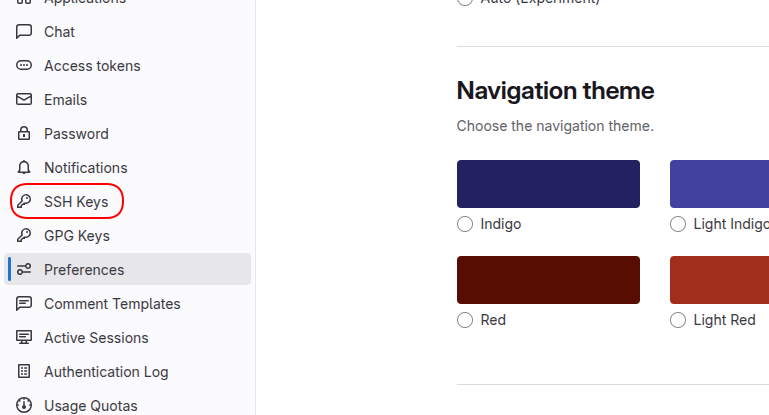
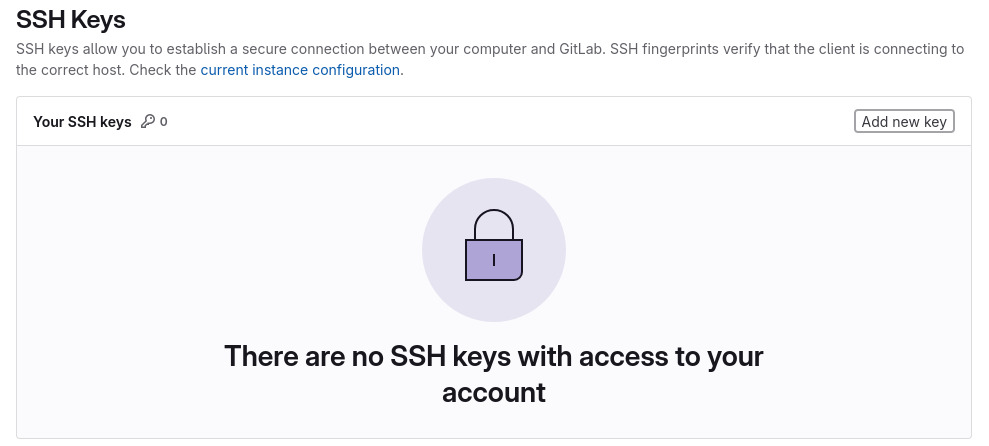
Go to User Settings / Preferences / SSH keys
You will need to open and log in to the GitLab server if you have not done so already.
-
URL: https://server.{subdomain_base}/-/user_settings/ssh_keys
-
Username:
root -
Password:
redhat..123
Click Add new key and paste the public key into the "Key" box. Give it a title and click Add key.
On node1, pull the rh1-aap-extra-vars-eda repository and copy both folders into rh1-aap-extra-vars-eda:
cd 03-lab/
git clone git@server.example.com:root/rh1-aap-extra-vars-eda.git
cp -rf rh1-eda-example/* rh1-aap-extra-vars-eda/[ec2-user@node1 ~]$ cd 03-lab/ [ec2-user@node1 03-lab]$ git clone git@server.example.com:root/rh1-aap-extra-vars-eda.git [ec2-user@node1 03-lab]$ cp -rf rh1-eda-example/* rh1-aap-extra-vars-eda/
Change directory to rh1-aap-extra-vars-eda and commit to git:
cd rh1-aap-extra-vars-eda/
git config --global user.name "ec2-user"
git config --global user.email ec2-user@localhost
git add .
git commit -m "RH1"
git push[ec2-user@node1 03-lab]$ cd rh1-aap-extra-vars-eda/ [ec2-user@node1 rh1-aap-extra-vars-eda]$ git config --global user.name "ec2-user" [ec2-user@node1 rh1-aap-extra-vars-eda]$ git config --global user.email ec2-user@localhost [ec2-user@node1 rh1-aap-extra-vars-eda]$ git add . [ec2-user@node1 rh1-aap-extra-vars-eda]$ git commit -m "RH1" [ec2-user@node1 rh1-aap-extra-vars-eda]$ git push
Now in Automation Execution(Controller):
If you have not already opened Ansible Auotomaton Platform, do so now. The URL is: https://controller.{subdomain_base}/ Log in with the these credentials
User: admin
Pass: R3dh4t1!
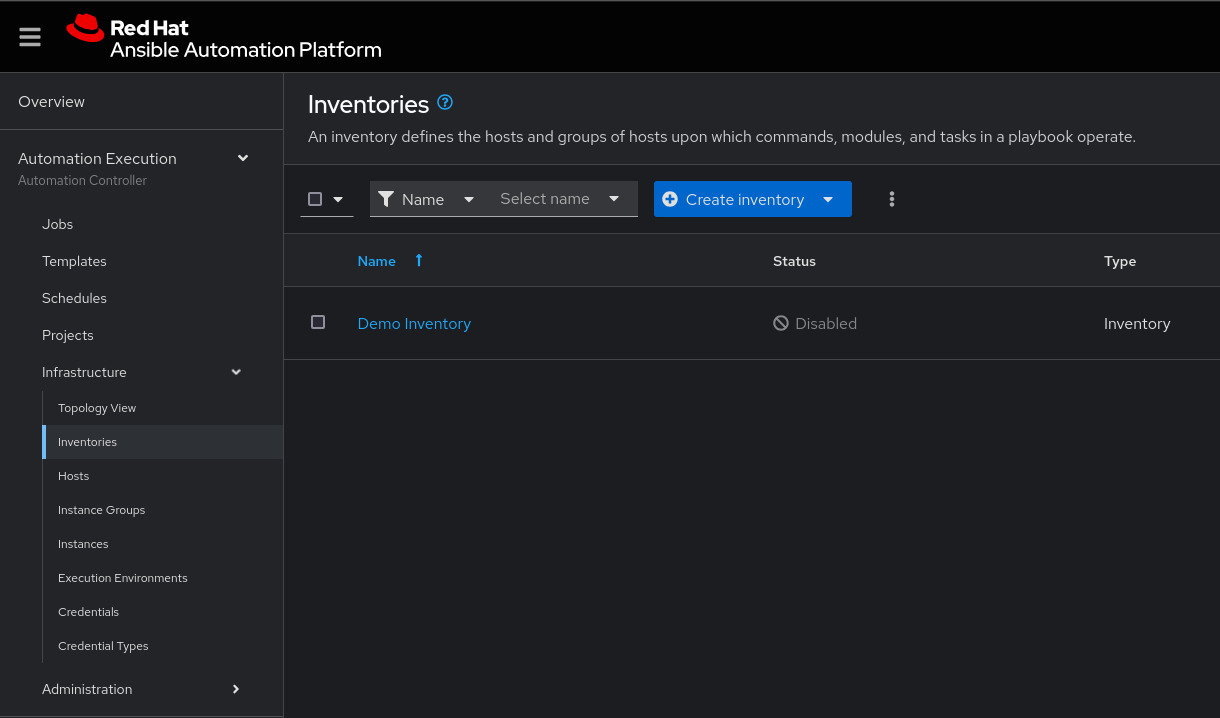
Create the inventory. Select .
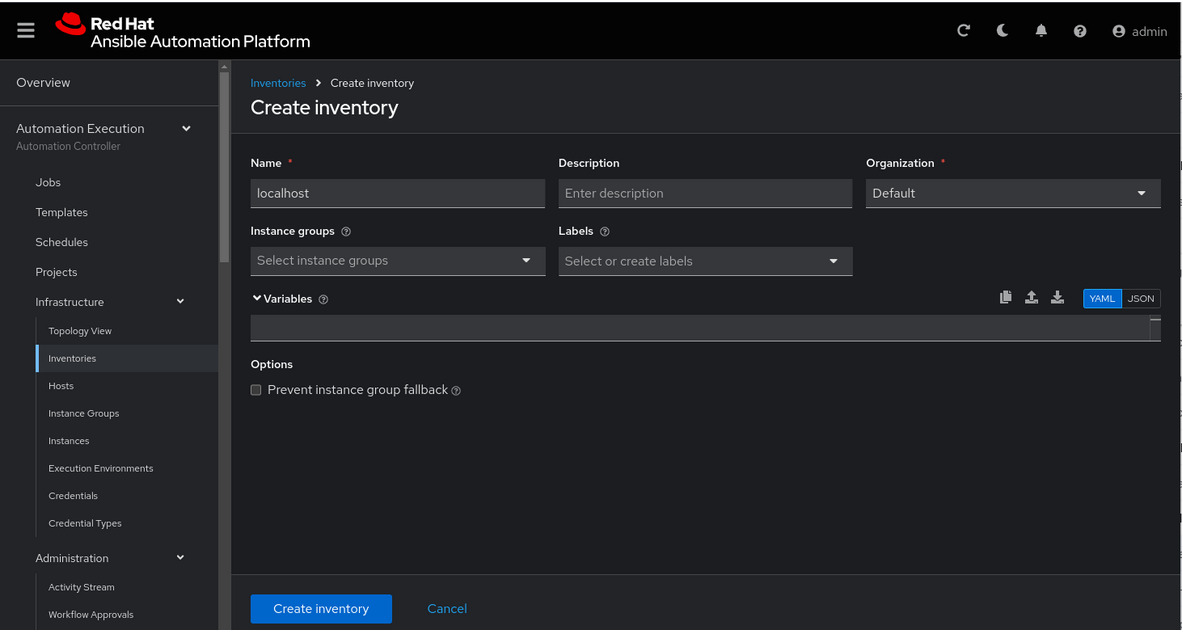
To create the inventory, click Create inventory in blue.
Name: localhost
Organization: Default
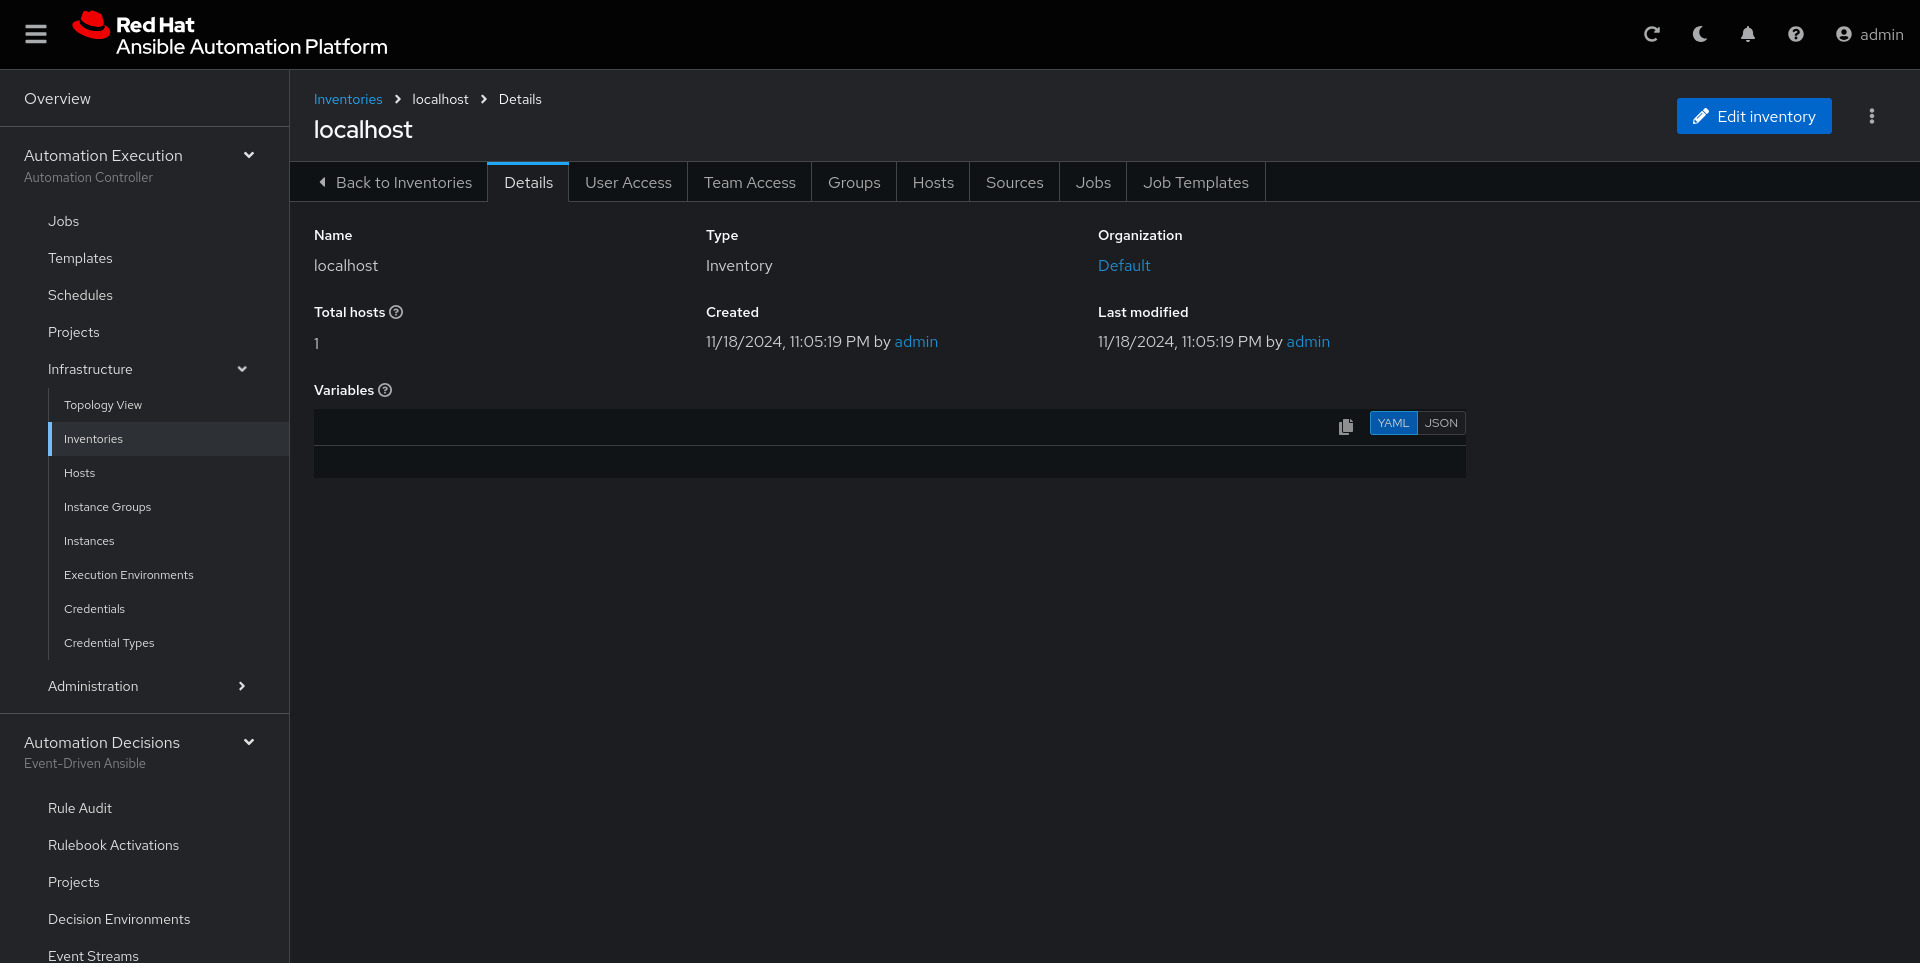
Now click Create inventory:
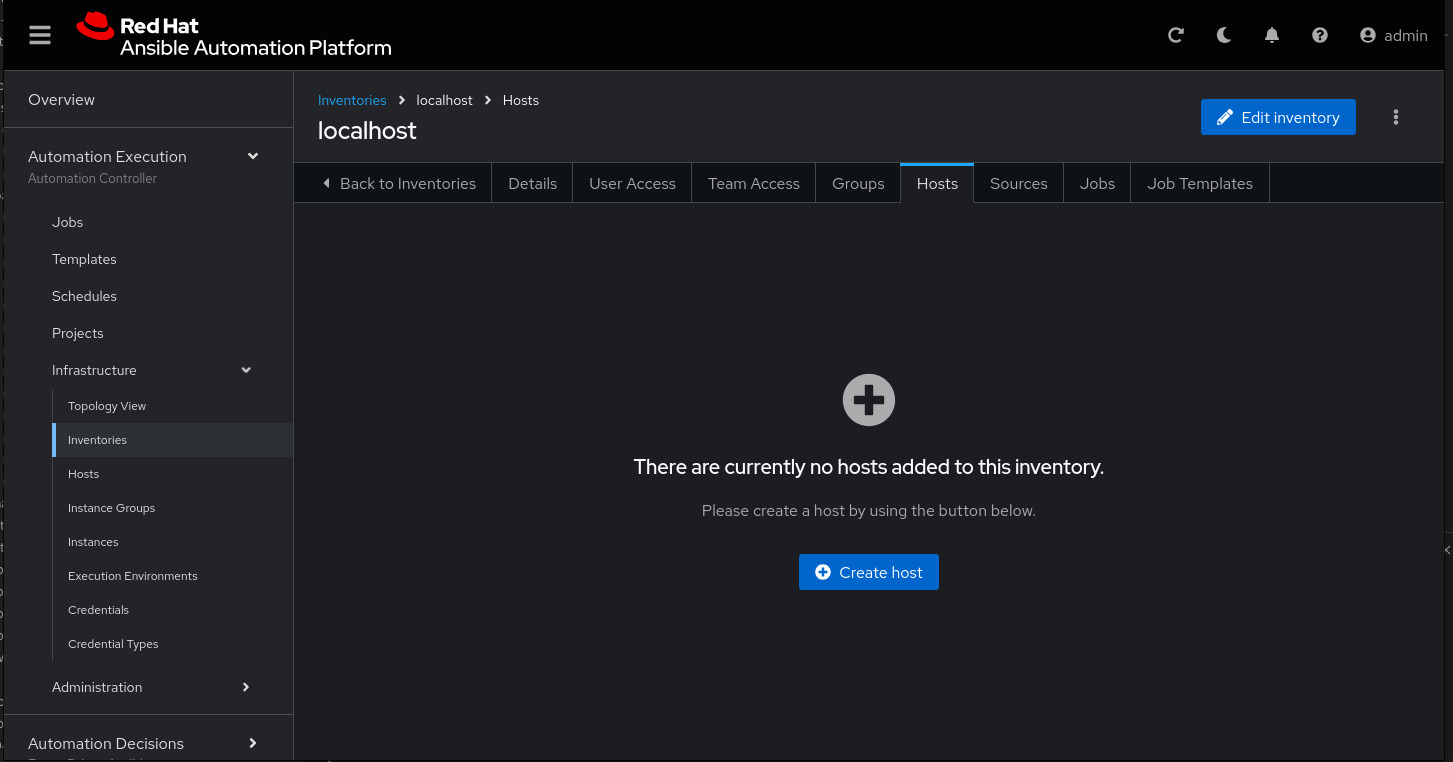
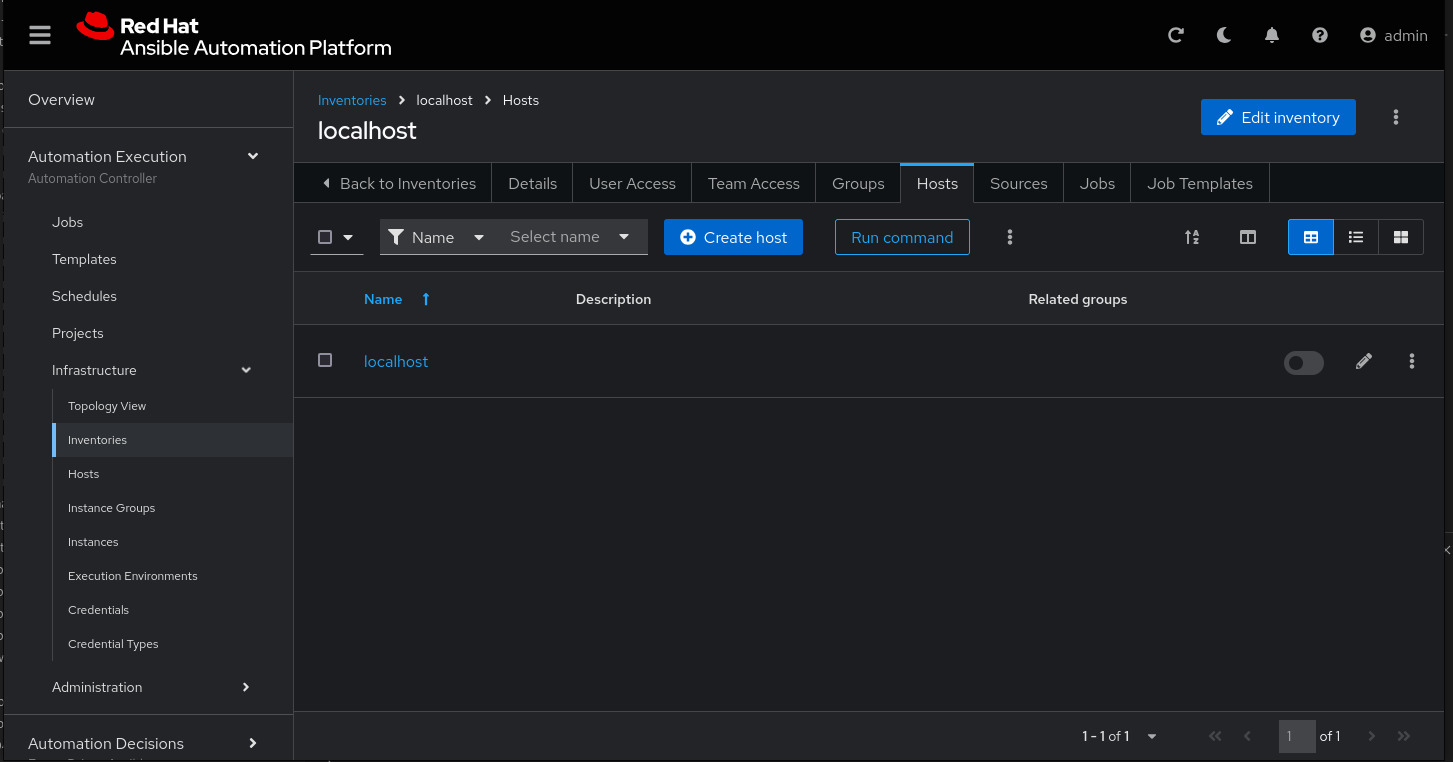
To add a host to the inventory, click the Hosts tab.
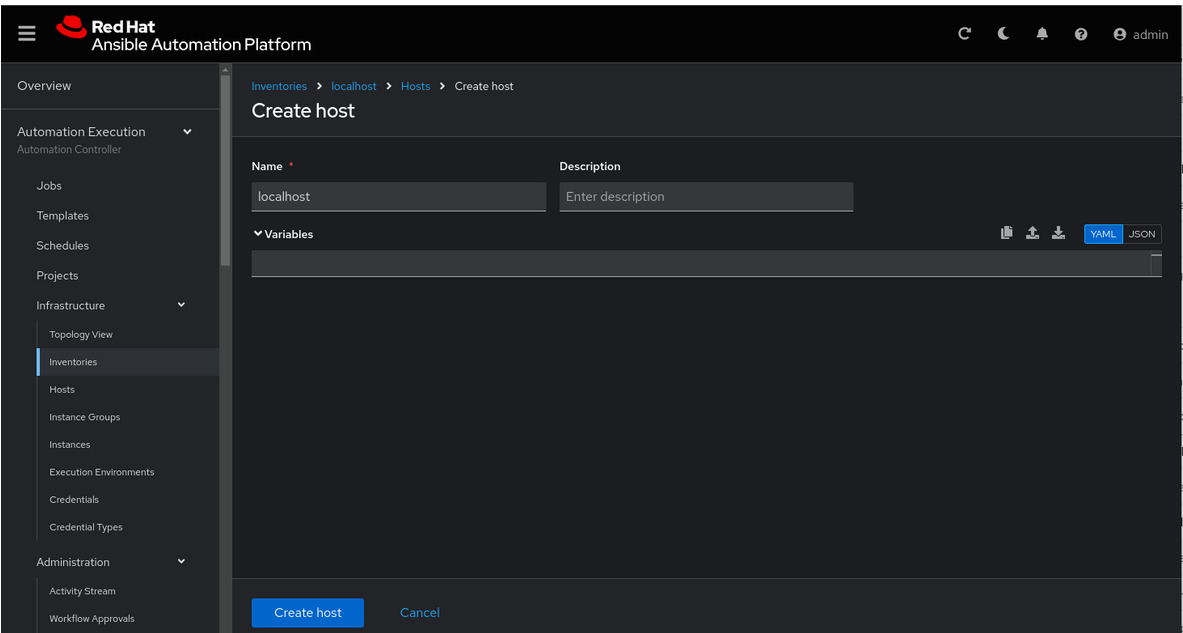
Click Create host:
Name: localhost
Click Create host:
Next, create the ec2-user user credential in Ansible Automation Platform.
To create the machine credential in Ansible Automation Platform, we need to get the private key from the bastion host.
The environment referenced in the lab document is using .ssh/vkhtjkey.pem as the SSH key. Your key will be named differently.
| To validate your private key: |
[lab-user@bastion ~]$ ls -lha .ssh/
total 24K
drwx------. 2 lab-user lab-user  102 Nov 19 02:24 .
drwxr-xr-x. 8 lab-user lab-user 4.0K Nov 19 12:41 ..
-rw-------. 1 lab-user lab-user 2.4K Nov 19 13:10 authorized_keys
-r--------. 1 lab-user root      216 Nov 19 01:40 config
-rw-r--r--. 1 lab-user lab-user  374 Nov 19 12:41 known_hosts
-r--------. 1 lab-user root     2.6K Nov 19 01:40 wlffskey.pem
-r--------. 1 lab-user root      552 Nov 19 01:40 wlffskey.pub
[lab-user@bastion ~]$
[lab-user@bastion ~]$ cat .ssh/vkhtjkey.pem
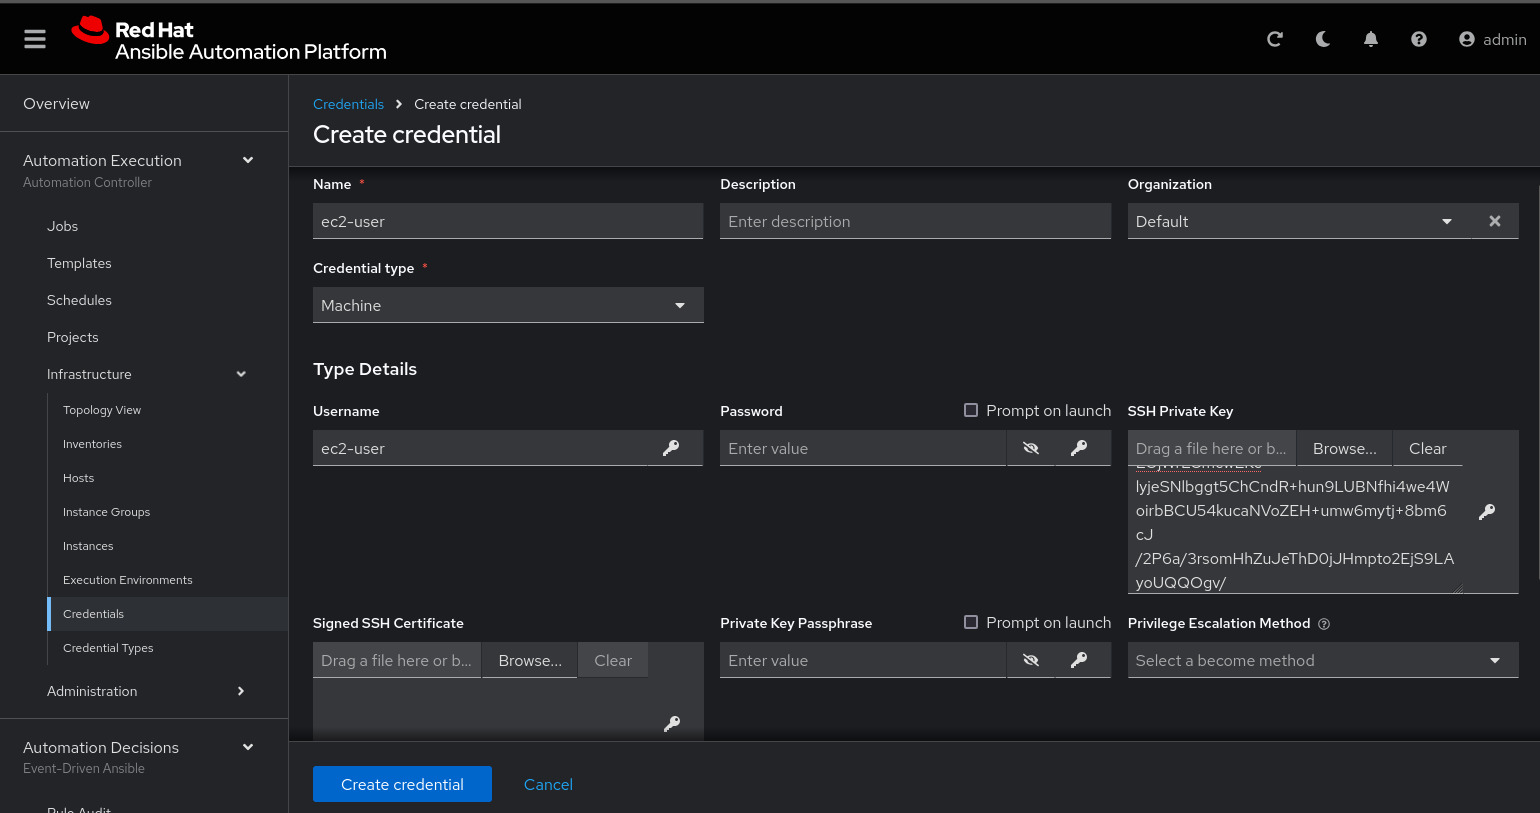
Copy the contents of the private key and create the machine credential:
Name: ec2-user
Organization: Default
credential type: Machine
Username: ec2-user
SSH Private Key: Copy your bastion private key: cat .ssh/vkhtjkey.pem
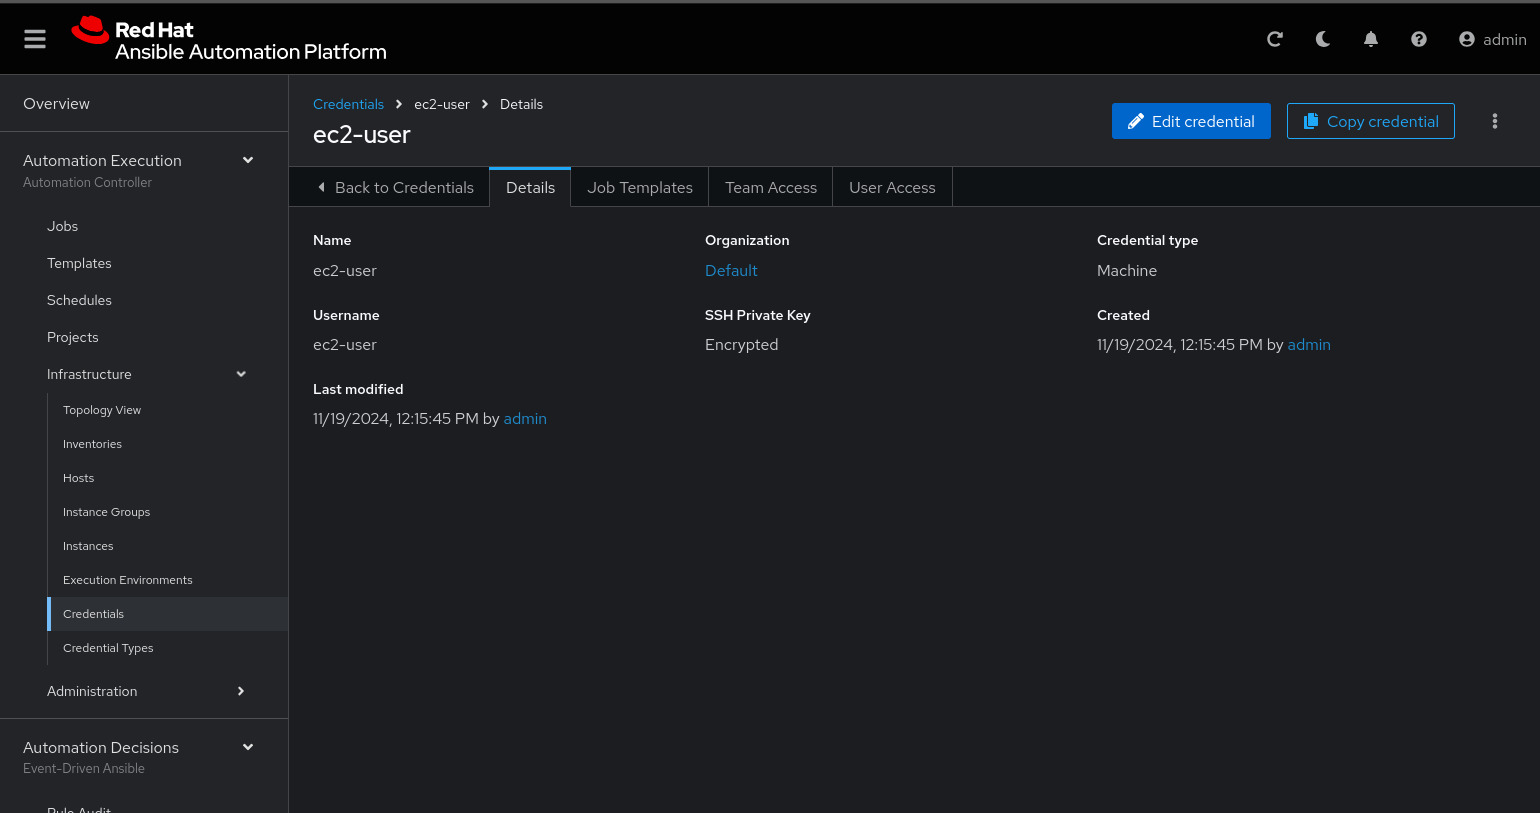
Confirm that you created the ec2-user user:
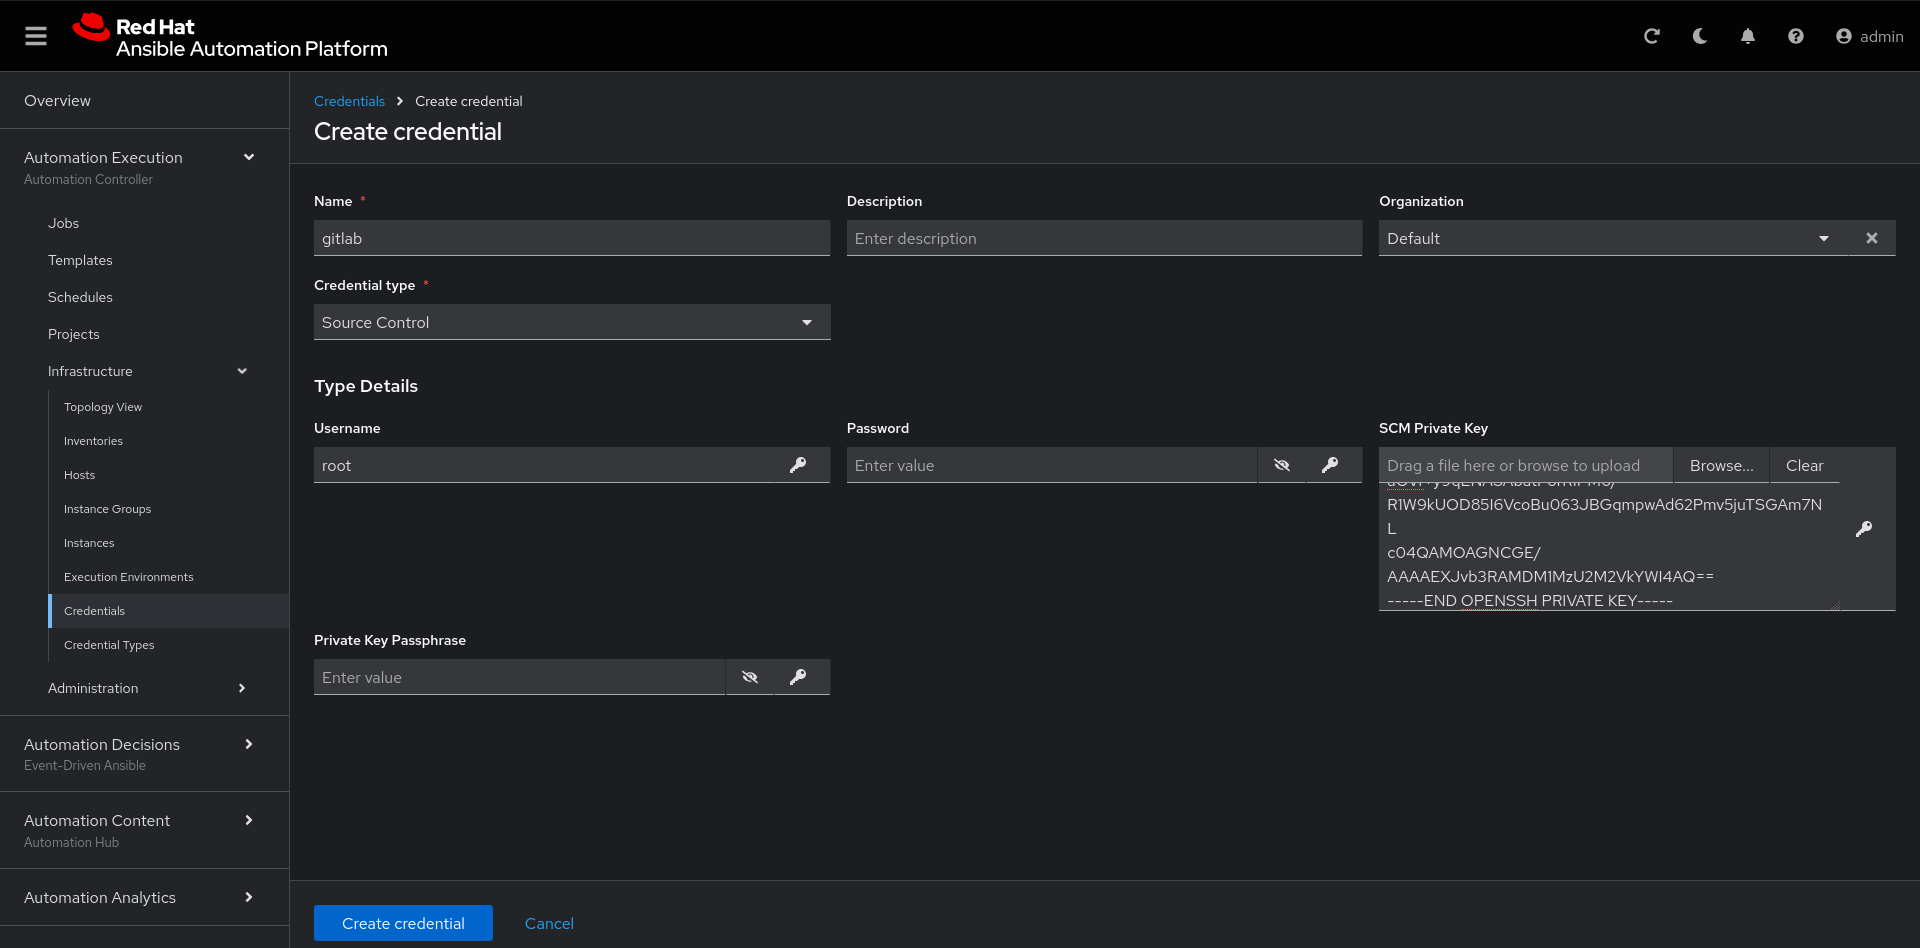
Create the gitlab credential:
Name: gitlab
Organization: Default
credential type: Source Control
Username: root
SCM Private Key: Copy your bastion private key: cat .ssh/vkhtjkey.pem
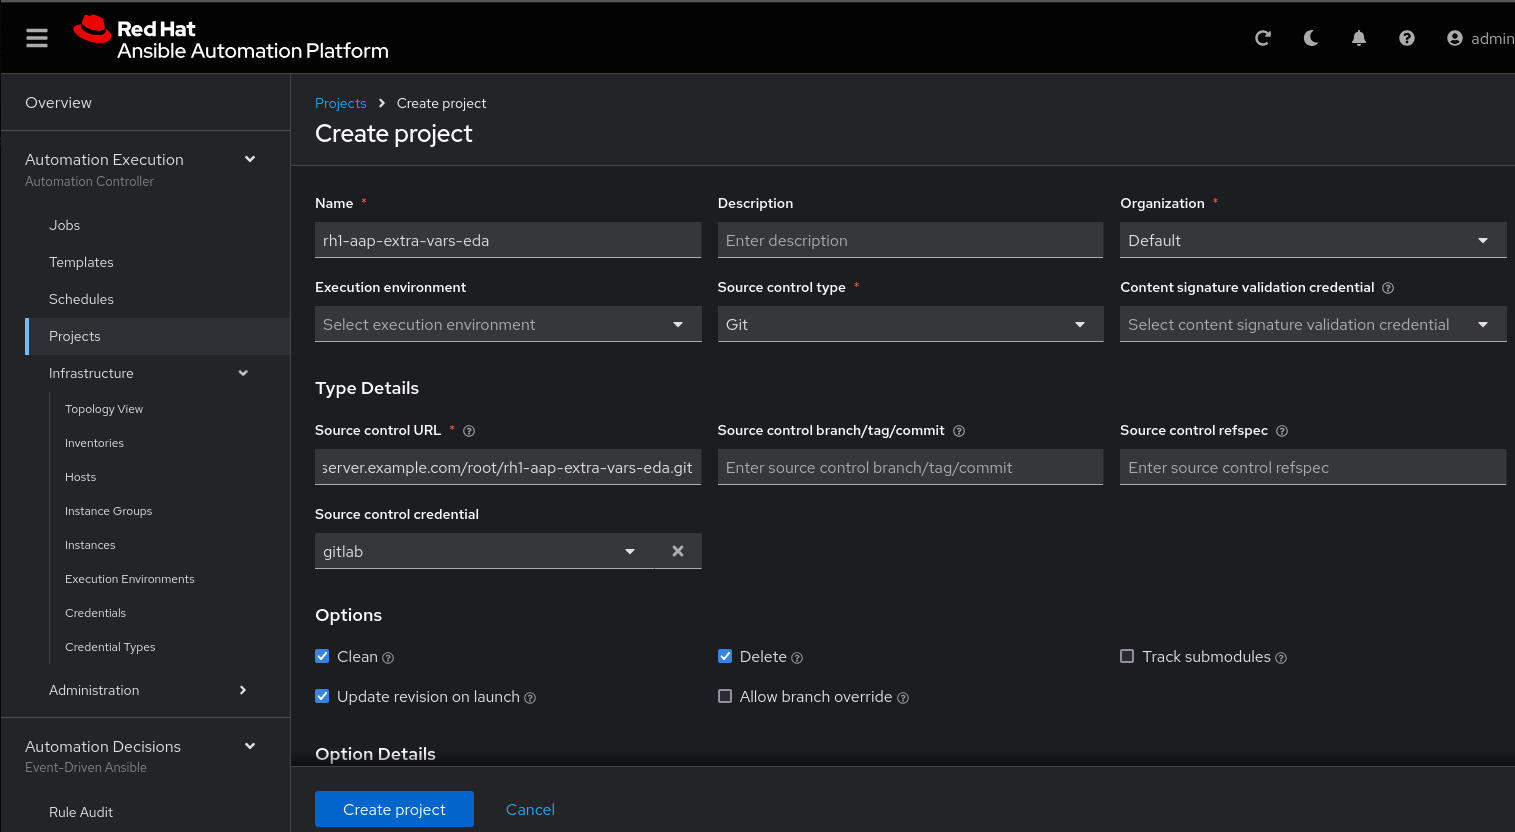
Create a project in Ansible Automation Platform to sync the rh1-aap-extra-vars-eda project:
Name: rh1-aap-extra-vars-eda
Organization: Default
credential control type: git
Source control URL: git@server.example.com:root/rh1-aap-extra-vars-eda.git
Source control credential: gitlab
check box:
  Clean
  Delete
  Update revision on launch
Now click Create project:
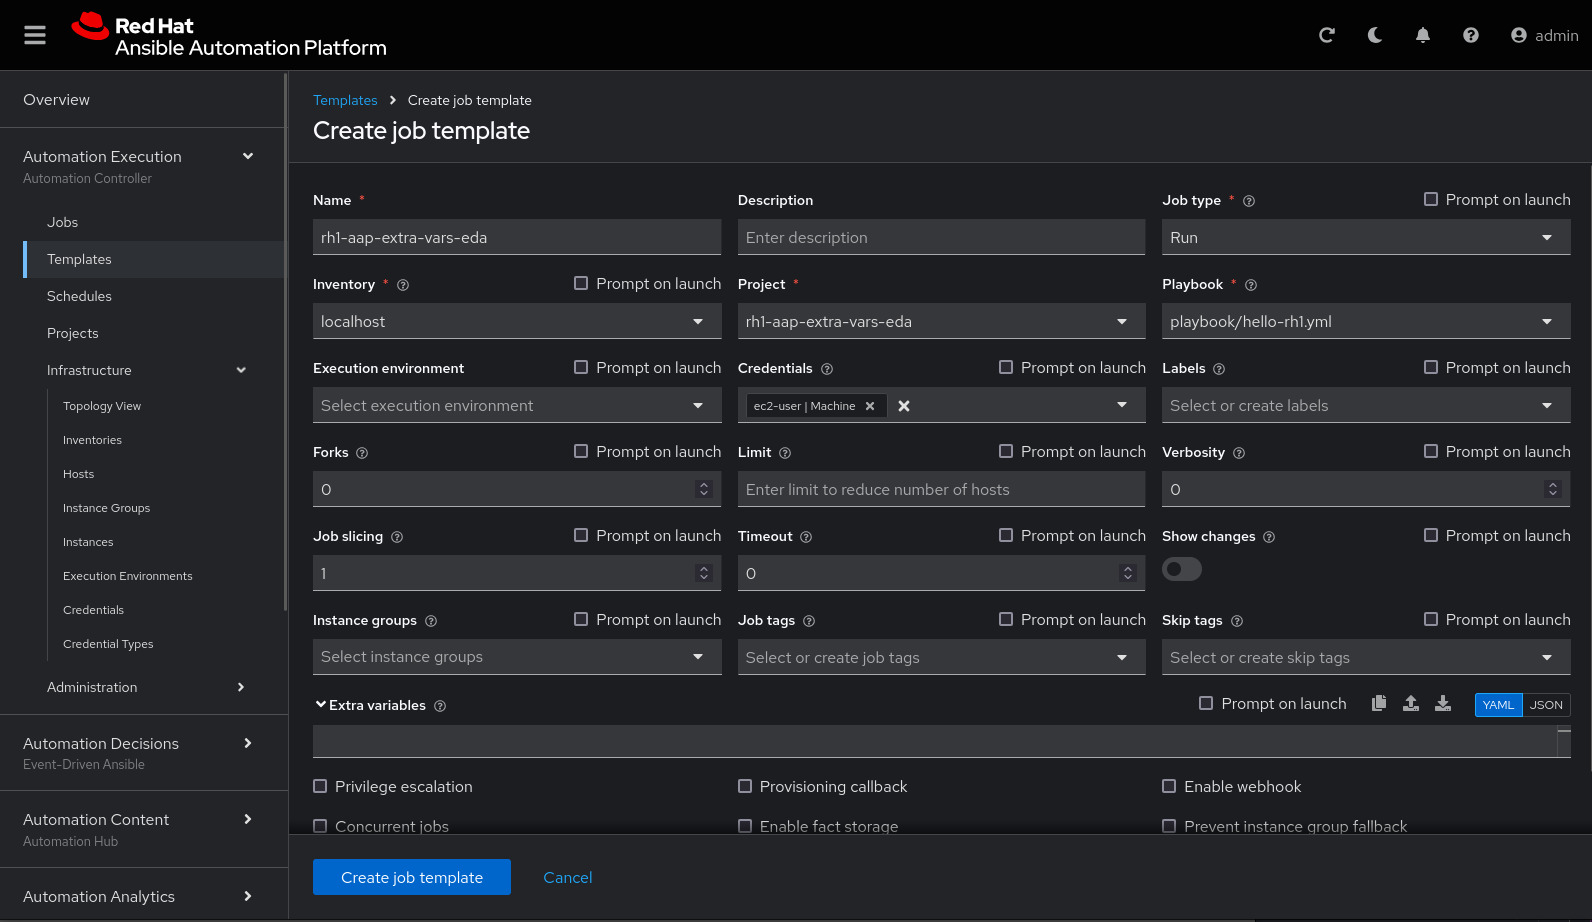
Once the project finishes syncing, create the job_template in Ansible Automation Platform with the project name rh1-aap-extra-vars-eda:
Name: rh1-aap-extra-vars-eda
Inventory: localhost
Project: rh1-aap-extra-vars-eda
Playbook: playbook/hello-rh1.yml
Credentials: ec2-user
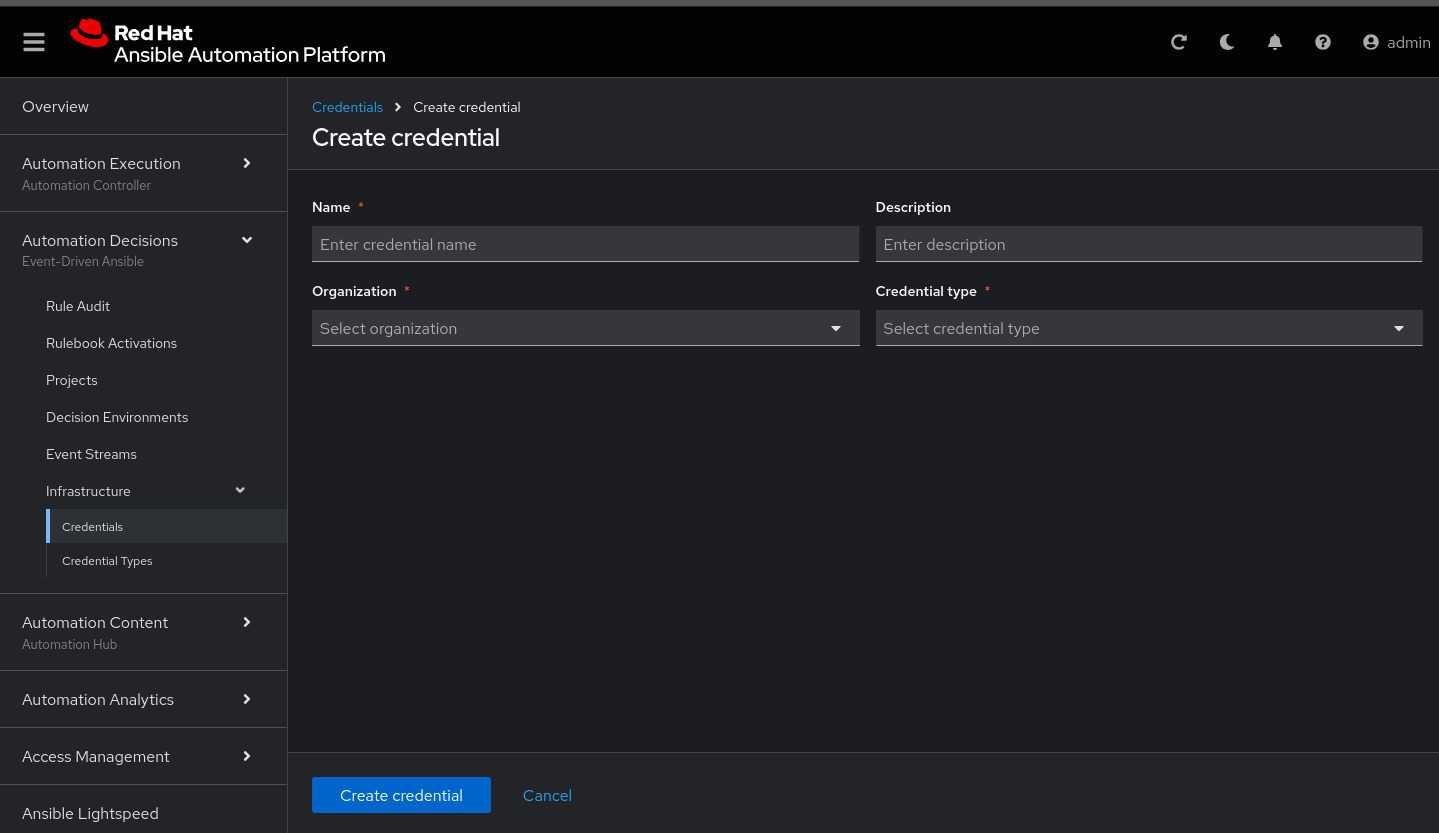
Now in Automation Decisions (Event-Driven) create the credential:
To create the credential, select :
Now add the credential information:
Name: gitlab
Organization: Default
Credential type: Source Control
Username: root
Password: redhat..123
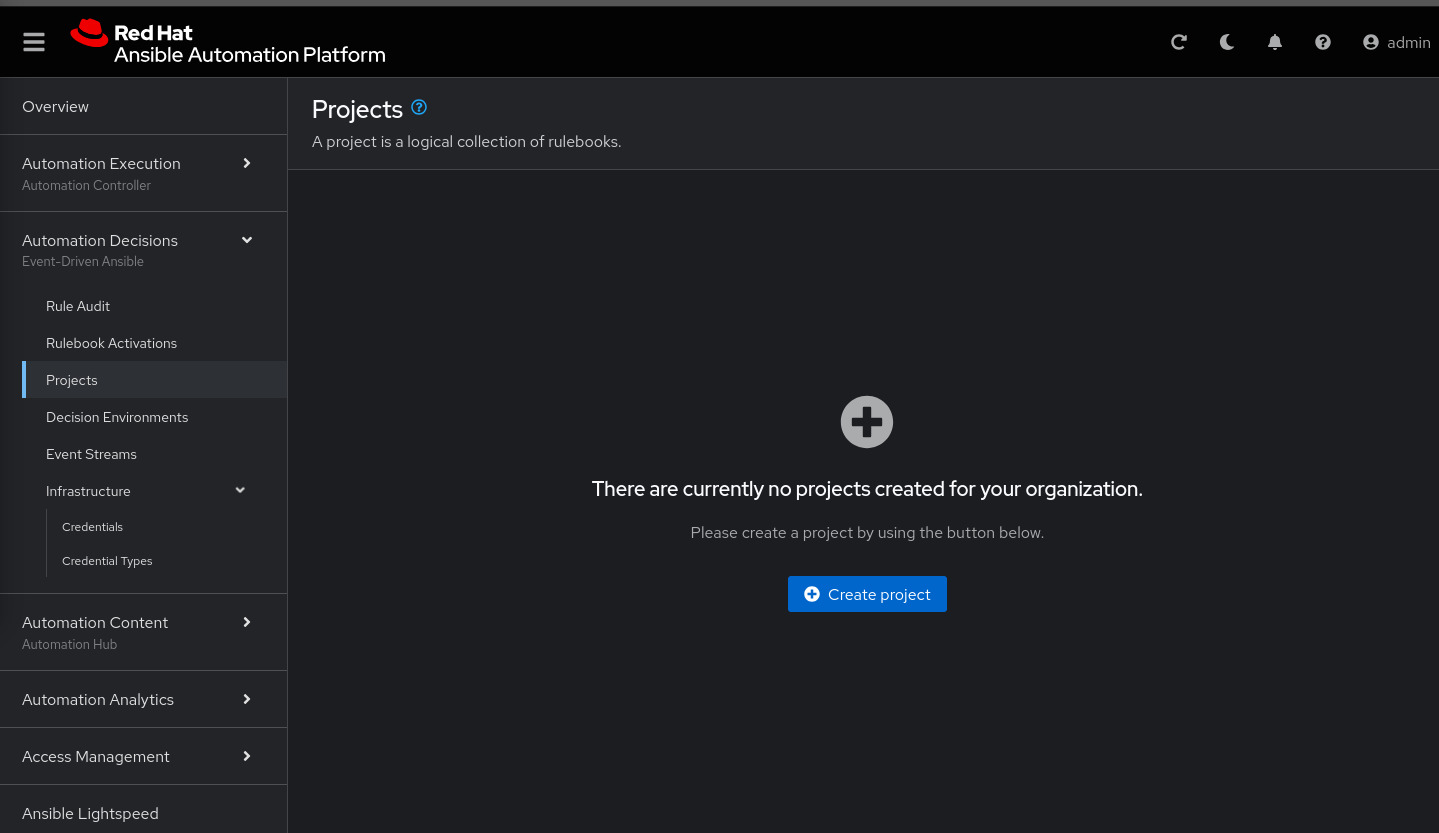
Create the project in Event-Driven:
Select Automation Decisions > Projects and Click Create project:
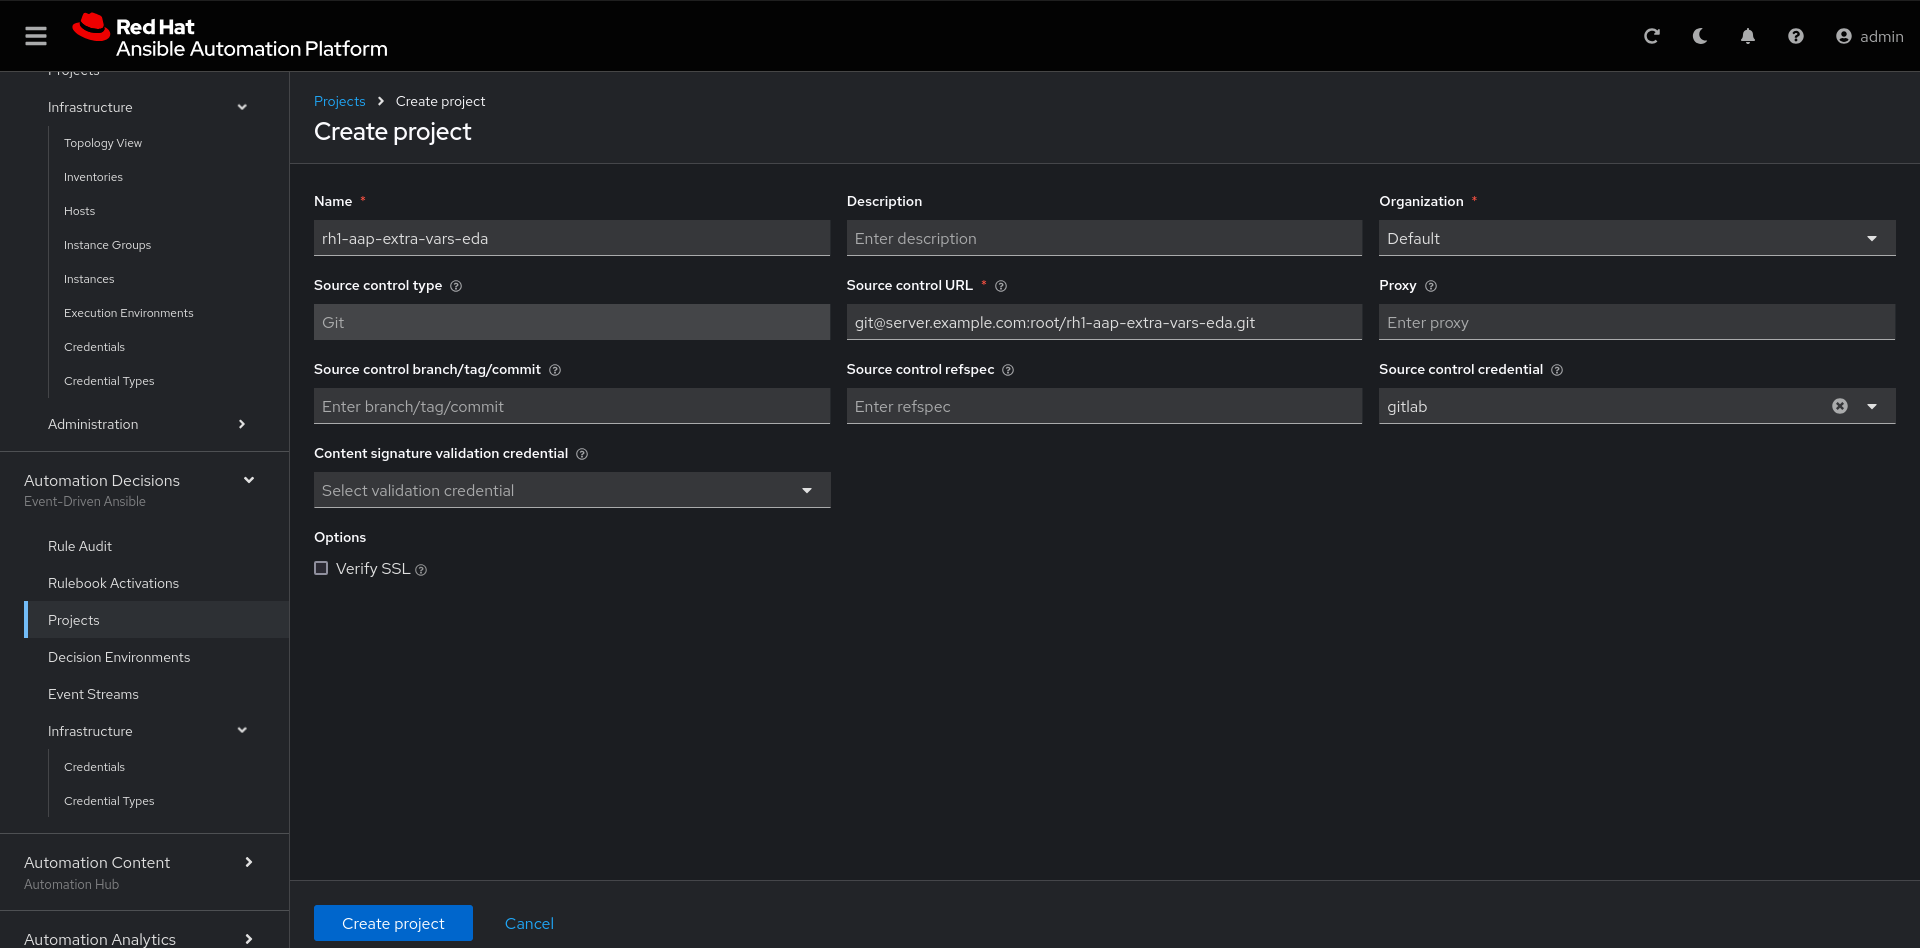
Create the project with the following information:
Name: rh1-aap-extra-vars-eda
Organization: Default
Source control type: git
Source control URL: https://server.example.com/root/rh1-aap-extra-vars-eda.git
Source control credential: gitlab
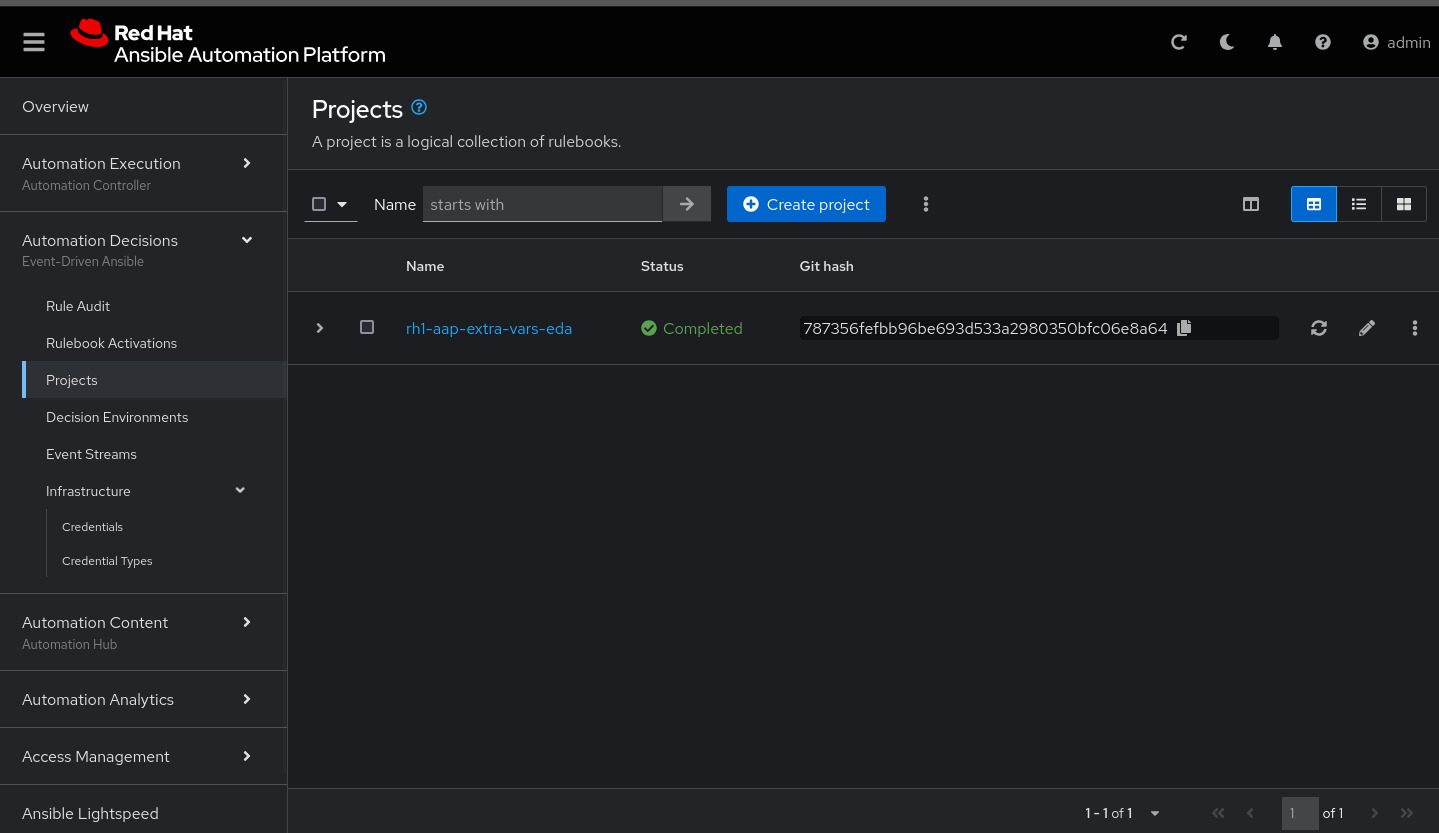
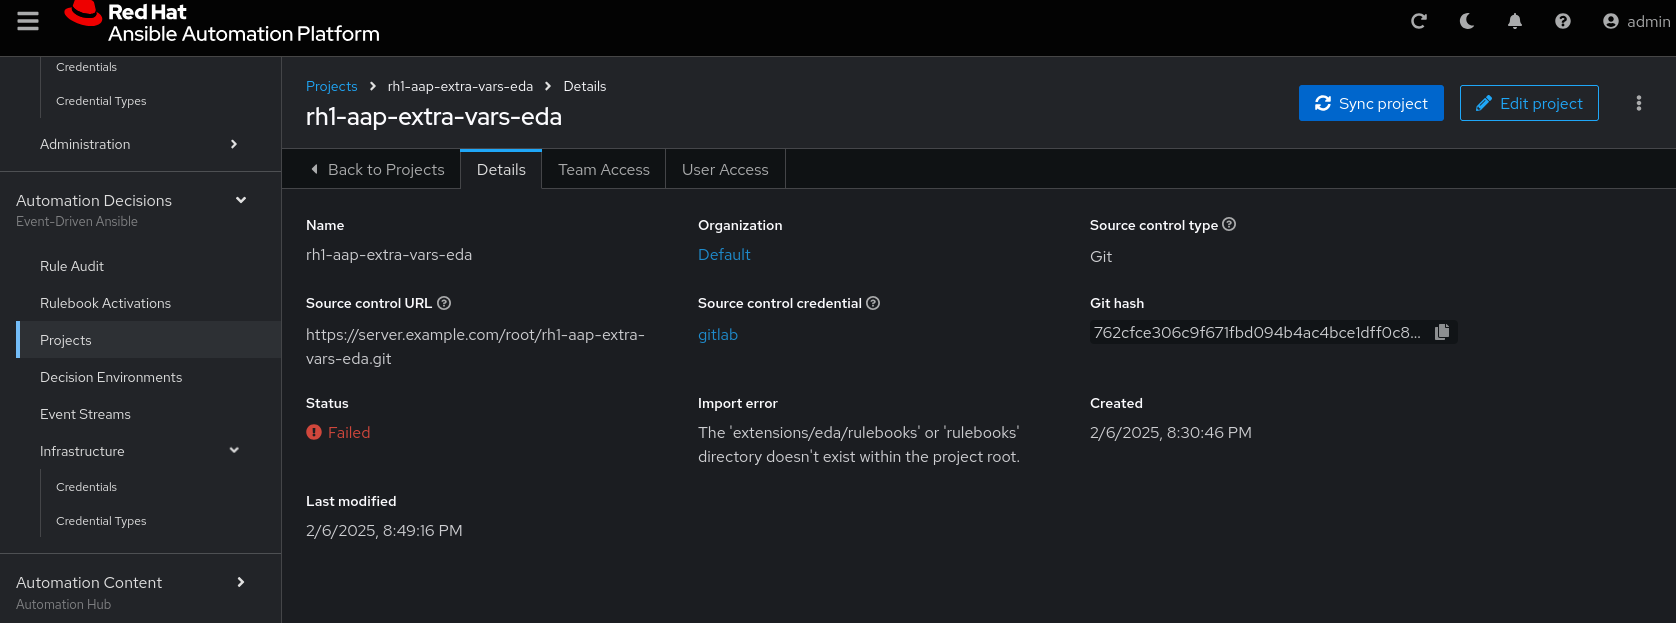
Disable verify SSL: Uncheck| The project does not sync. Find the error and resolve. |
| Import error: The 'extensions/eda/rulebooks' or 'rulebooks' directory doesn’t exist within the project root. |
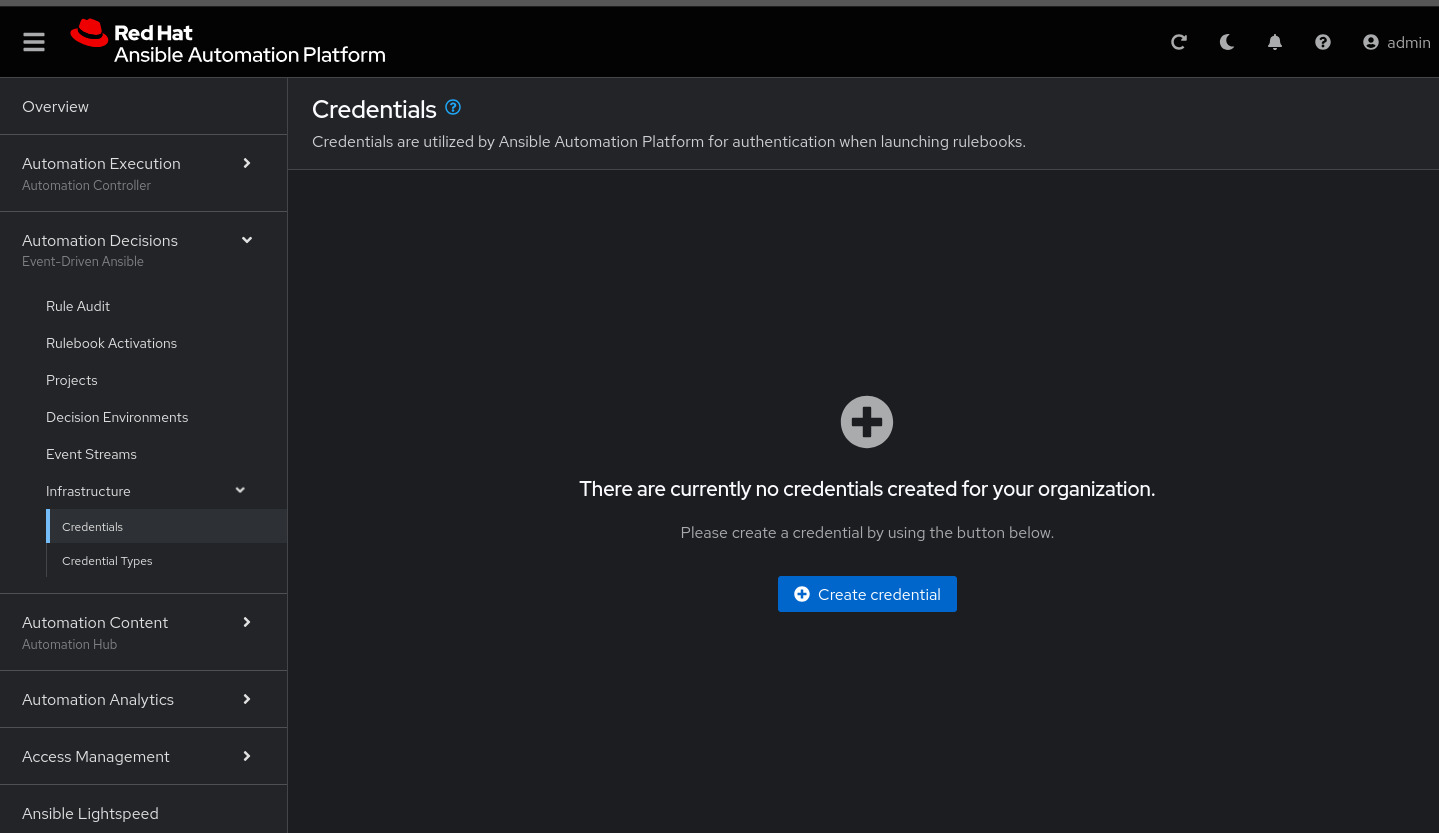
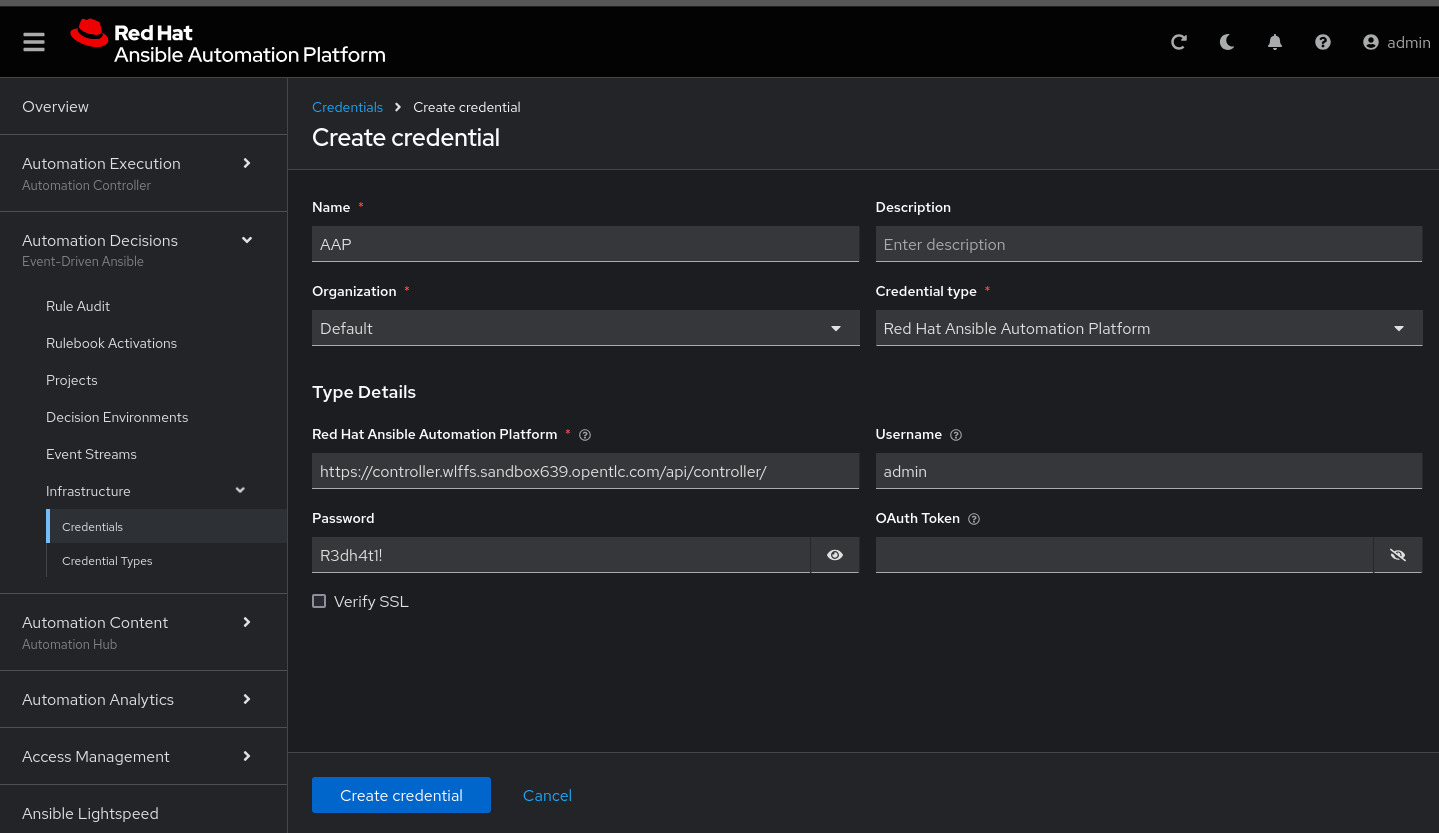
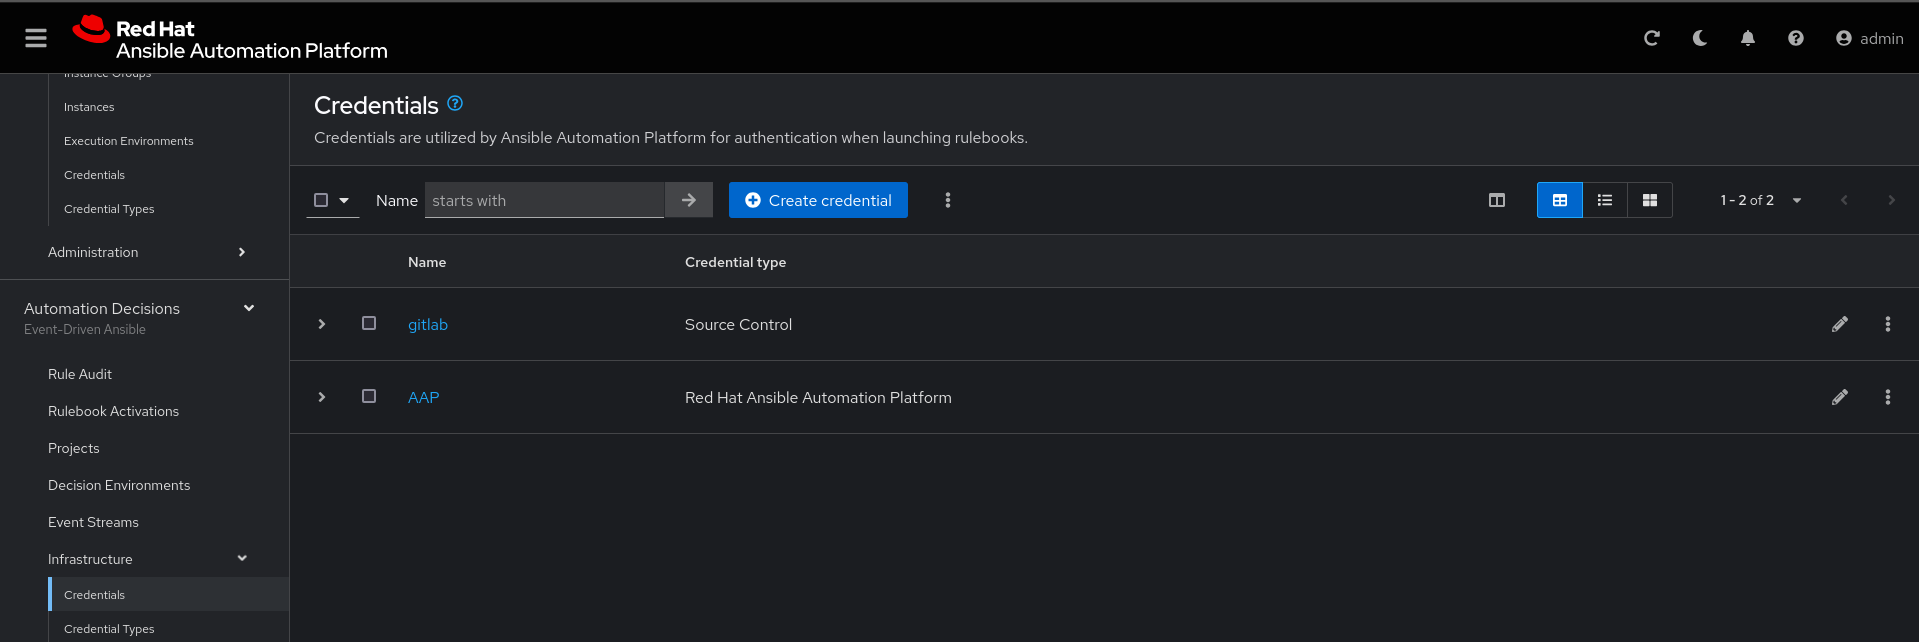
Next, under Automation Decisions > Infrastructure > Credentials, click Create credential
Click Create credential:
Now add, the following to your credential:
Name: AAP
Organization: Default
Credential type: Red Hat Ansible Automation Platform
Red Hat Ansible Automation Platform: https://controller.example.com/api/controller/
Username: admin
Password: R3dh4t1!
Click Create credential:
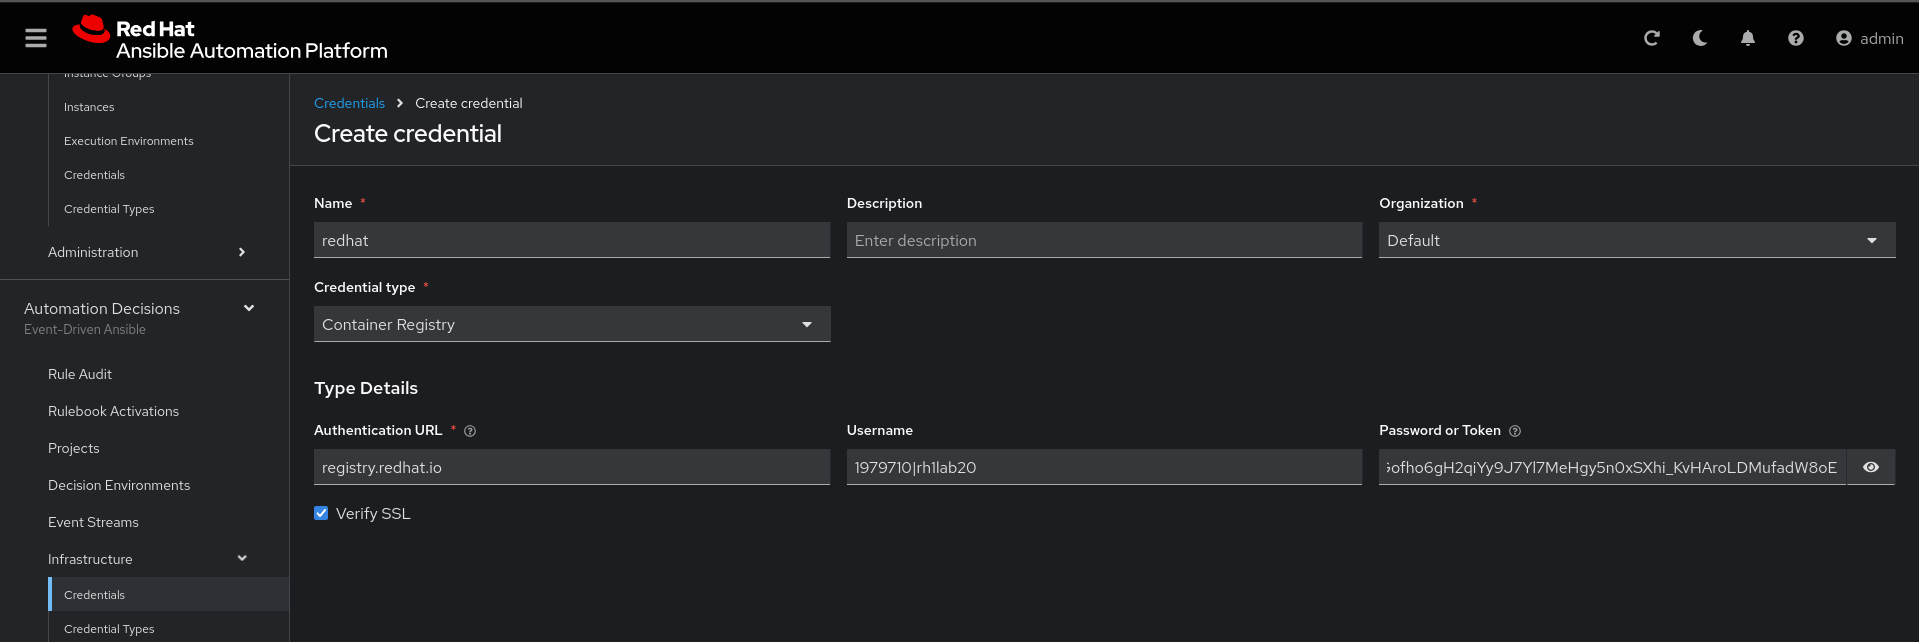
Create credential registry Red Hat.
Click in Create credential in Automation Decisions:
Name: redhat
Organization: Default
Credential type: Container Registry
authentication URL: registry.redhat.io
username: 1979710|rh1lab20
Password or Token: (The token is located in /home/ec2-user/03-lab/registry-credentials.txt one node1)
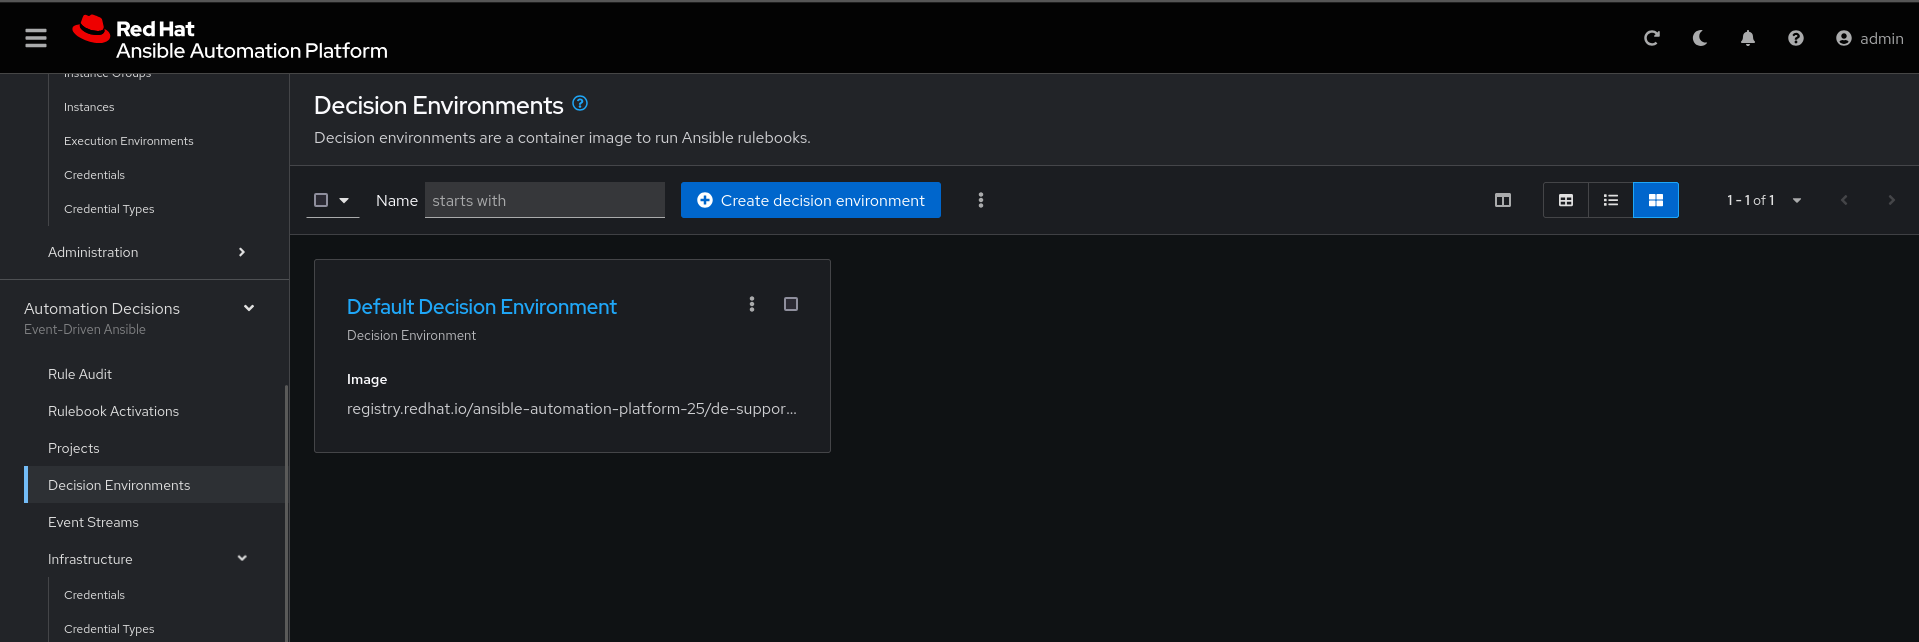
Now edit Decision Environments:
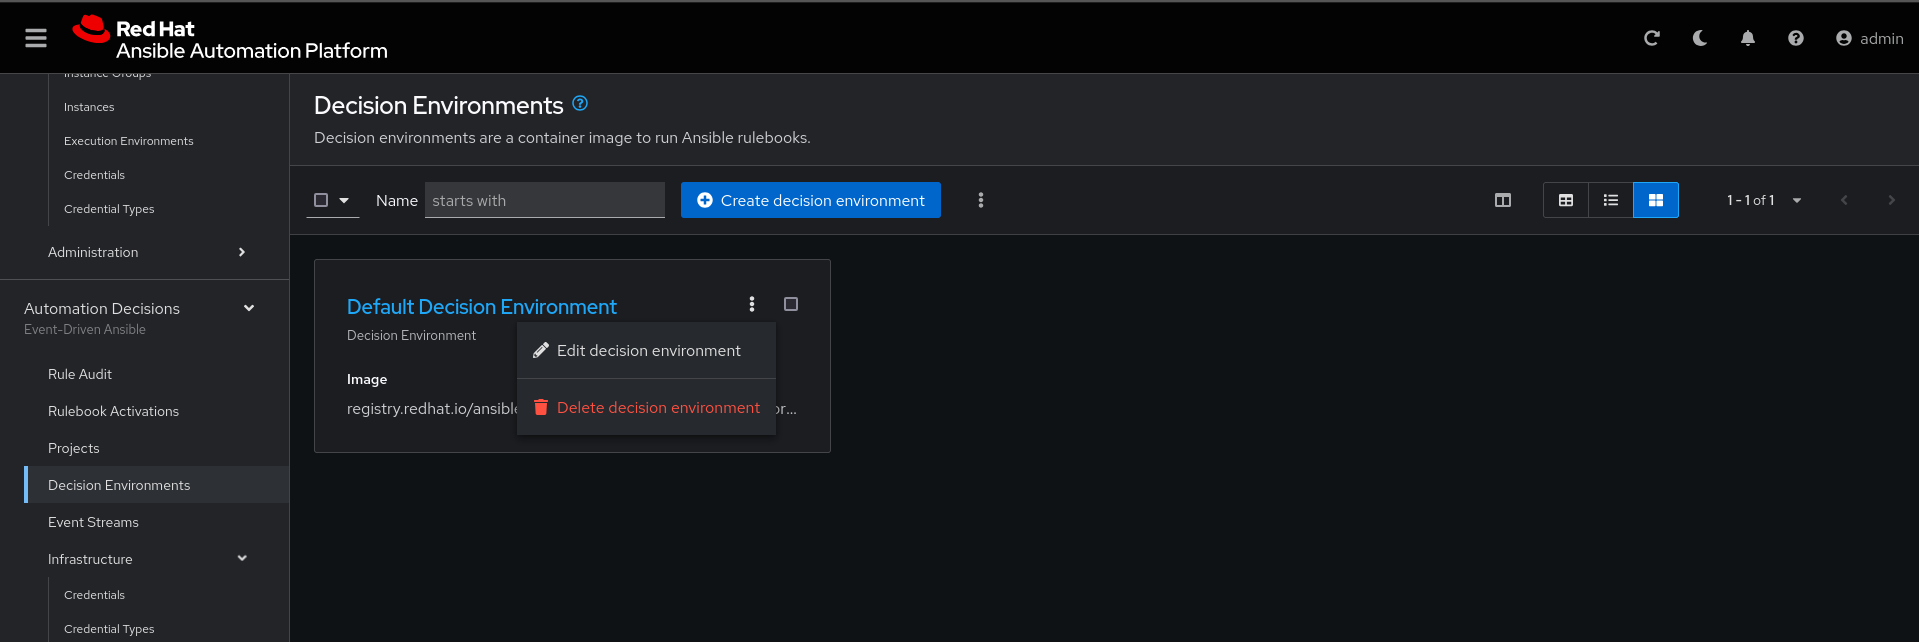
Click the three dots, then Edit decision environment.
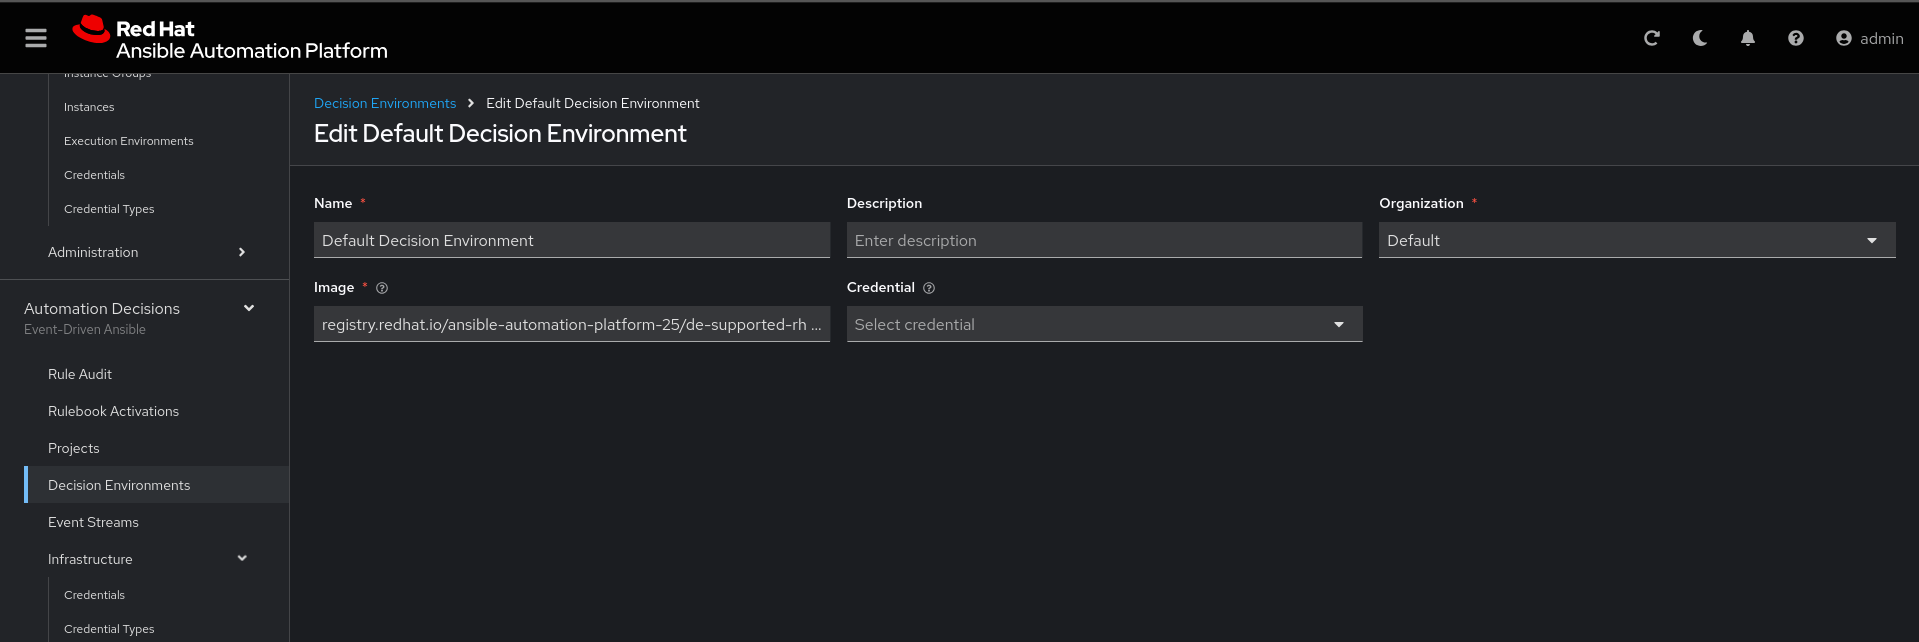
In credential, add redhat.
Click Save Decision Environment.
Now create the Rulebook:
| The Rulebook will not be able to be located. You need to resolve this issue. |
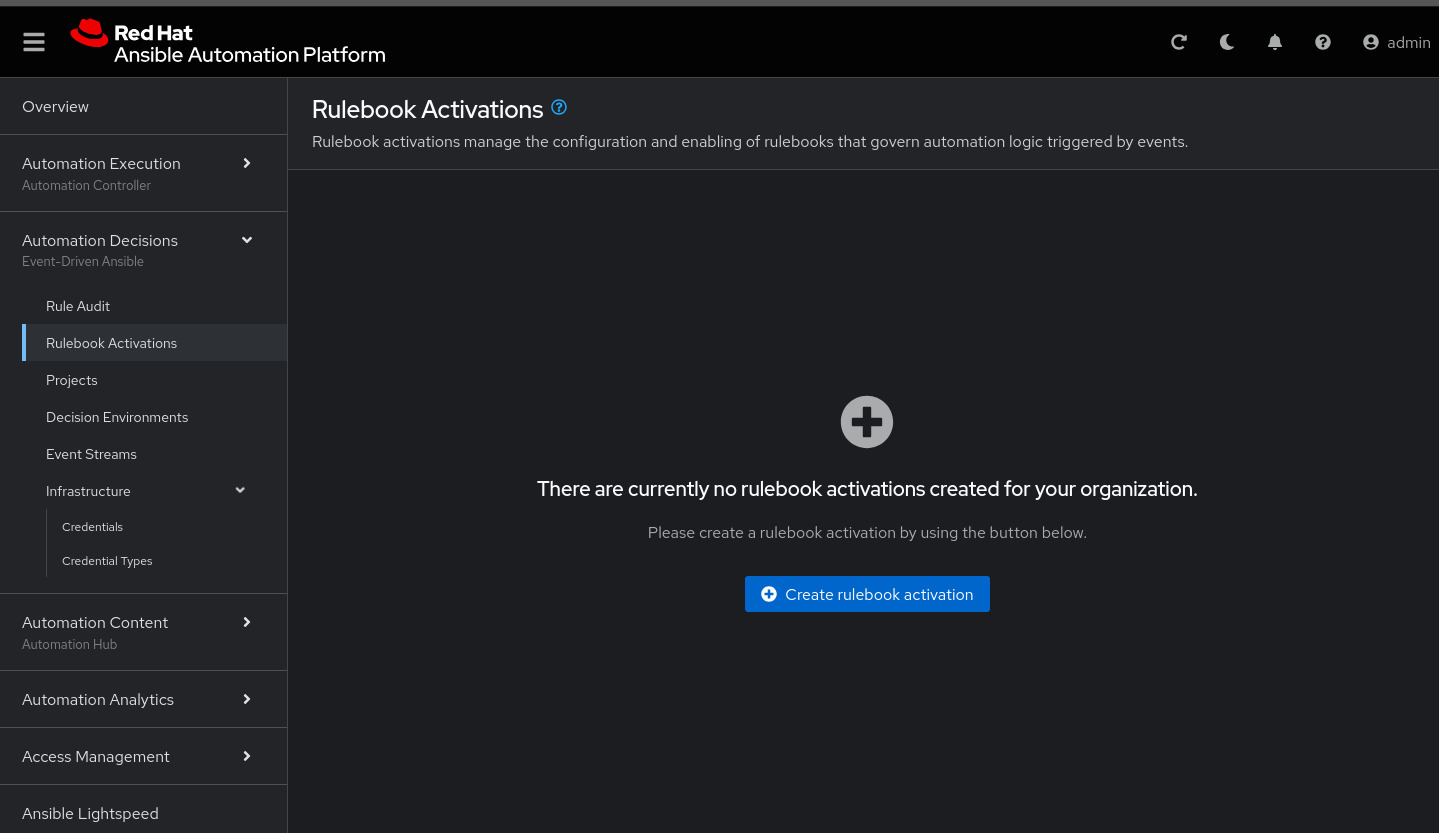
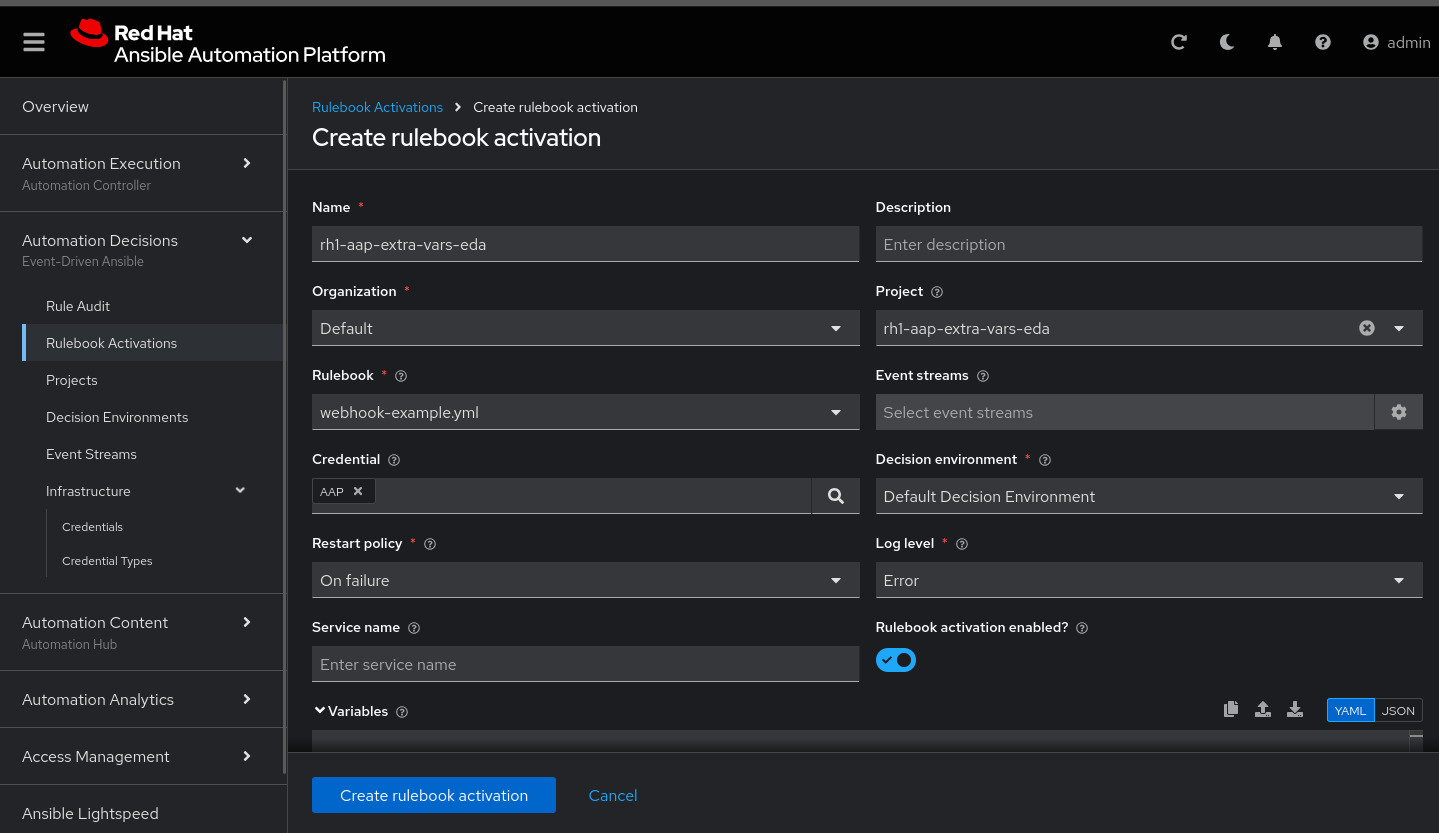
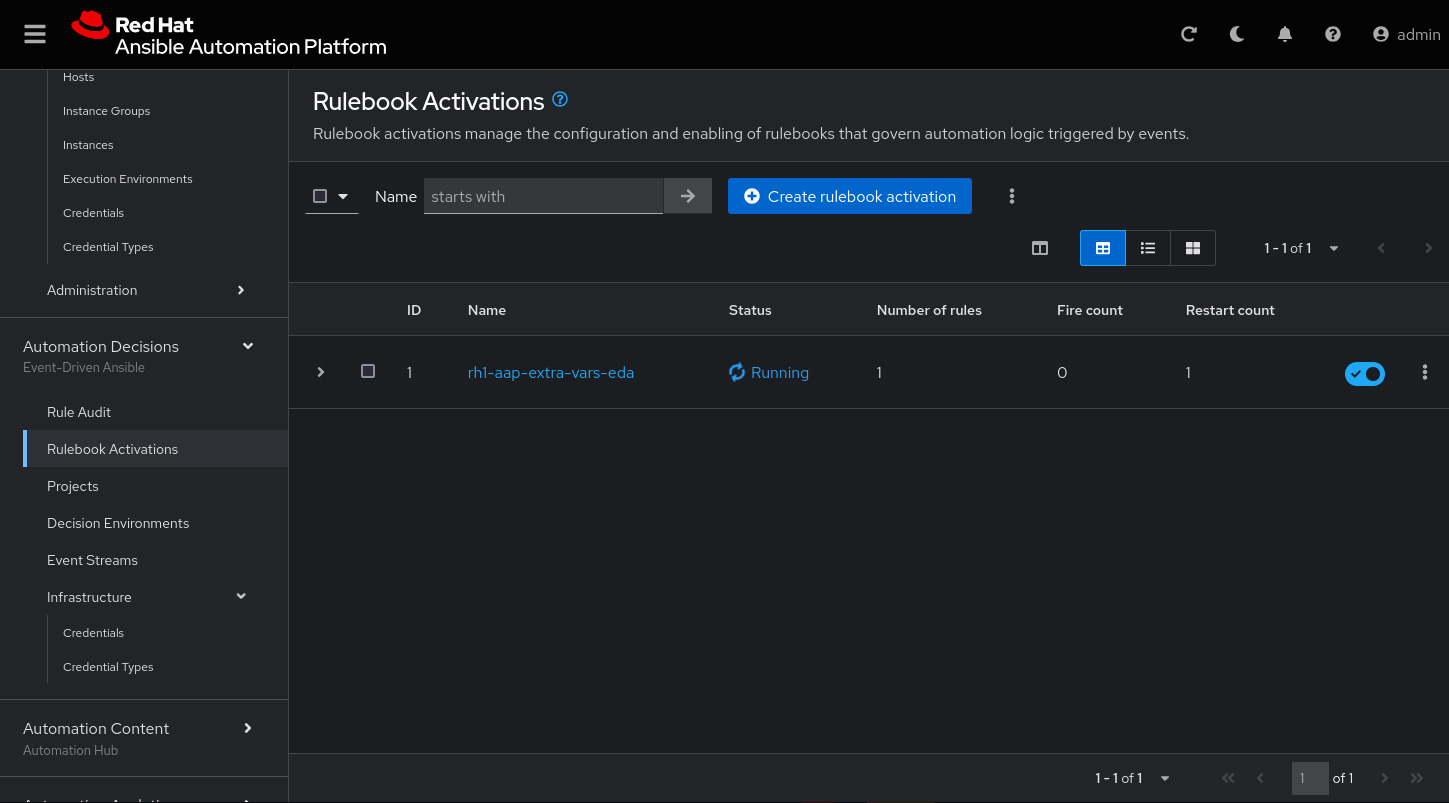
Under Automation Decisions > Rulebook Activations, click Create rulebook activation:
Name: rh1-aap-extra-vars-eda
Organization: Default
Project: rh1-aap-extra-vars-eda
Rulebook: webhook-example.yml
Credential: AAP
Decision environment: Default Decision Environment
Click Create rulebook activation
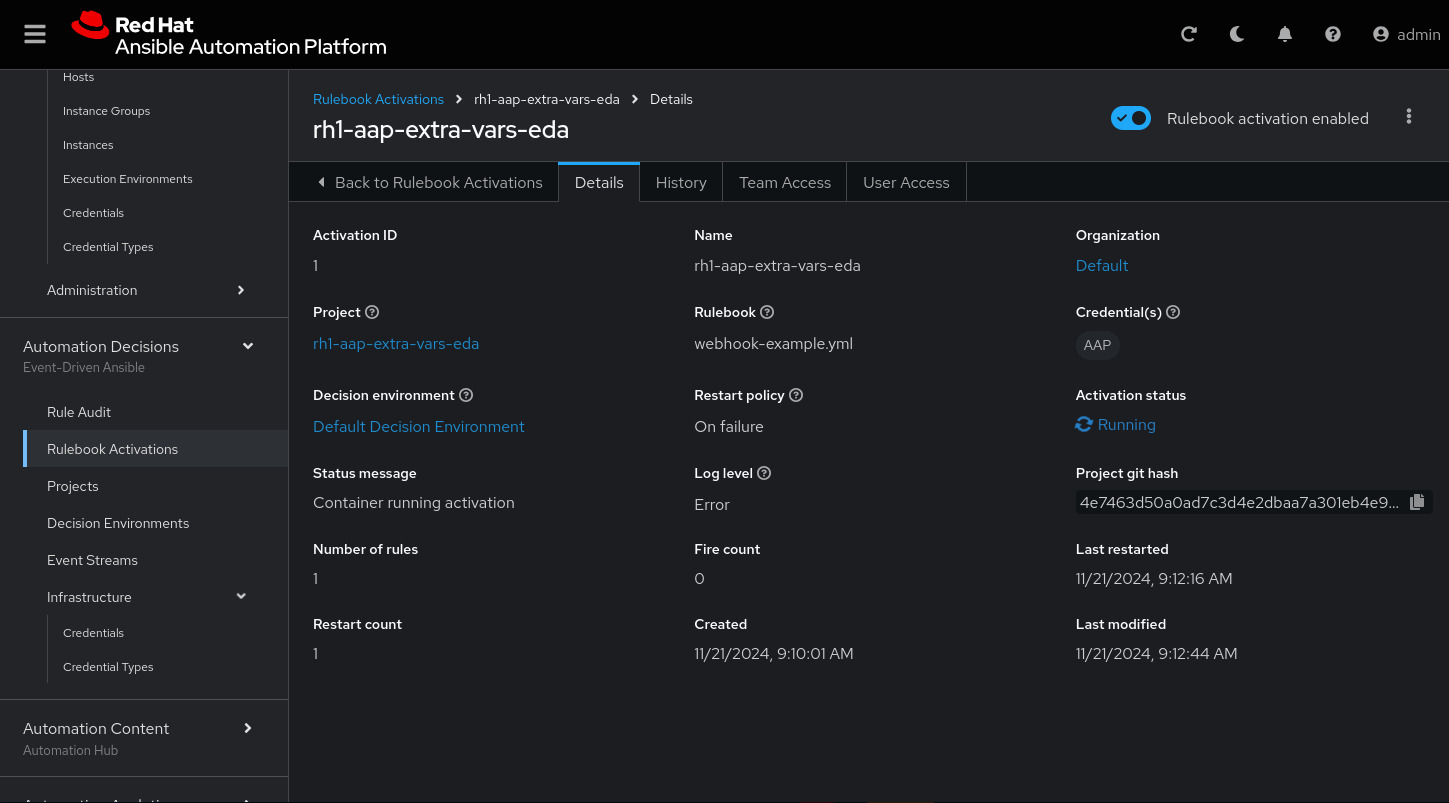
Now the activation should show as Running:
Click the rulebook: rh1-aap-extra-vars-eda
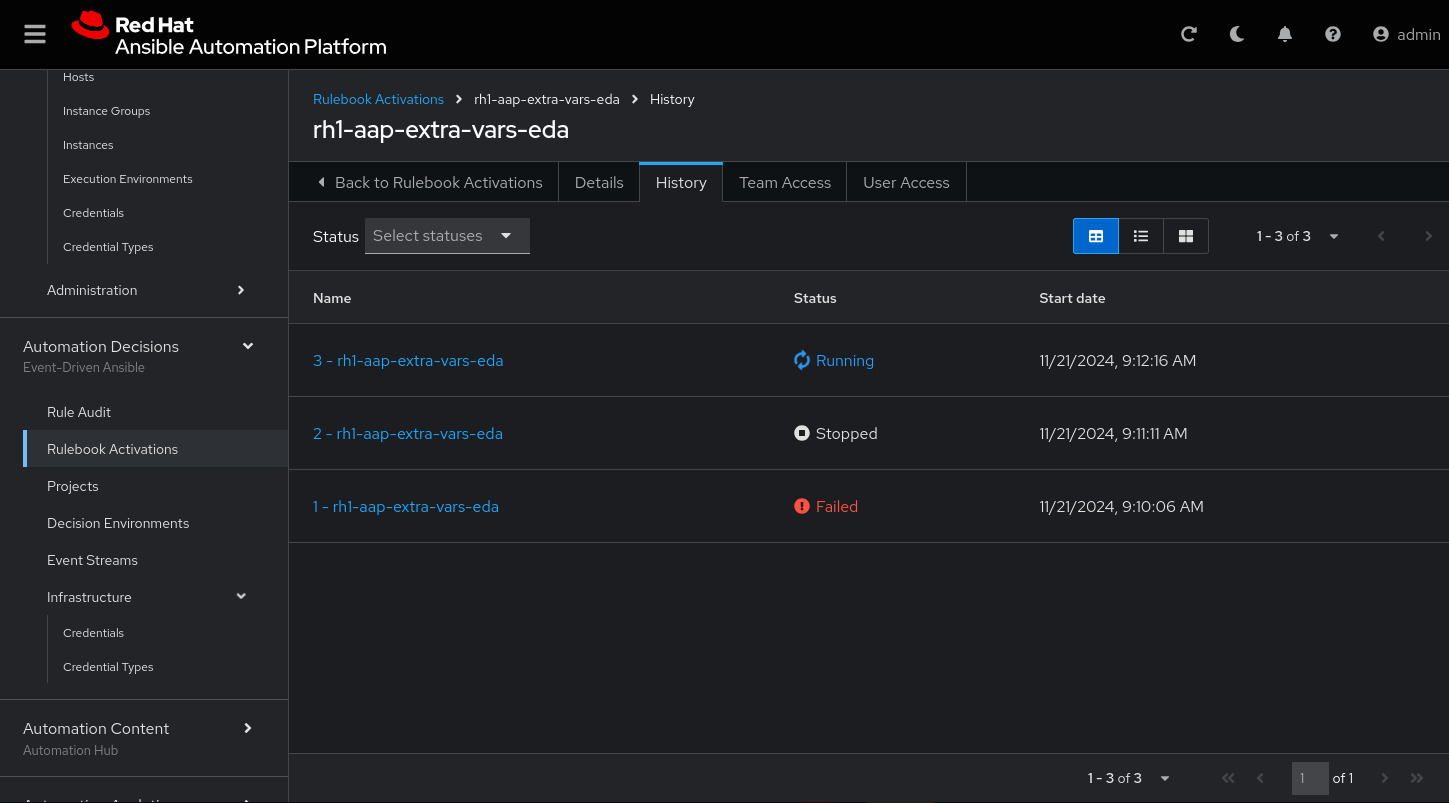
Next go to the History tab:
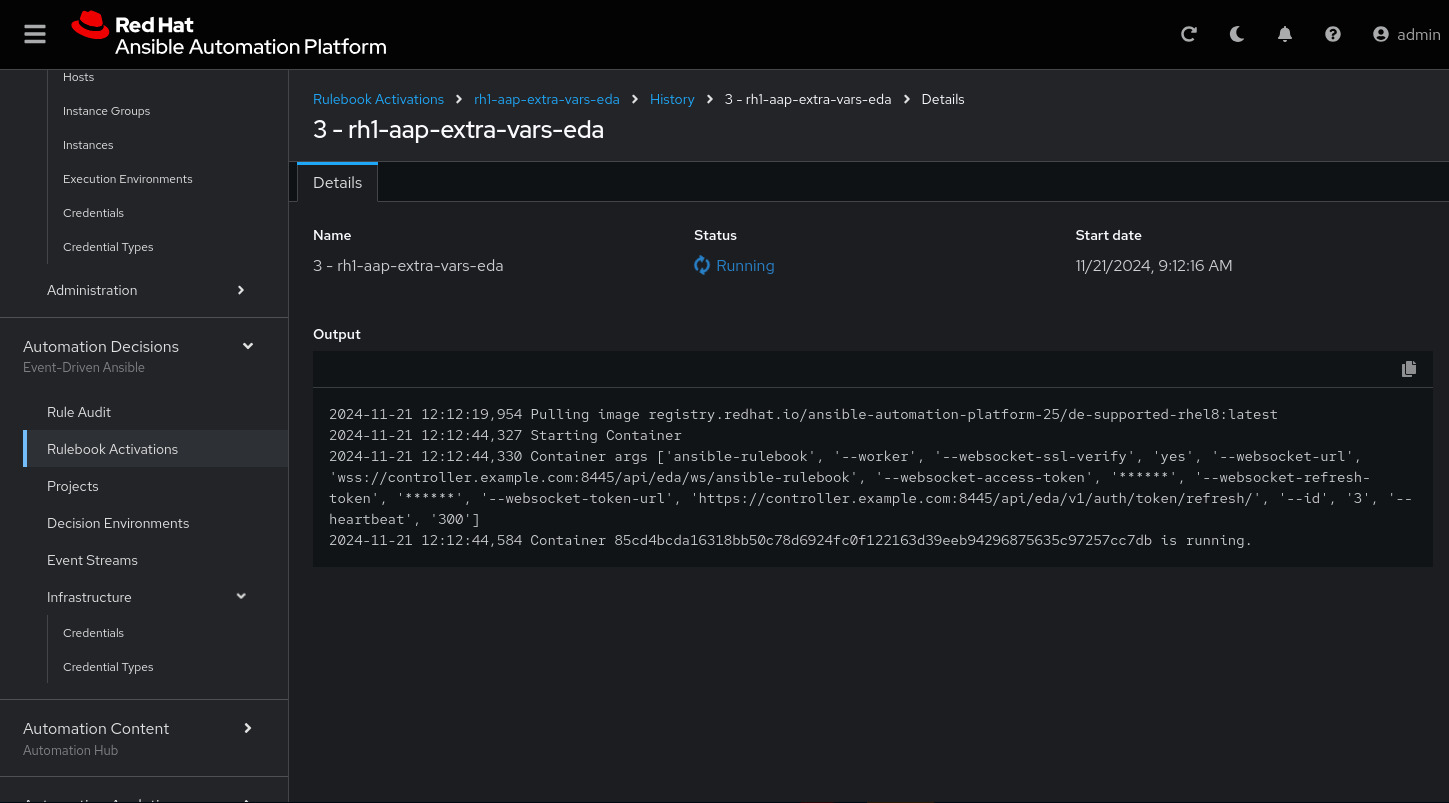
Click the rulebook that is in Running:
Now send the curl to this rulebook:
ssh node1
curl -H 'Content-Type: application/json' -d '{"event_name": "Hello", "host_host": "node1.example.com" }' controller:6000/endpoint
After sending the curl. The Job Template rh1-aap-extra-vars-eda will run.
| You need to resolve this error: |
fatal: [localhost]: FAILED! => {"msg": "'hosts_update' is undefined. 'hosts_update' is undefined"}
| You need to resolve this error: |
fatal: [localhost]: UNREACHABLE! => {"changed": false, "msg": "Failed to connect to the host via ssh: ssh: connect to host localhost port 22: Connection refused", "unreachable": true}
PAUSE
Guided solution
-
The rulebook folder name is missing the S:
[ec2-user@node1 ~]$ cd 03-lab/
[ec2-user@node1 03-lab]$ ls
rh1-aap-extra-vars-eda  rh1-eda-example
[ec2-user@node1 03-lab]$ cd rh1-aap-extra-vars-eda/
[ec2-user@node1 rh1-aap-extra-vars-eda]$ ls
playbook  README.md  rulebook
[ec2-user@node1 rh1-aap-extra-vars-eda]$ mv rulebook rulebooks
[ec2-user@node1 rh1-aap-extra-vars-eda]$ git add .
[ec2-user@node1 rh1-aap-extra-vars-eda]$ git commit -m add
[ec2-user@node1 rh1-aap-extra-vars-eda]$ git push-
Disable host in inventory:
Go back to the inventory and disable the host:
-
Remove
remote_user: rootthe playbook hello-rh1.yml.
[ec2-user@node1 ~]$ cd 03-lab/
[ec2-user@node1 03-lab]$ ls
rh1-aap-extra-vars-eda  rh1-eda-example
[ec2-user@node1 03-lab]$ cd rh1-aap-extra-vars-eda/
[ec2-user@node1 rh1-aap-extra-vars-eda]$ ls
playbook  README.md  rulebooks
[ec2-user@node1 rh1-aap-extra-vars-eda]$ vim playbook/hello-rh1.yml
Save the file.
To resolve this issue:
| fatal: [localhost]: FAILED! ⇒ {"msg": "'hosts_update' is undefined. 'hosts_update' is undefined"} |
Make this configuration:
-
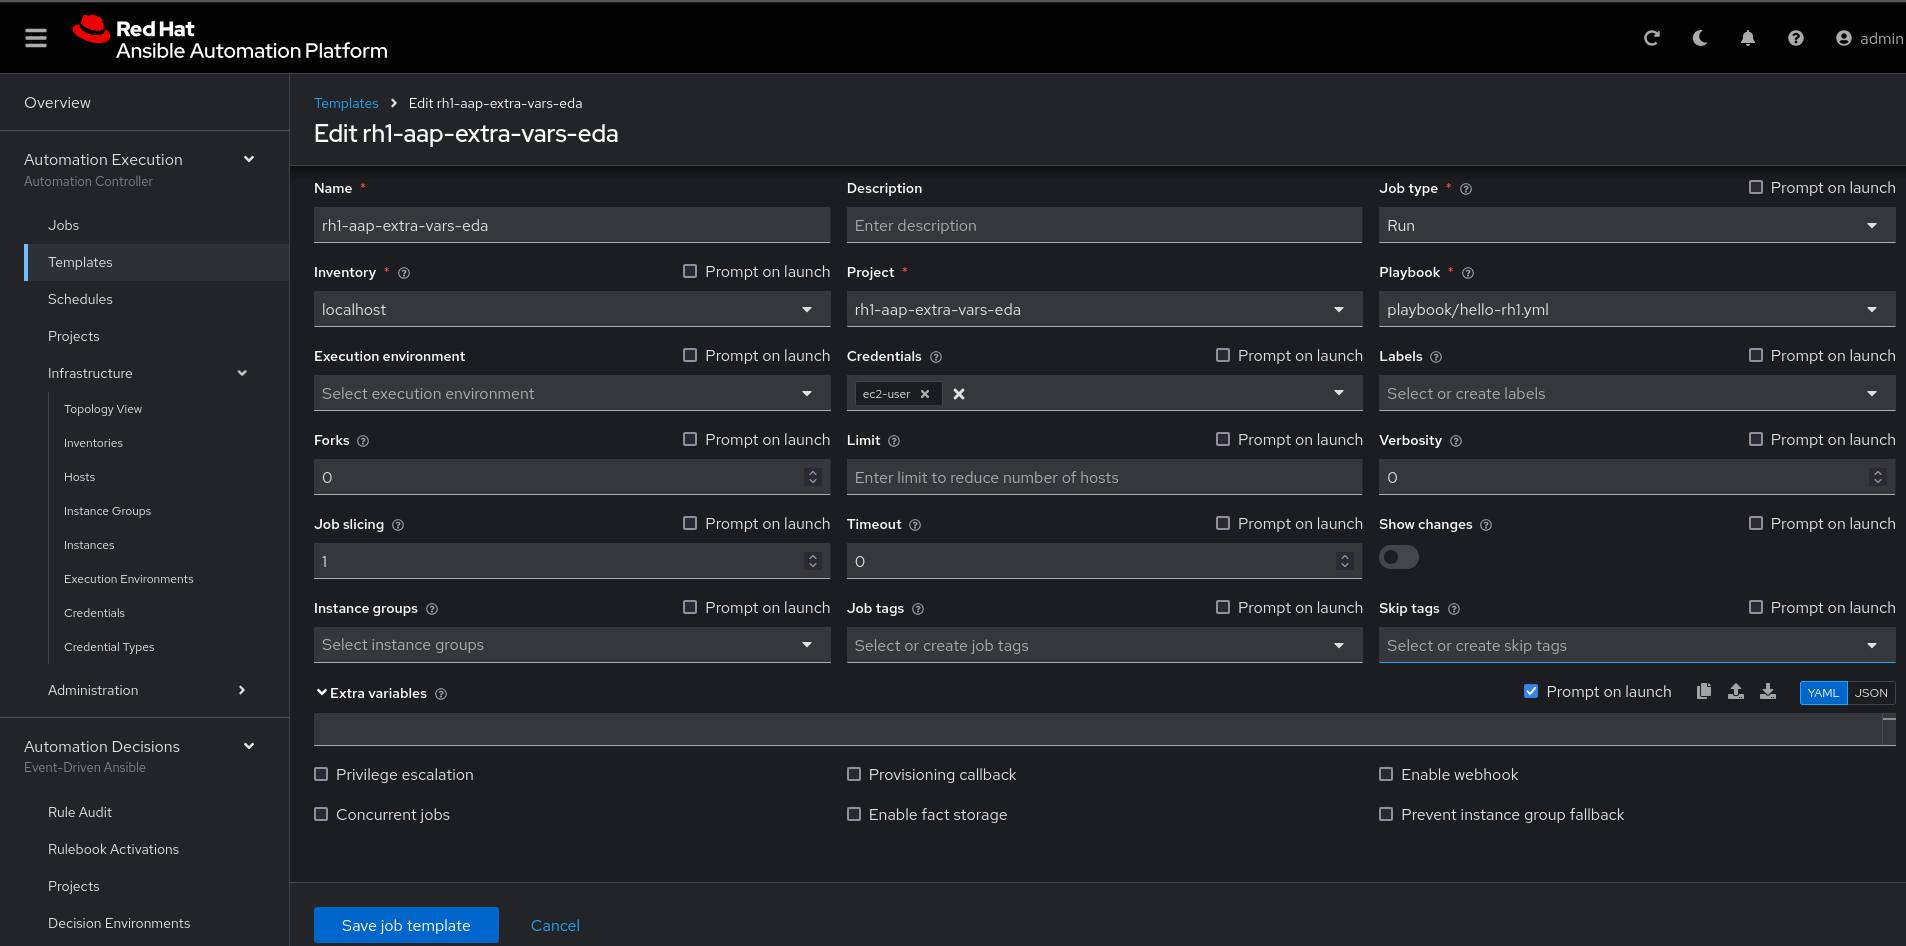
In job_template rh1-aap-extra-vars-eda, enable Prompt on launch in Extra variables.
-
Now, send the curl command:
ssh node1
curl -H 'Content-Type: application/json' -d '{"event_name": "Hello", "host_host": "node1.example.com" }' controller:6000/endpoint
After sending the curl. The Job Template rh1-aap-extra-vars-eda will run.
