Enabling VM communication - Part 2
Scenario
The virtual machines exercise11-a and exercise11-b are operational and with their IP addresses configured. However, they are not communicating with each other as expected.
-
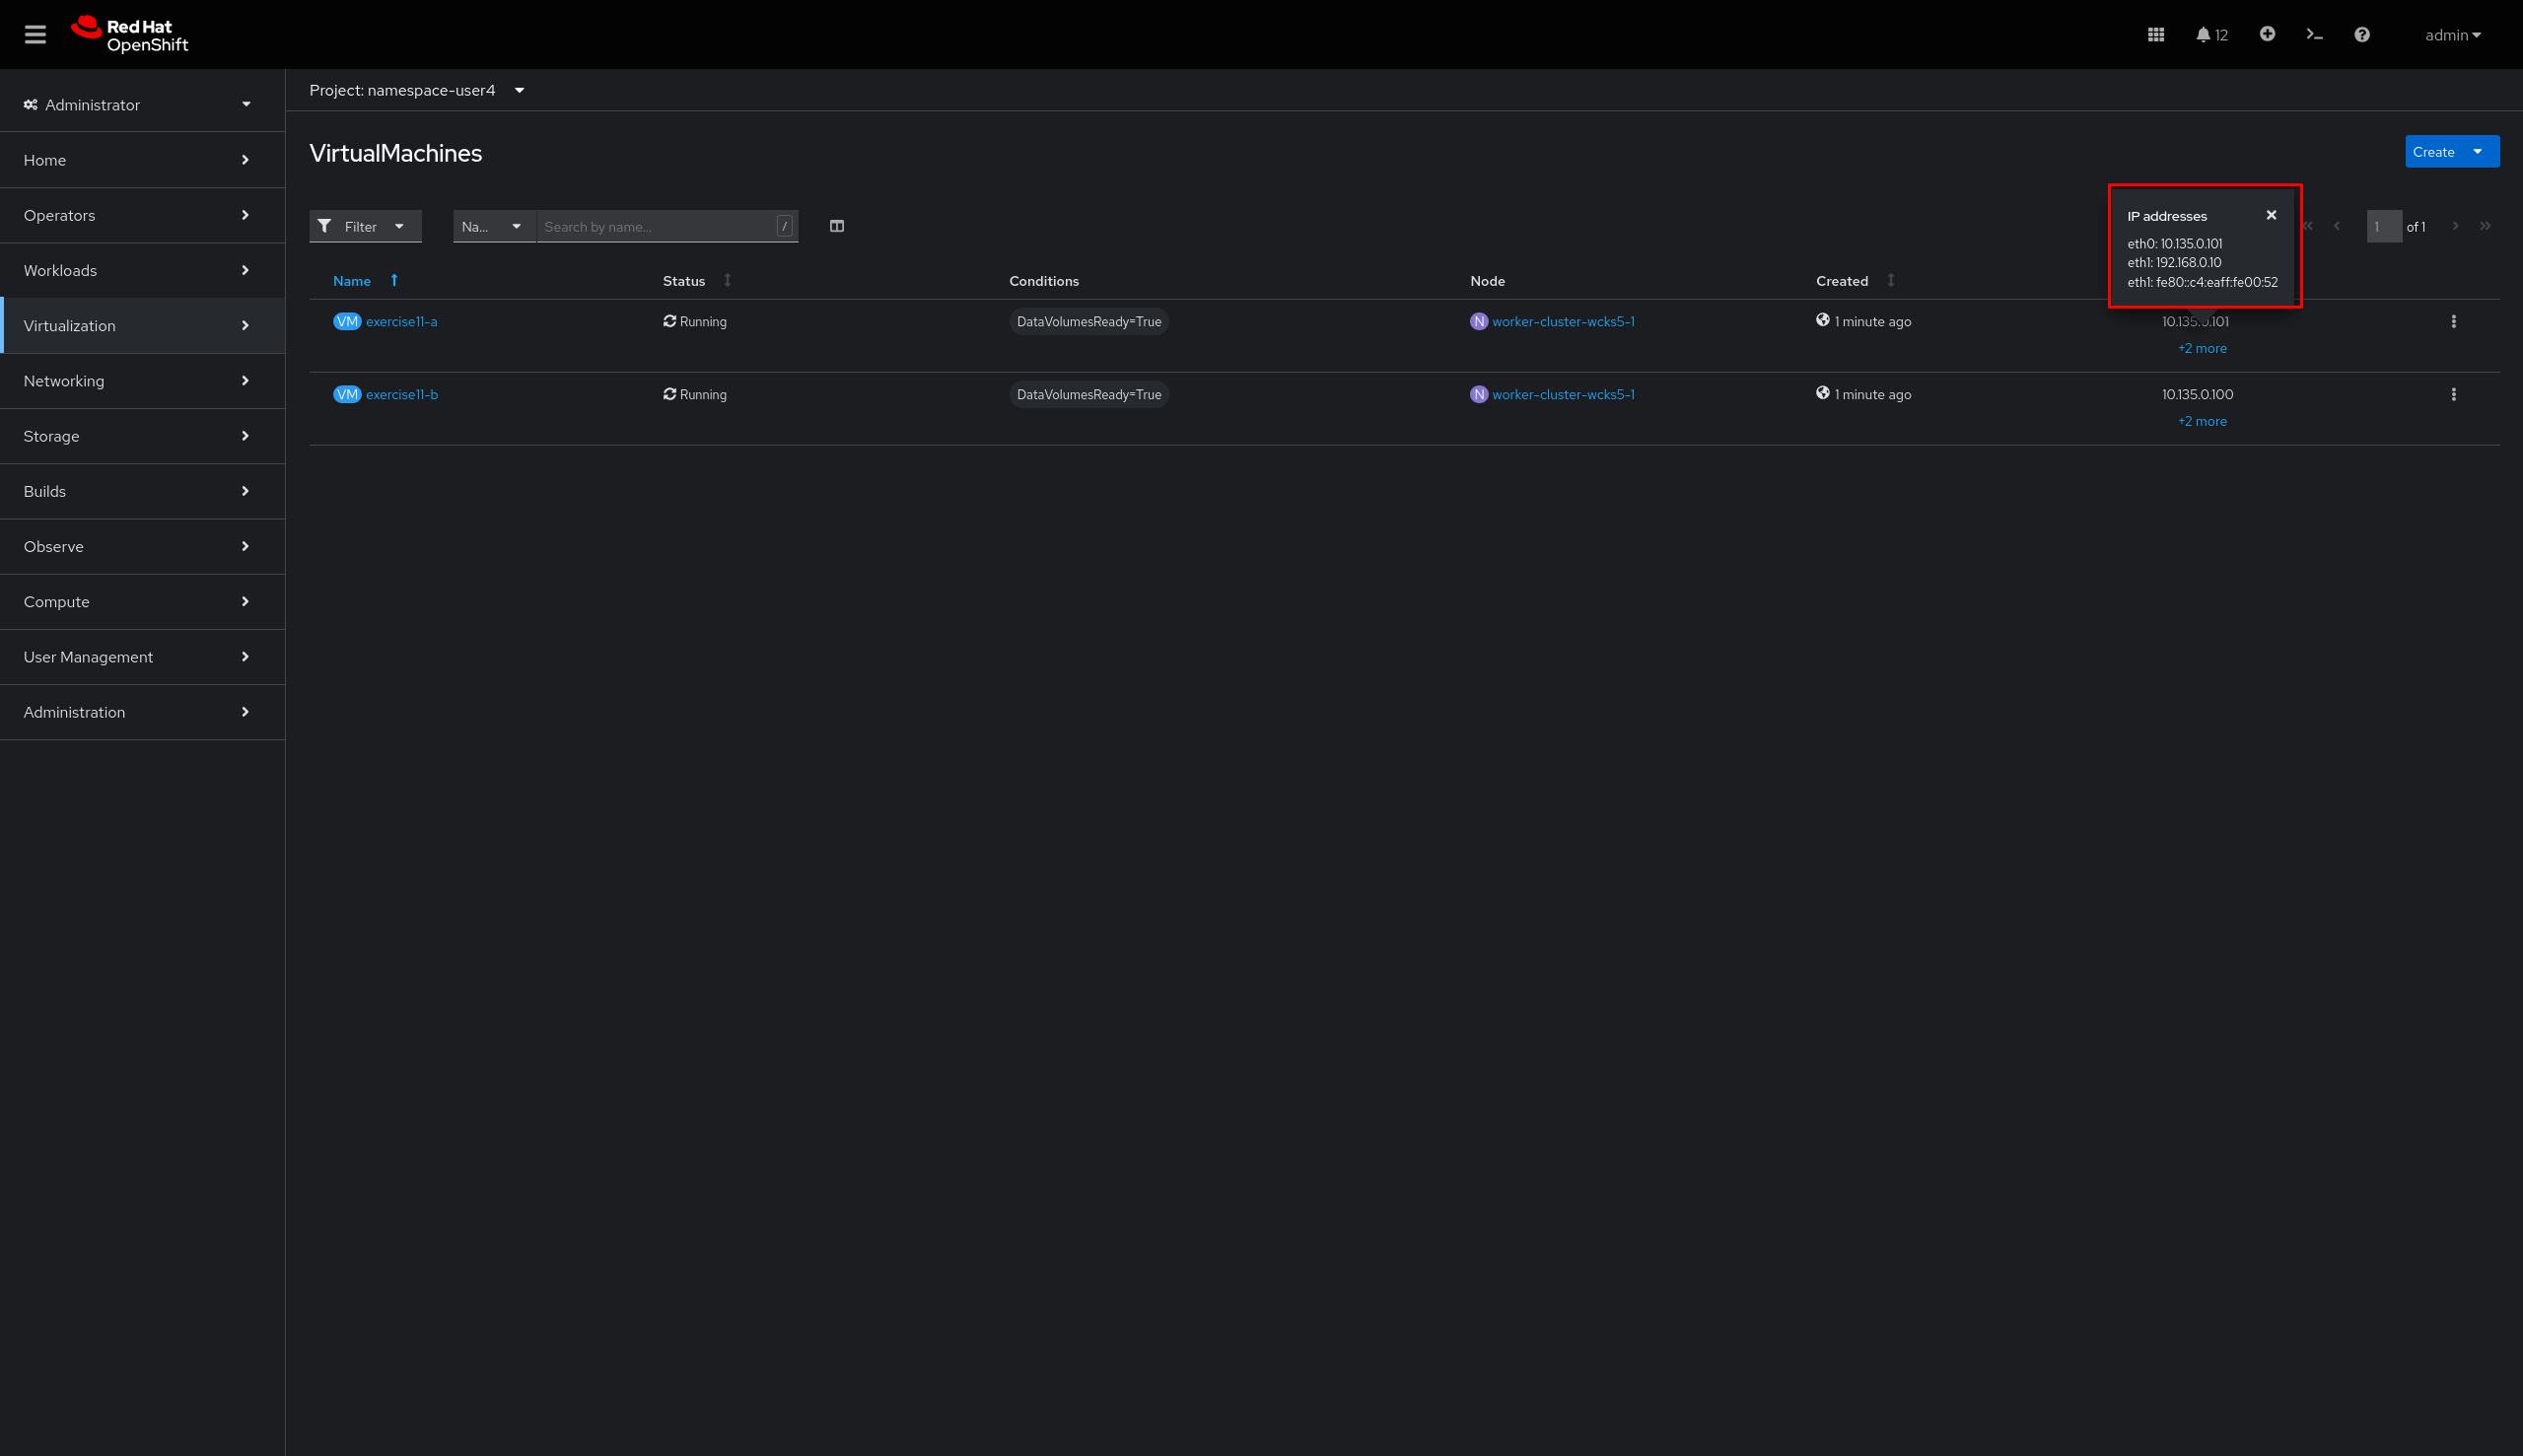
Virtual Machine
exercise11-aIP’s addresses
-
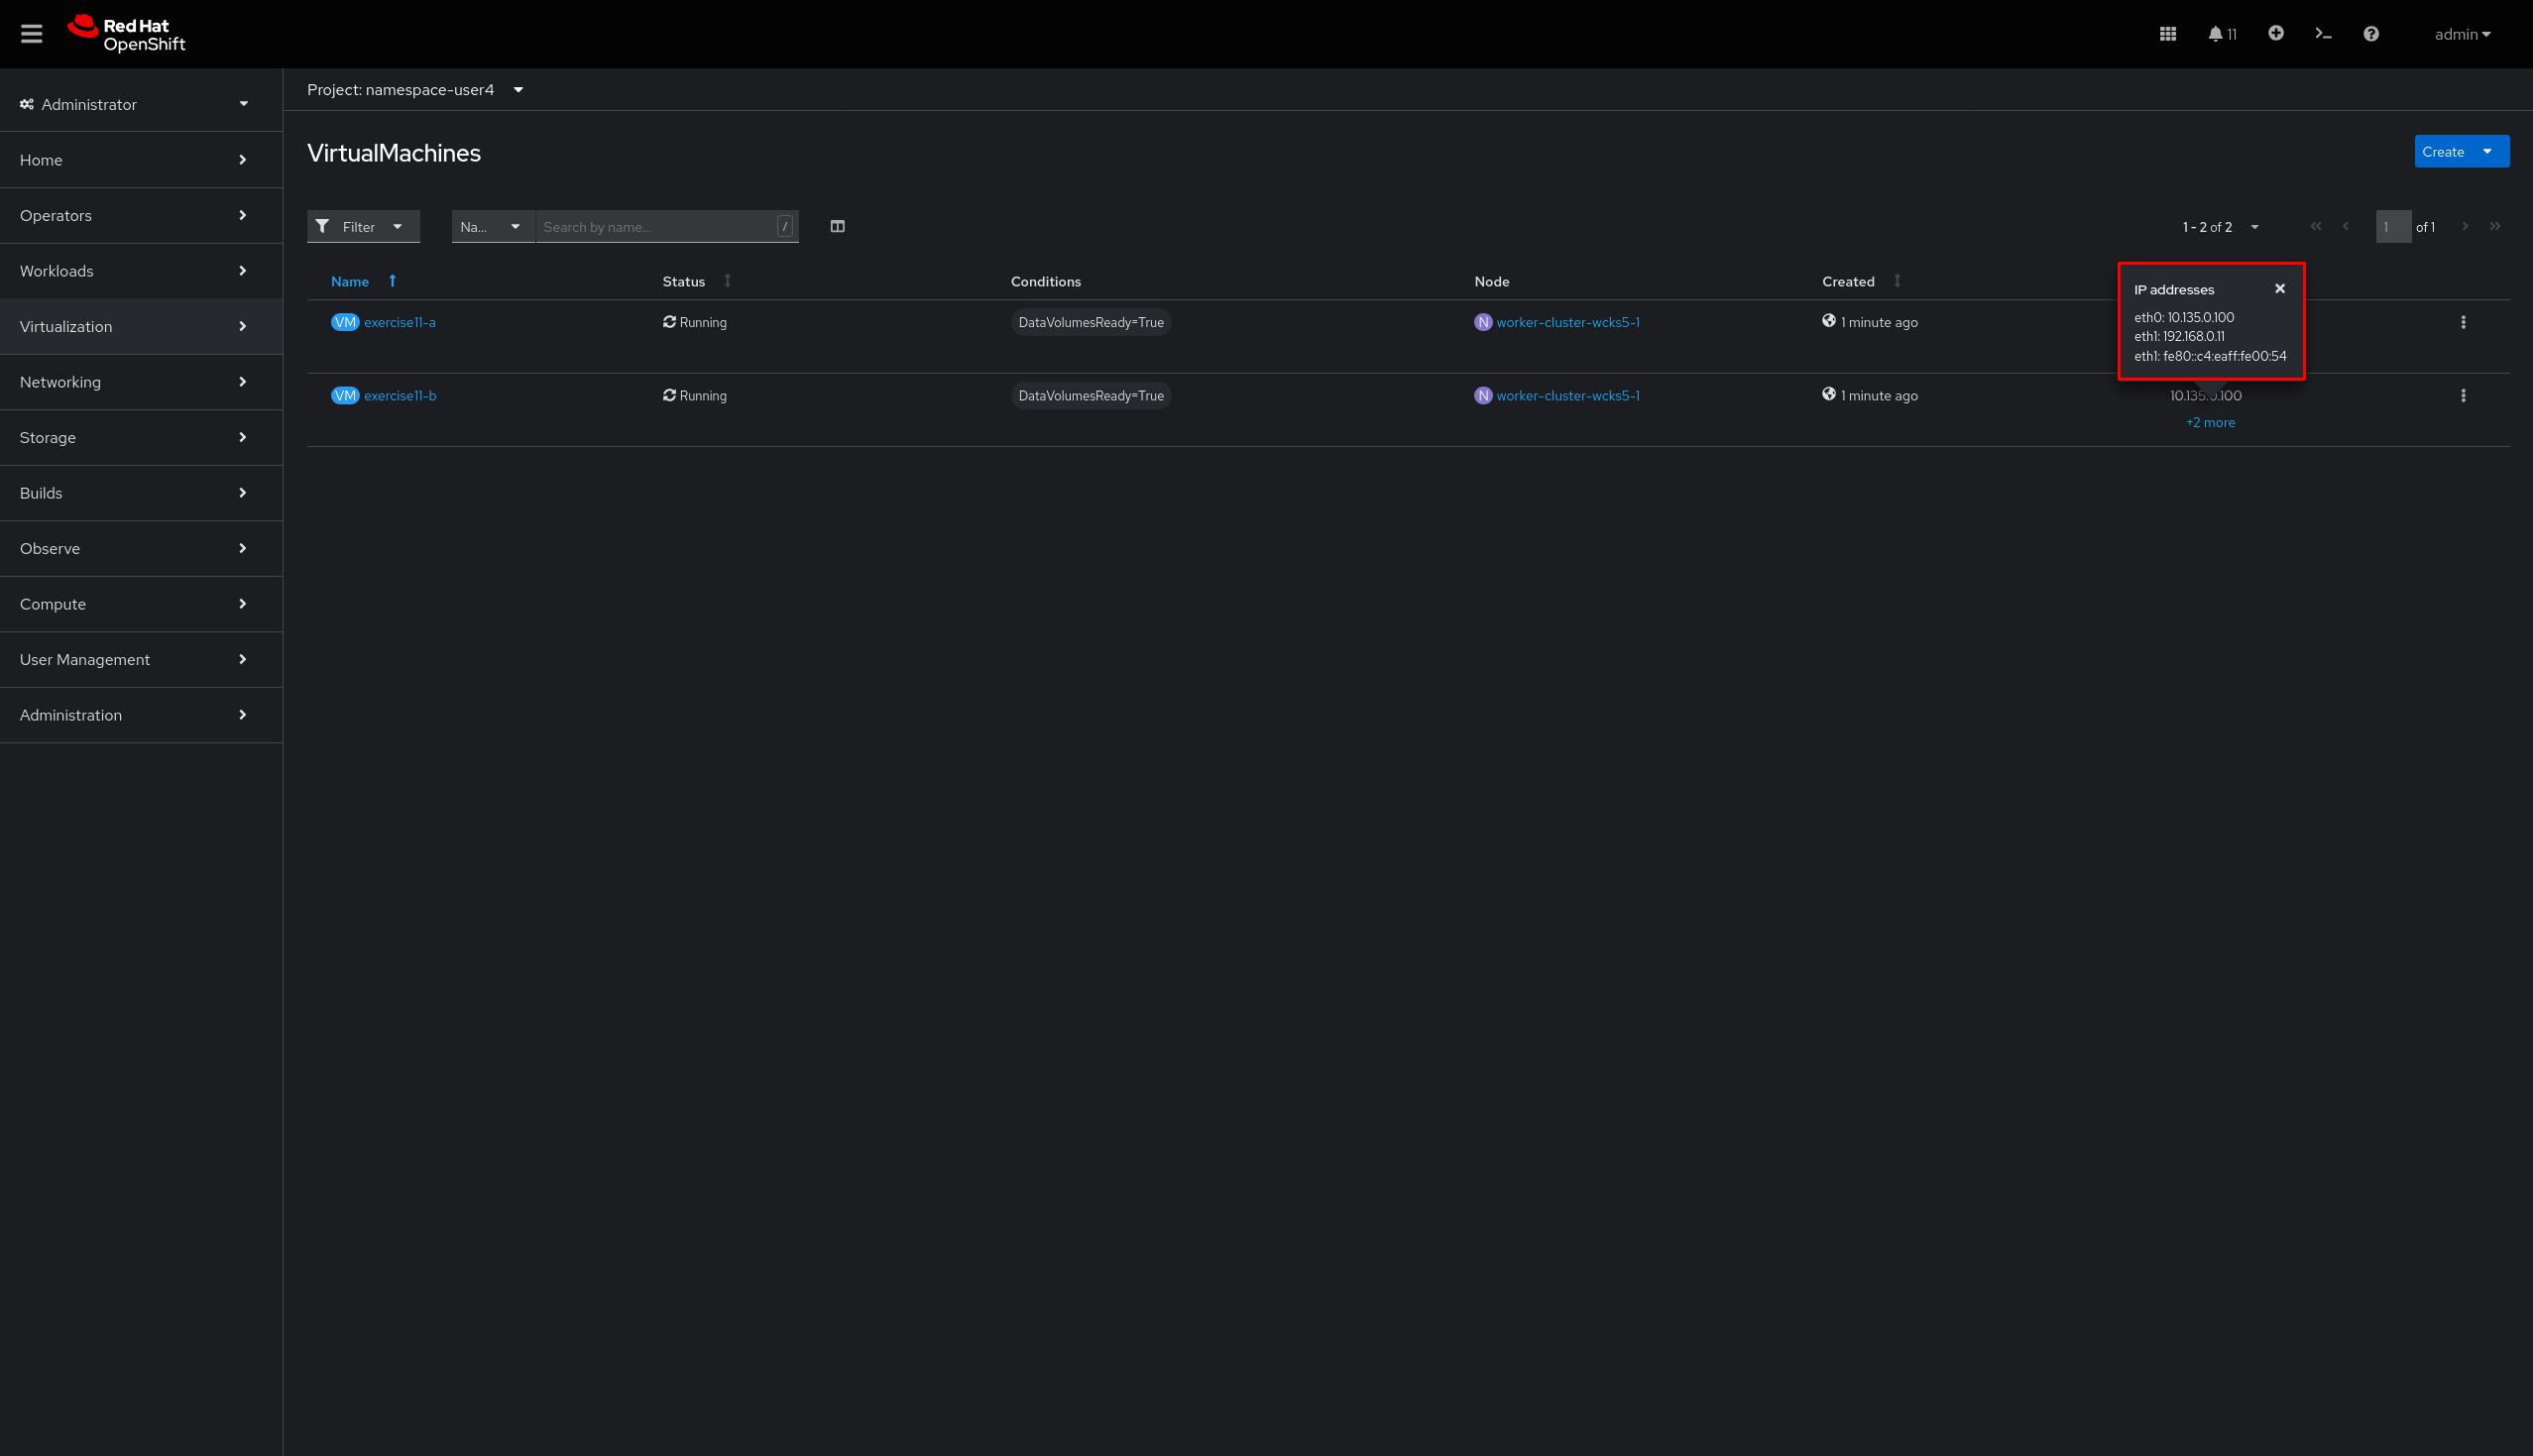
Virtual Machine
exercise11-bIP’s addresses
-
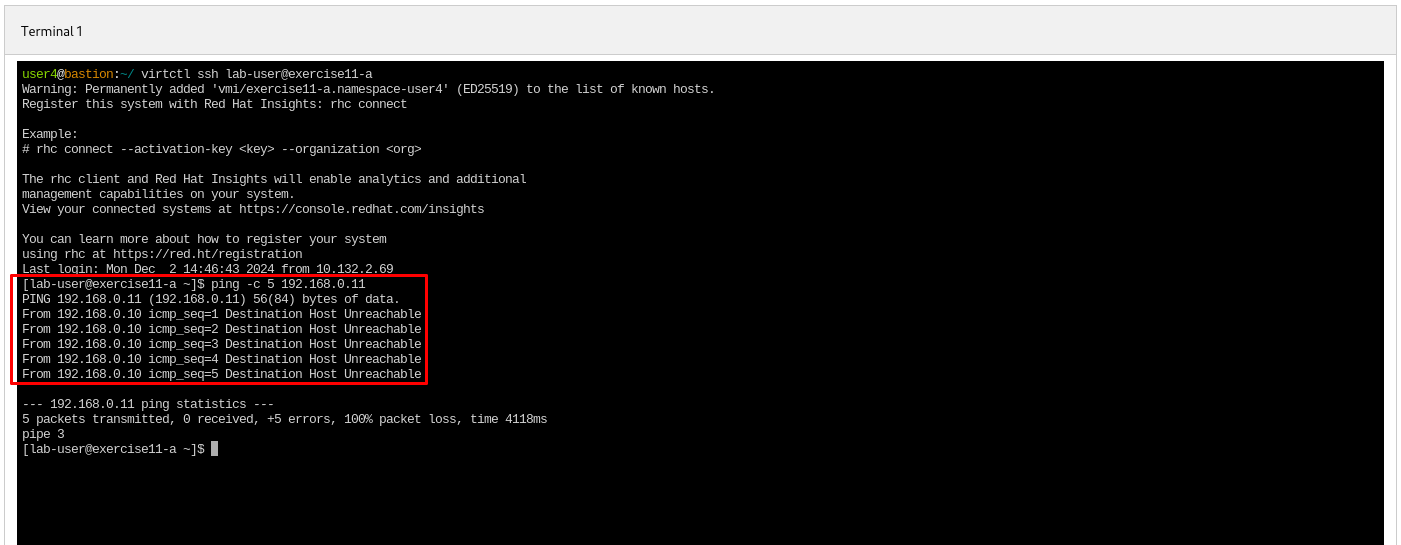
ping from
exercise11-atoexercise11-bis not working.
|
The steps to fix exercise11 are:
Console
-
Login to Openshift console using the assigned user account
userx{password}-
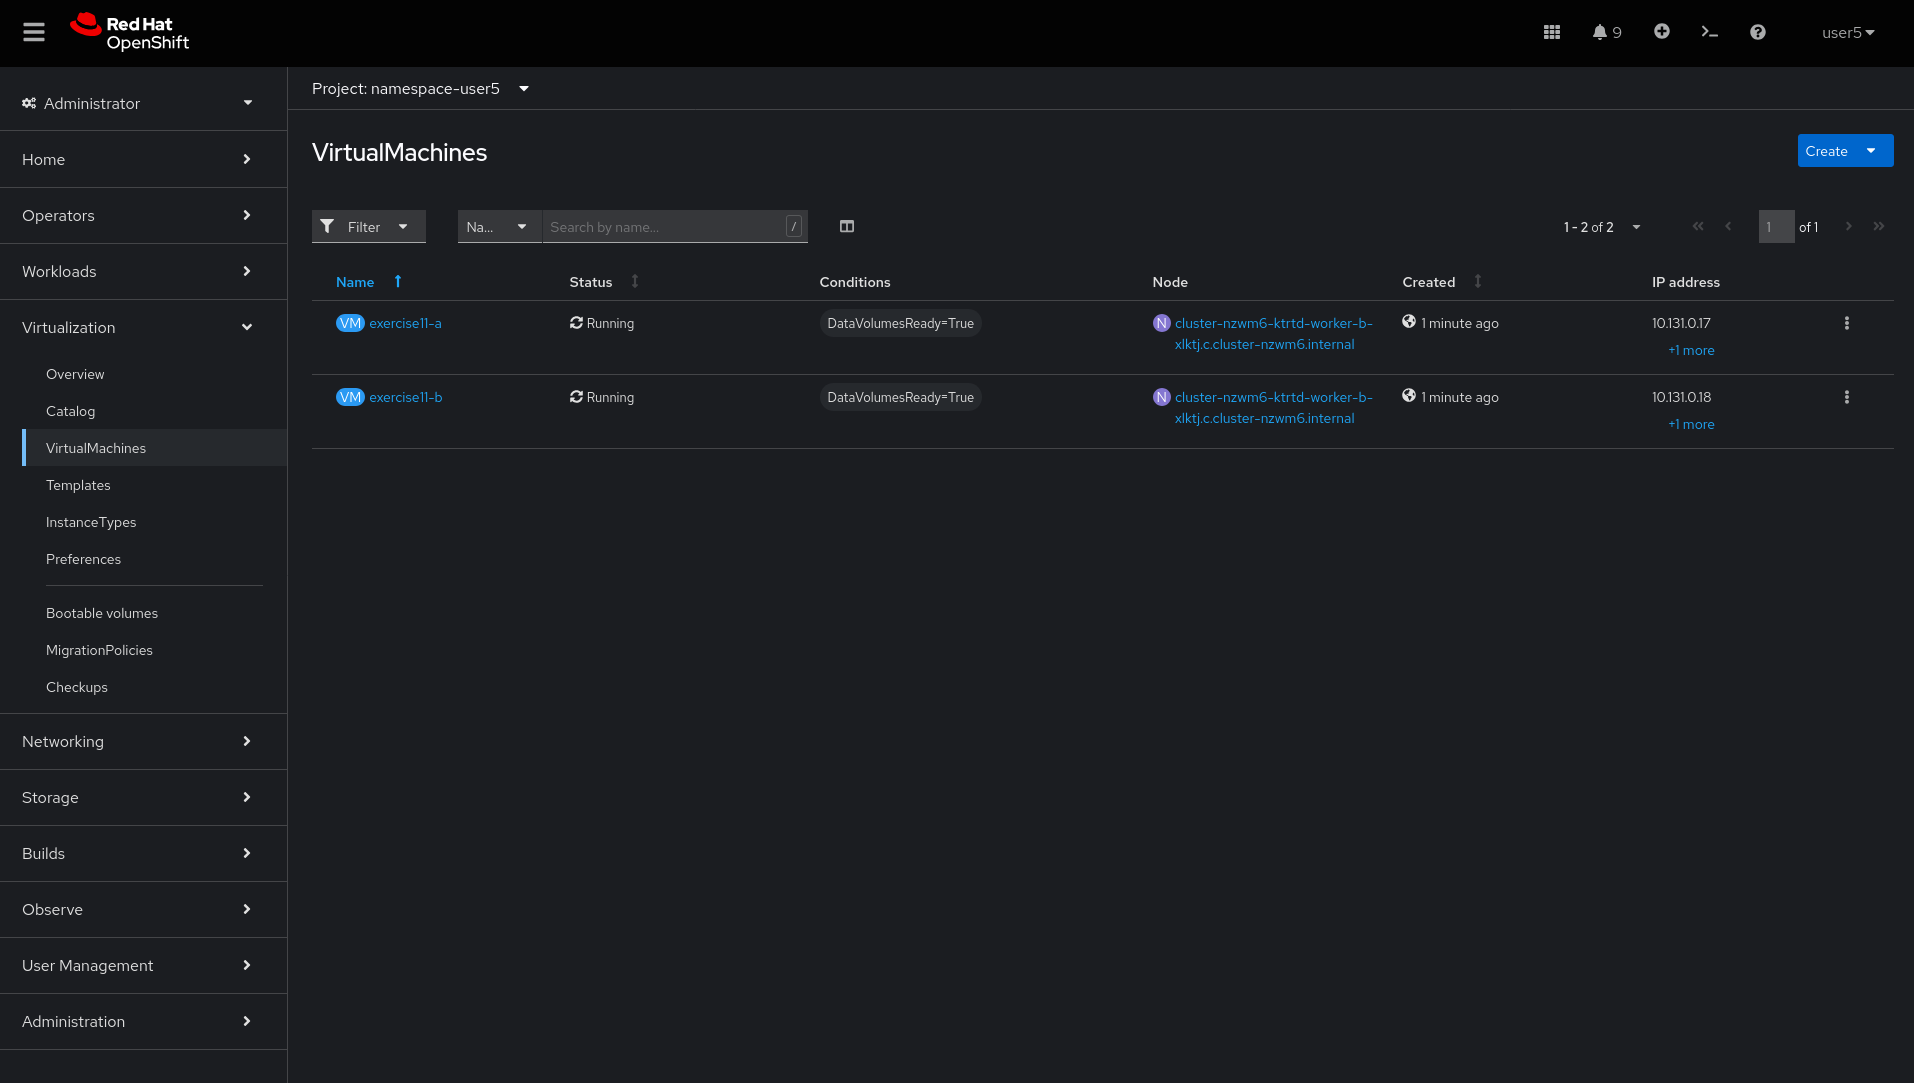
Go to Virtualization - VirtualMachines and check the virtual machines IP addresses
-
Verify
exercise11-aIP address
-
Verify
exercise11-bIP address
-
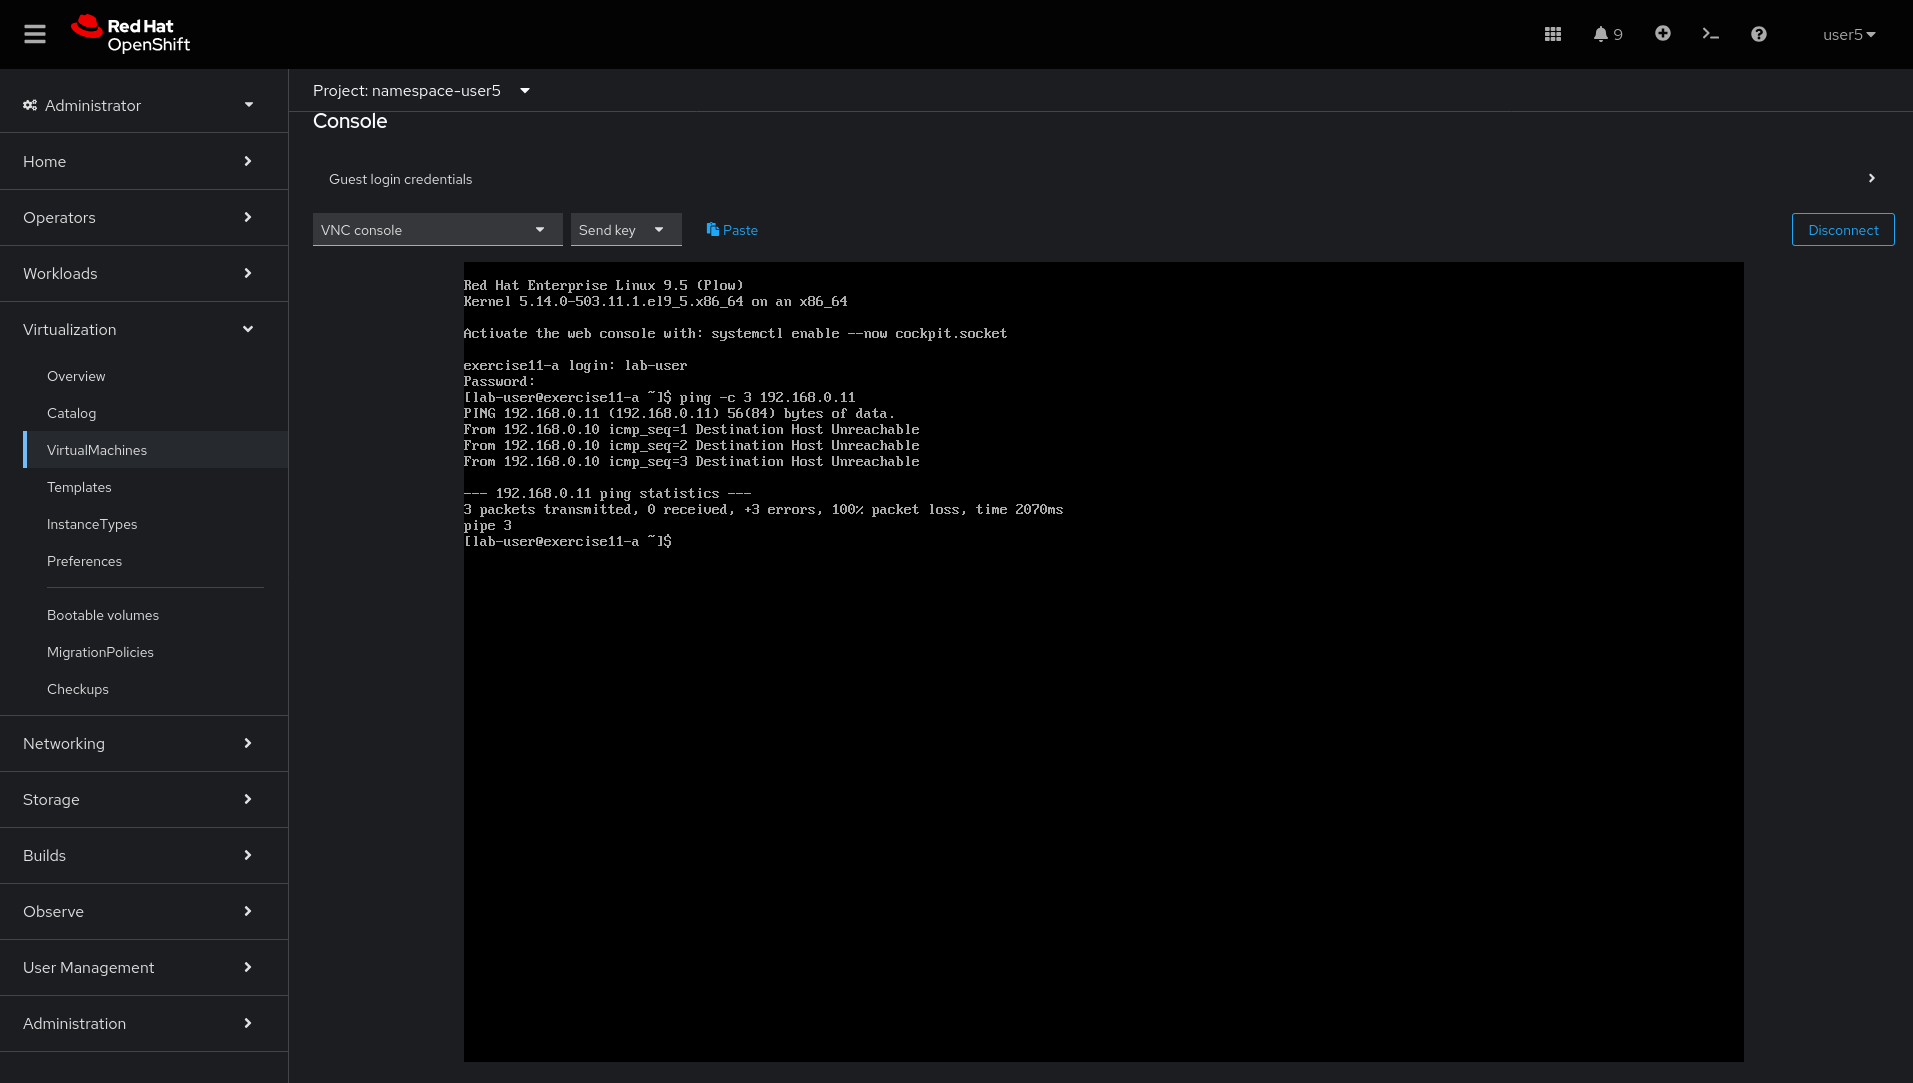
Click on
exercise11-aVirtual machine, openConsole, login with userlab-userand passwordredhat1. Try to ping and verify it’s not working.
-
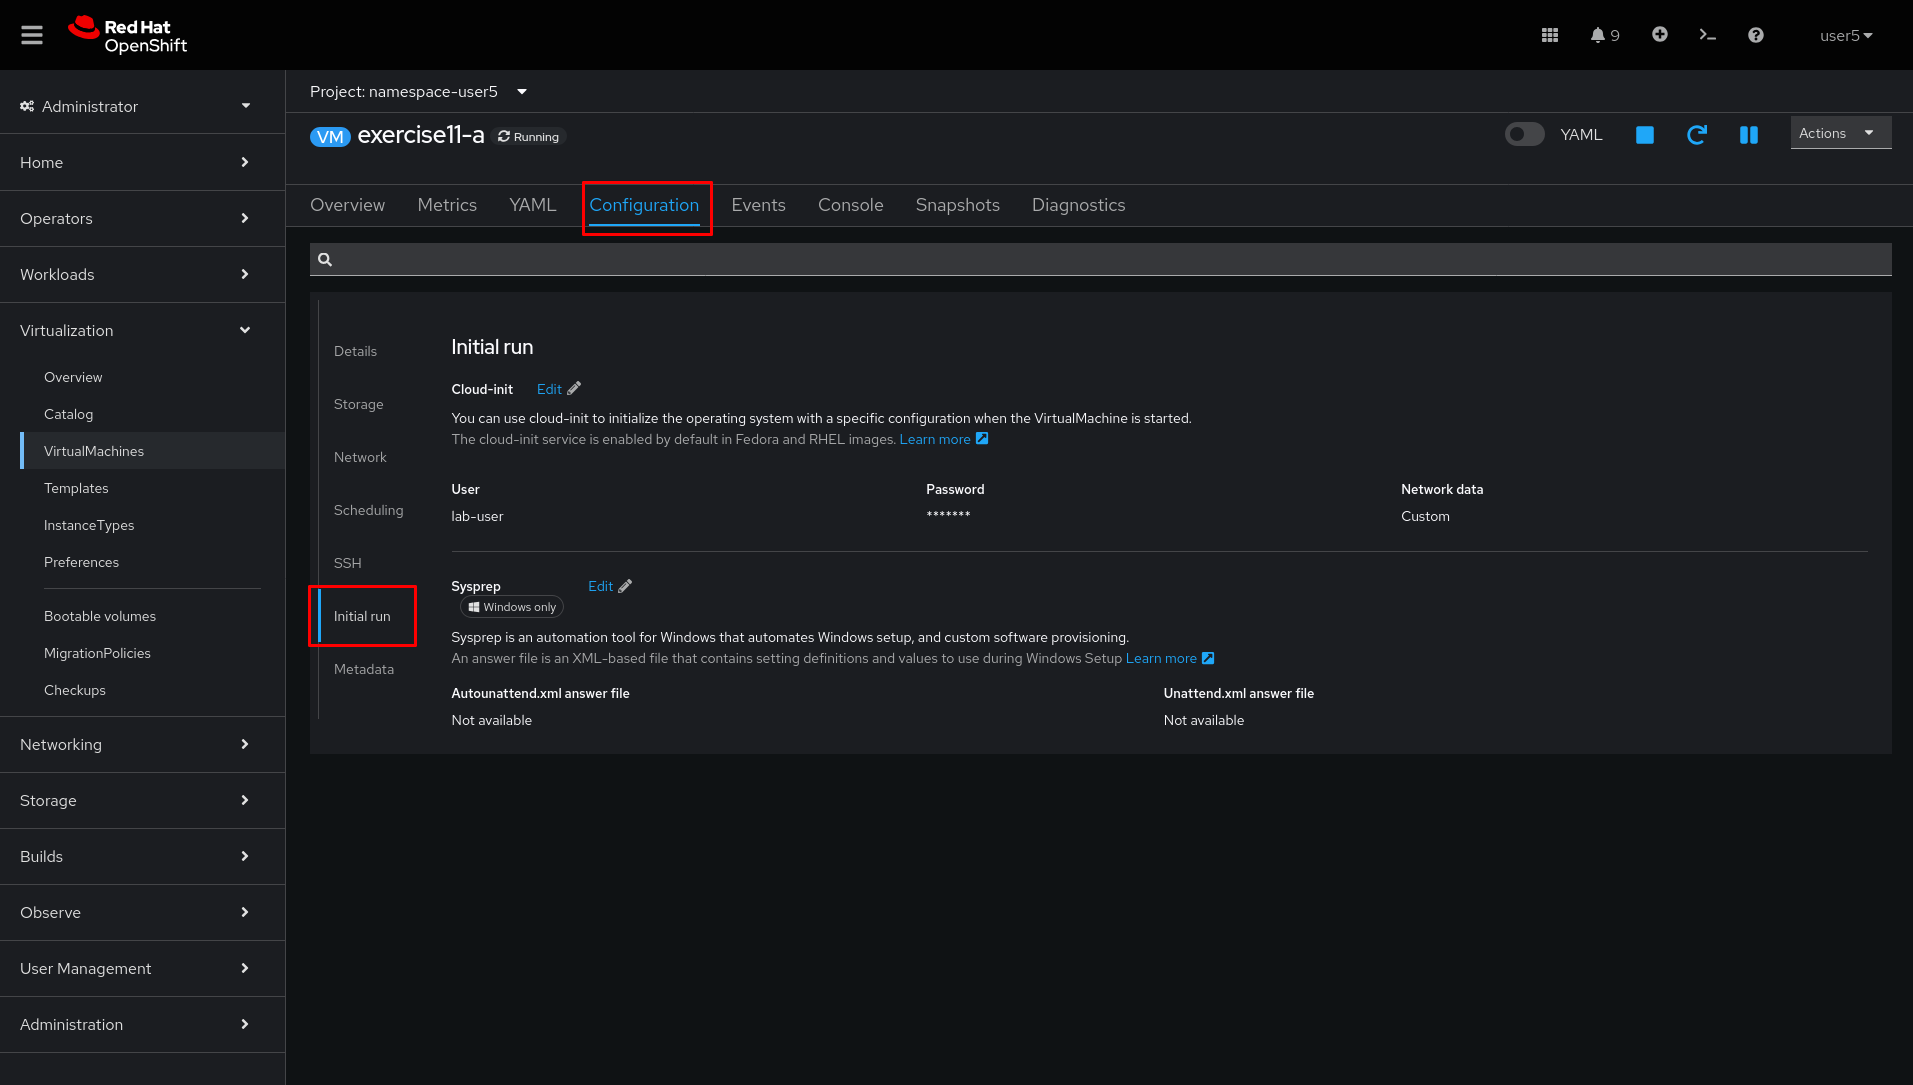
On
exercise11-avirtual machine, click onConfiguration→Initial run
-
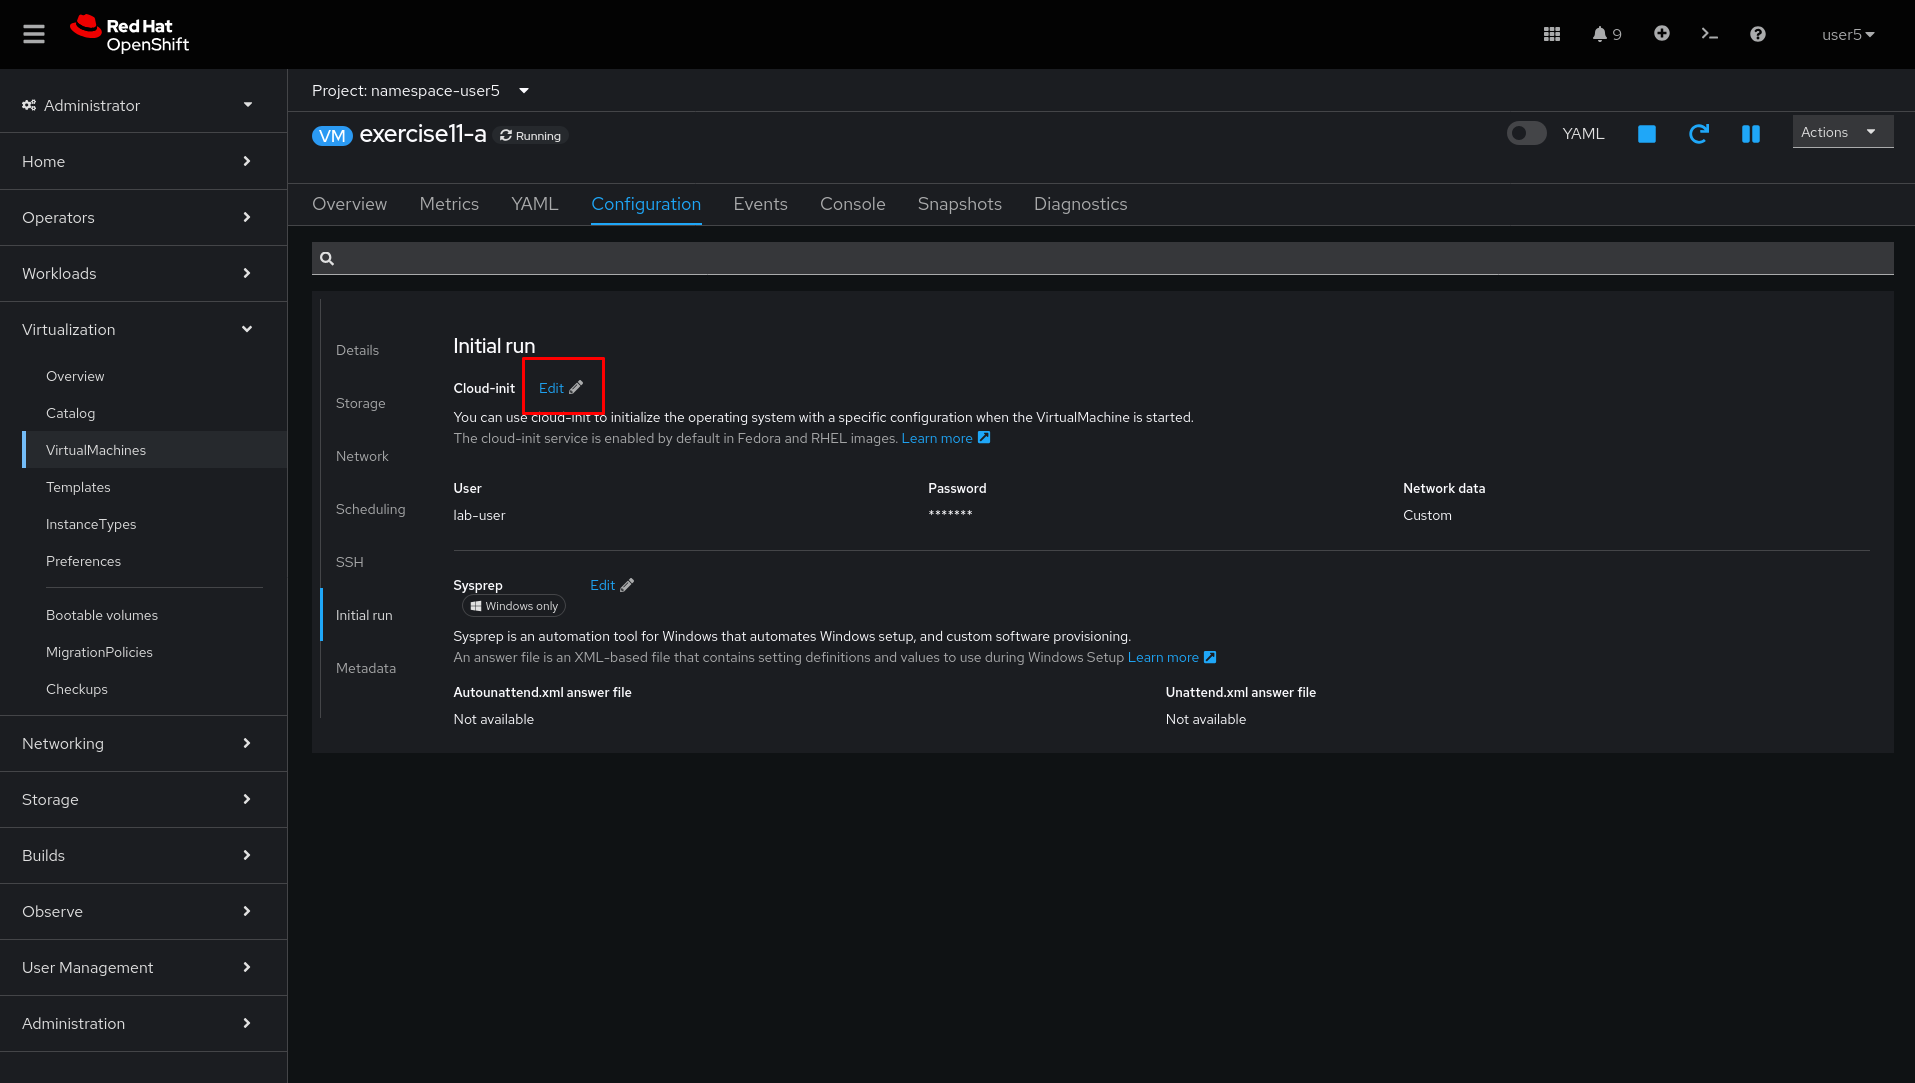
Click
edit
-
Verify the IP address is configured as cloud-init.

-
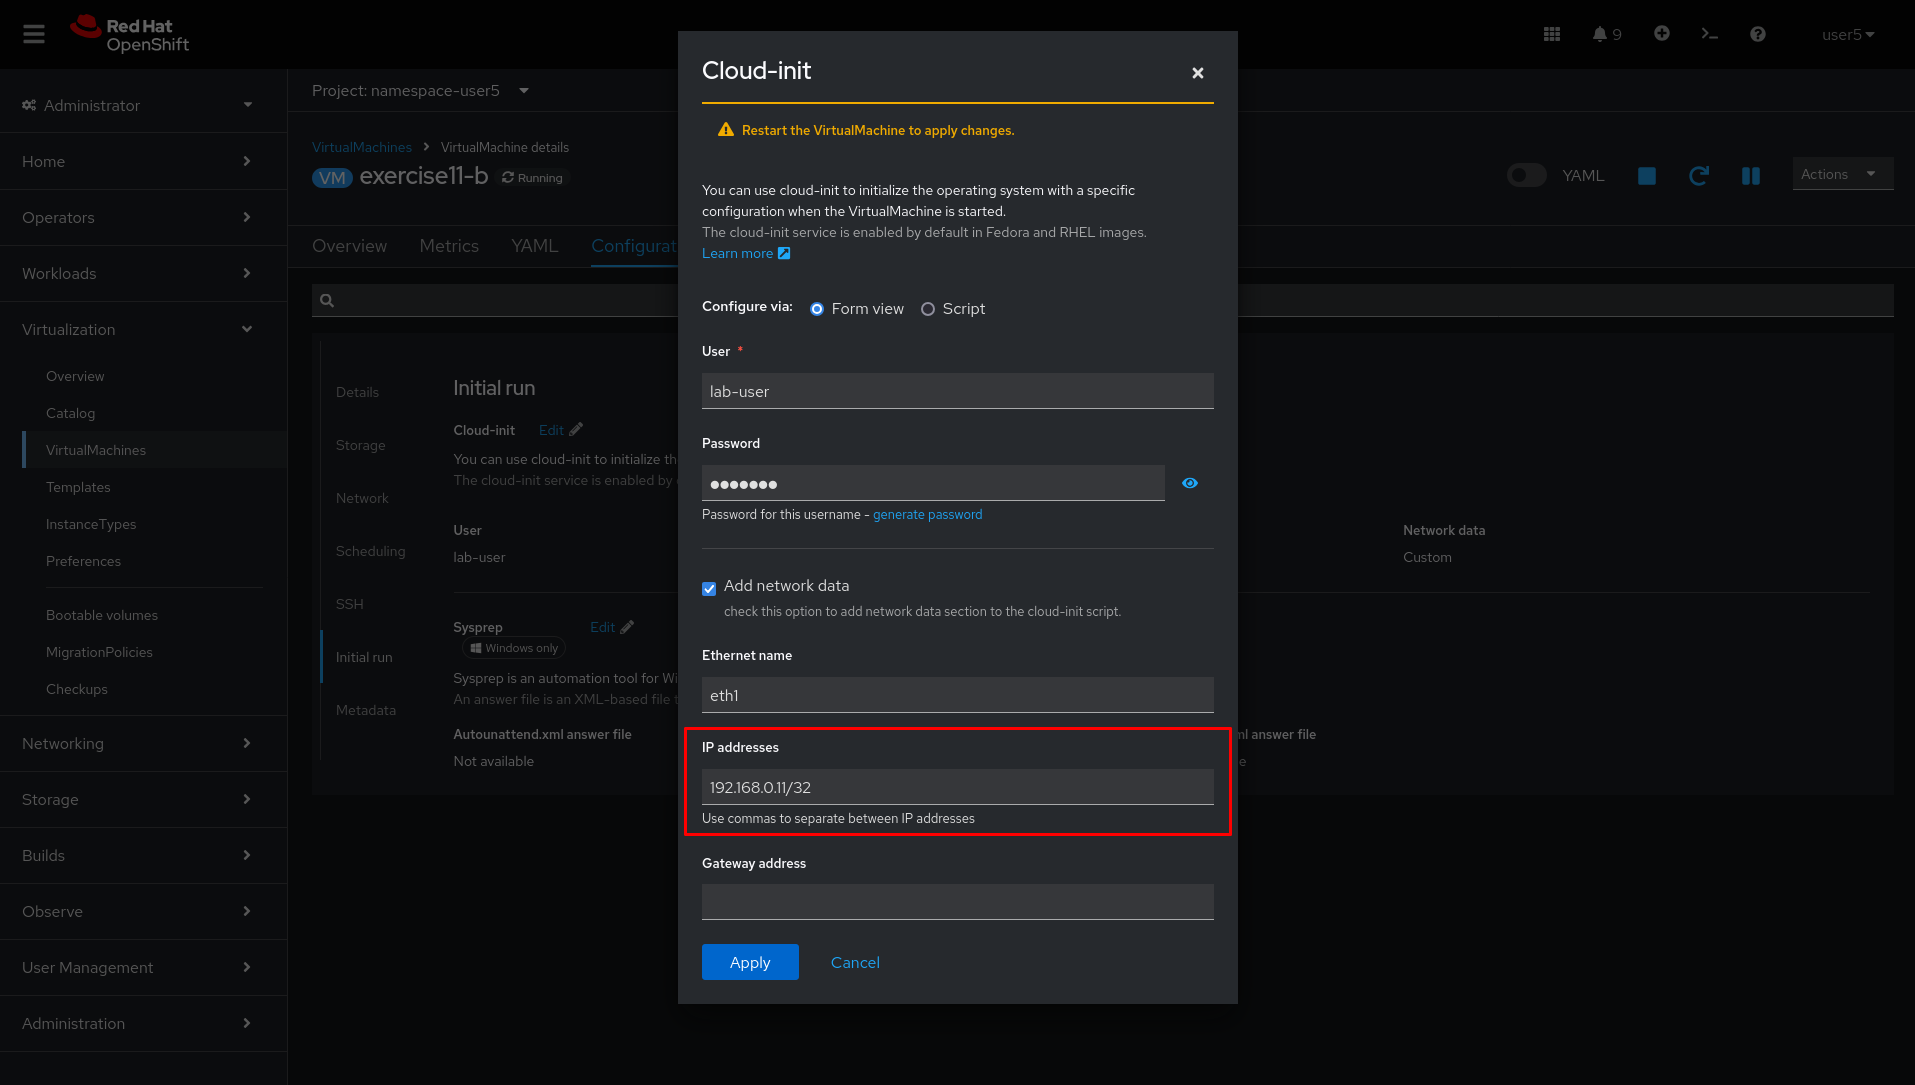
Perform the same steps to
exercise11-bvirtual machine and verify that this IP address was misconfigured using a /32 netmask, which must be fixed.
-
Click on YAML tab and Download the yaml file. It will be used to recreate the virtual machine with the correct netmask.

-
Click
Actions→Stop→Actions→Deleteto delete theexercise11-bvirtual machines
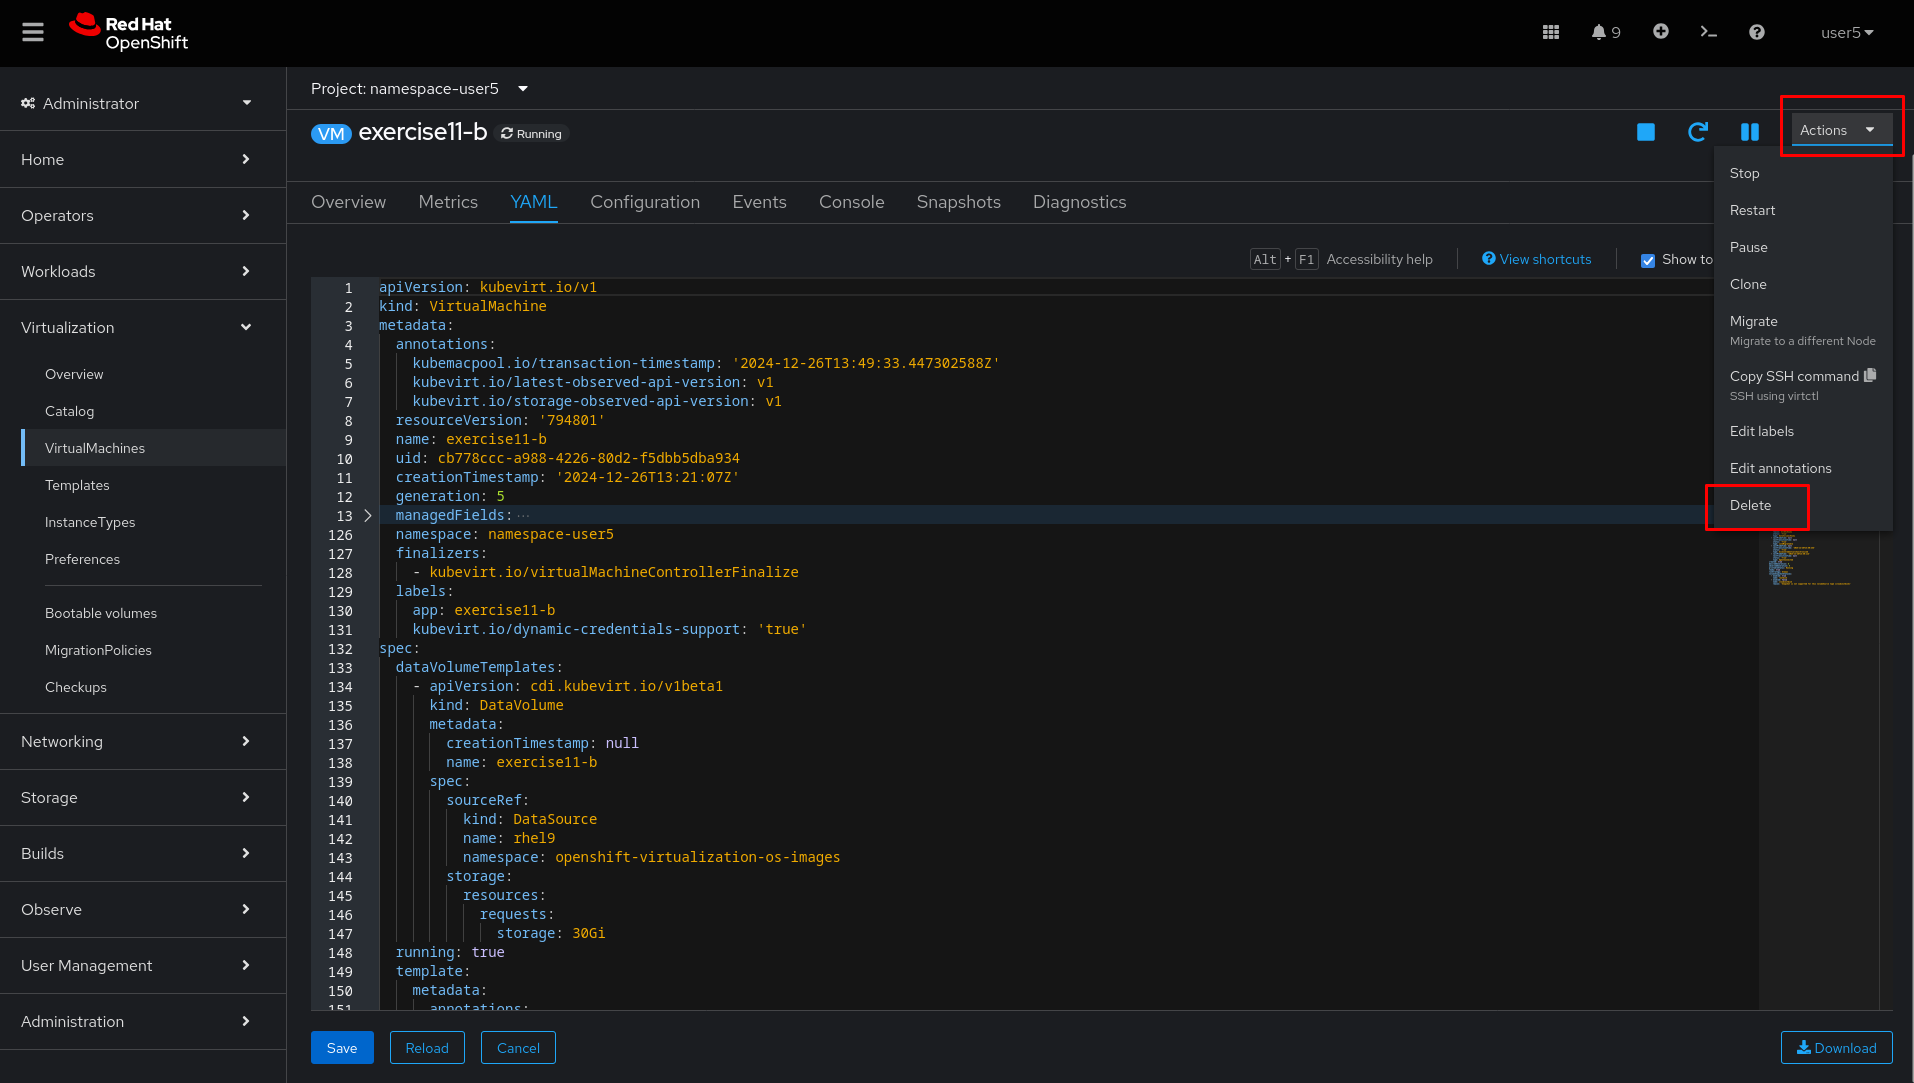
-
Click
Delete

-
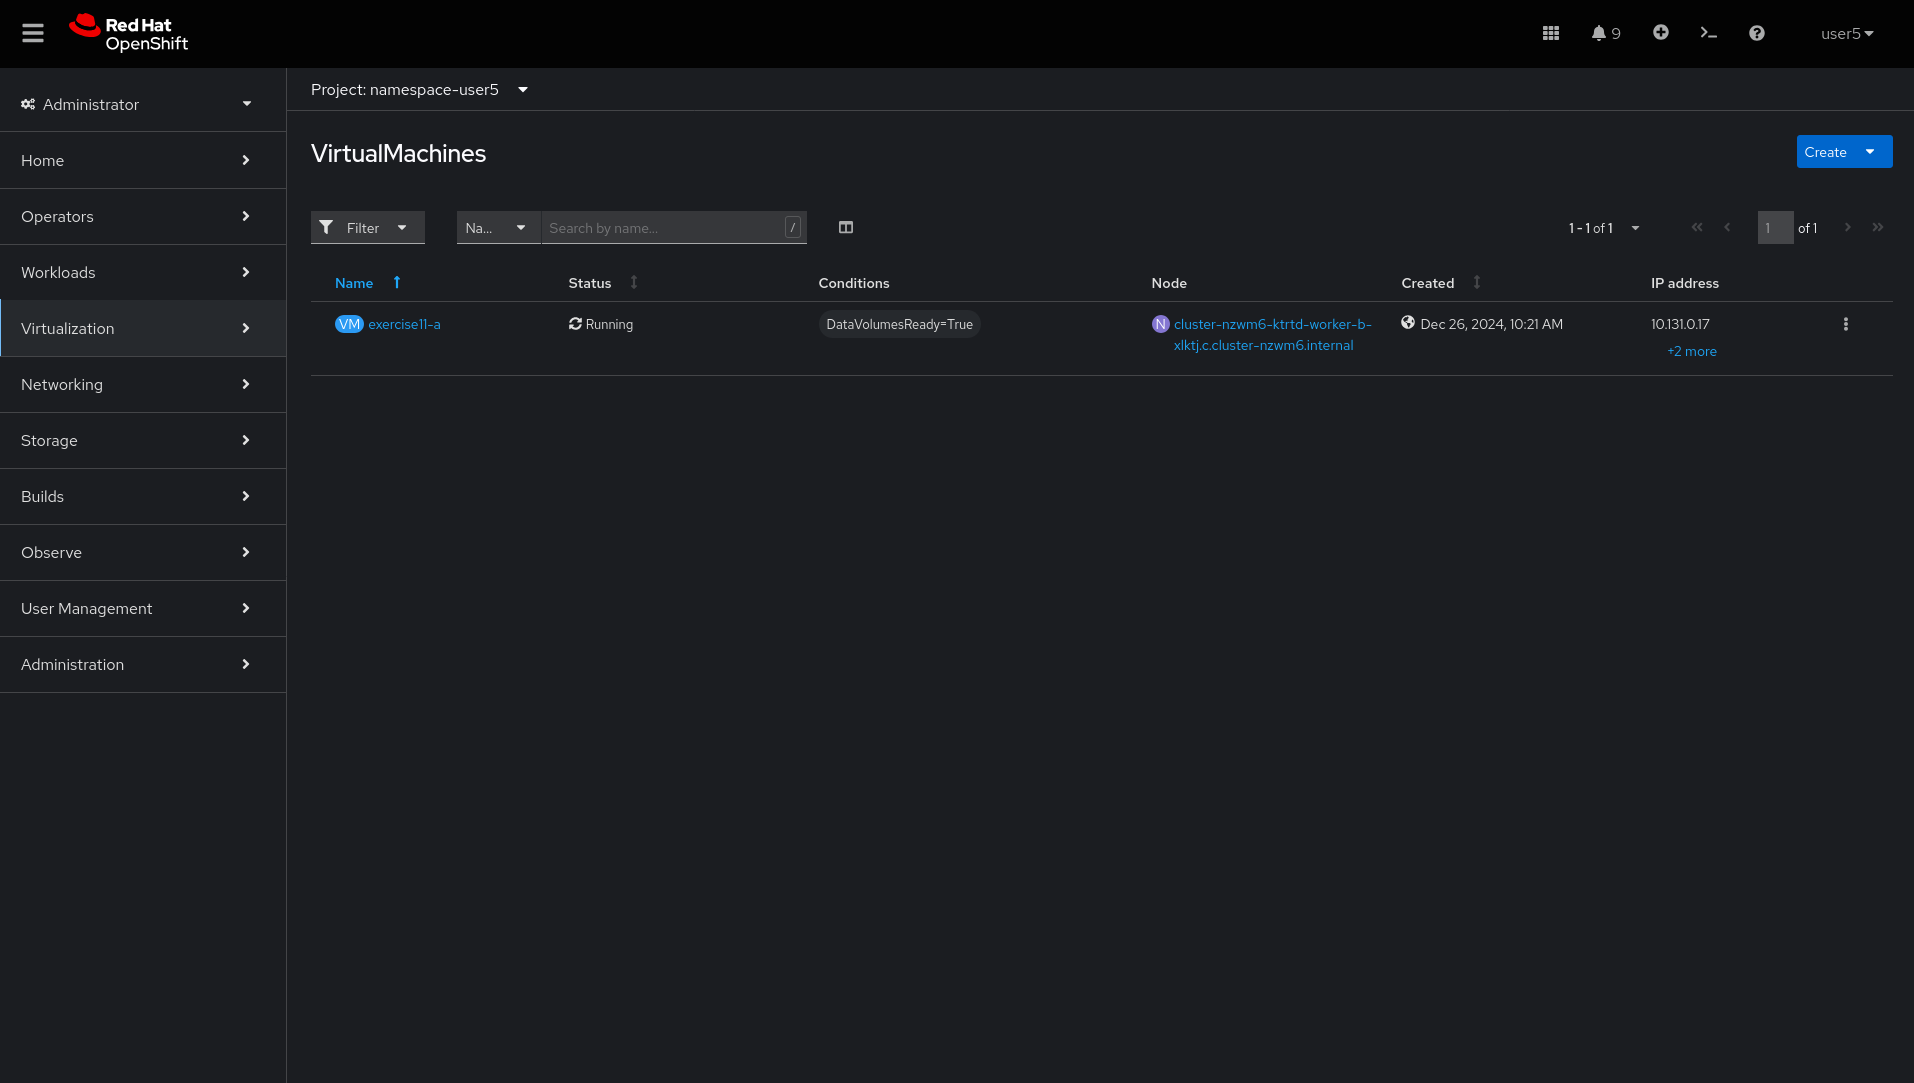
Wait for
exercise11-bto be deleted.
-
Click
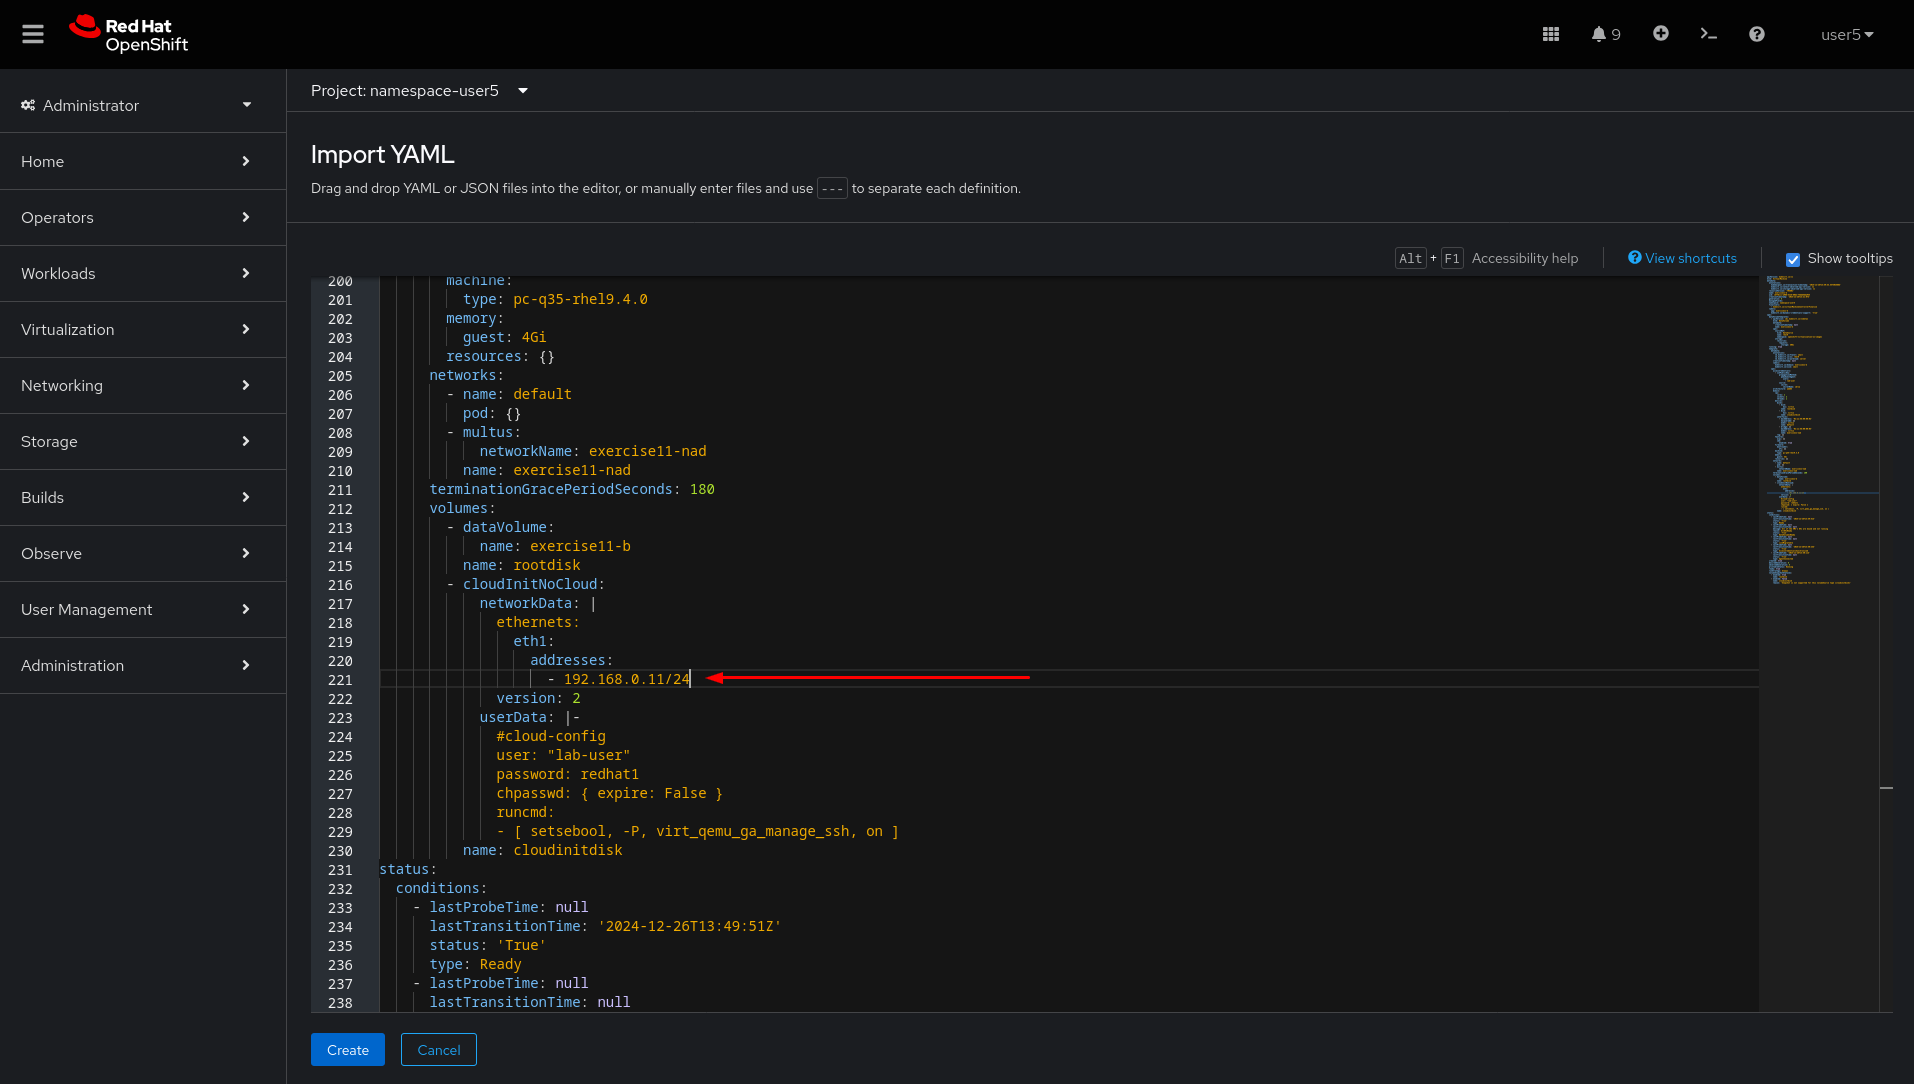
+-→Import YAMLbutton to create a new virtual machine using the YAML downloaded on step 9.

-
Paste the YAML content and edit the IP configured to this VM from
192.168.0.11/32to192.168.0.11/24
-
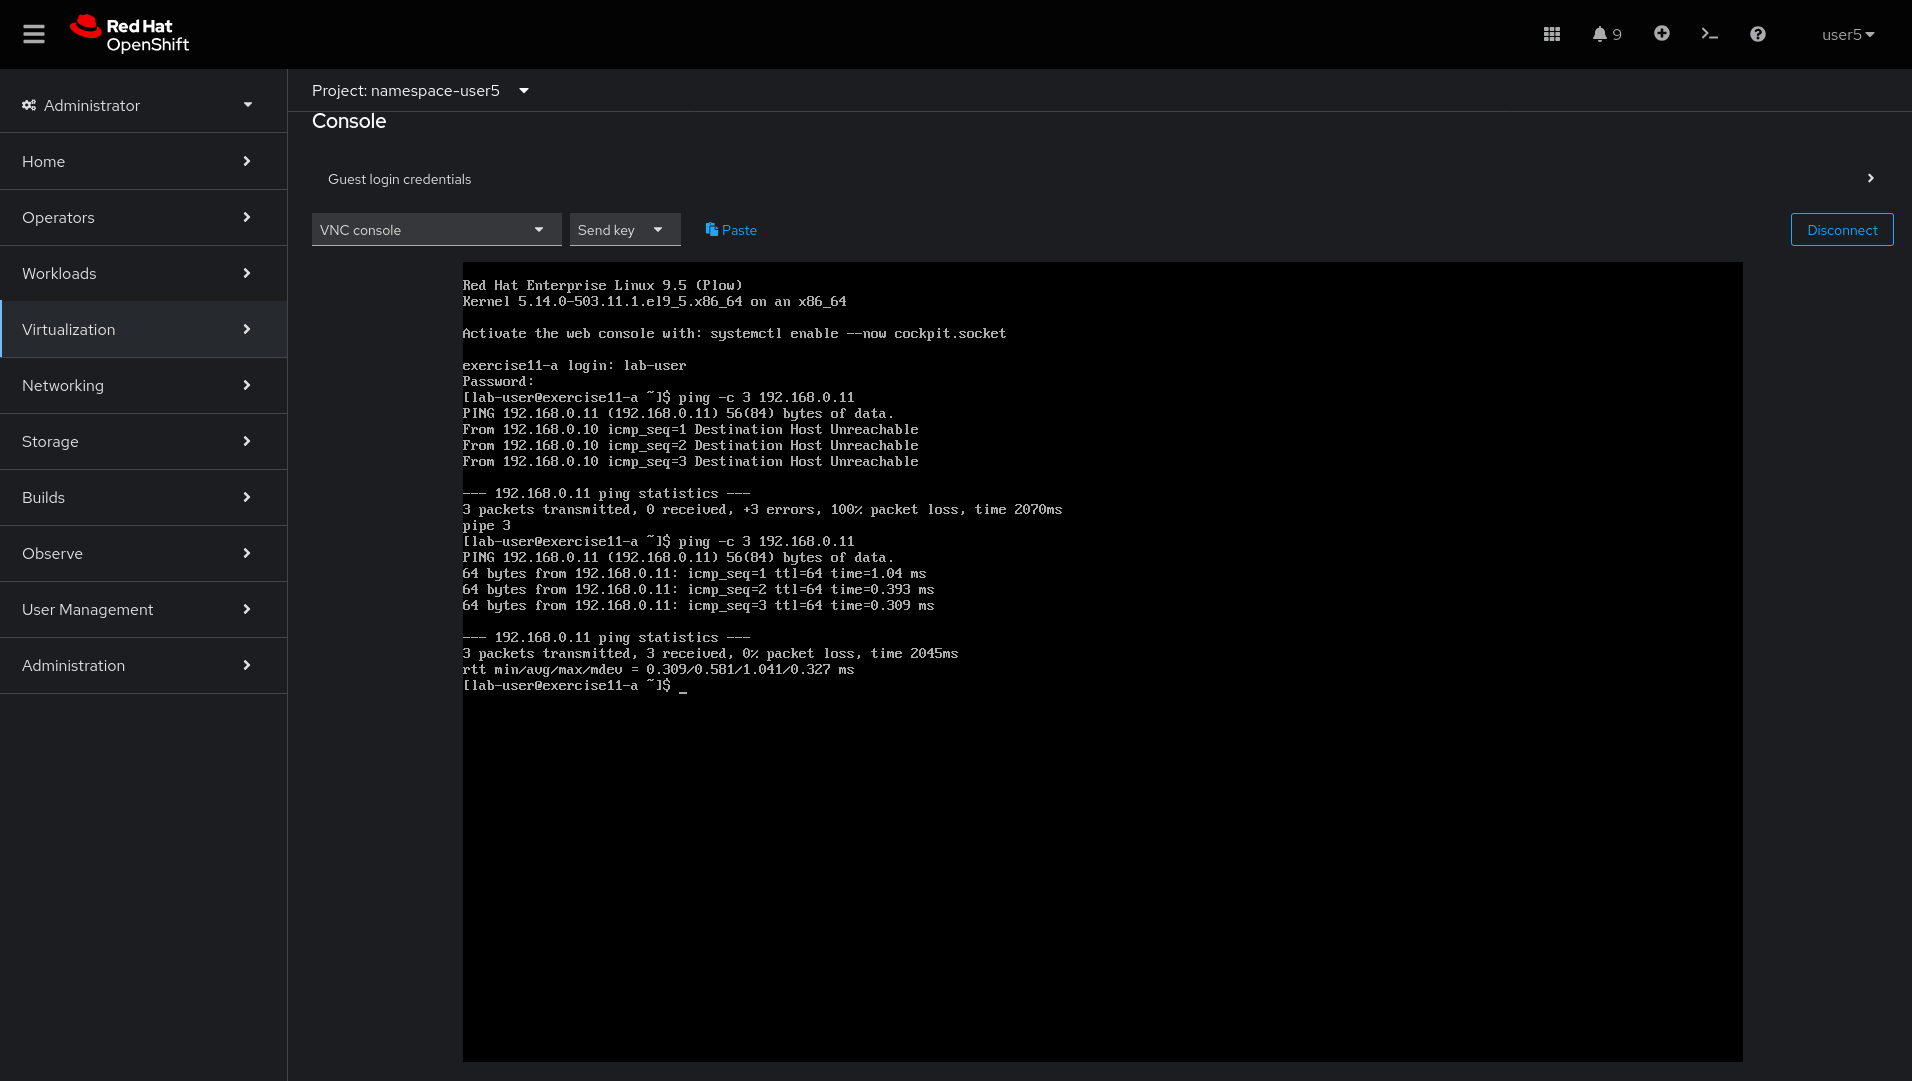
Wait for
exercise11-bVirtual Machine be recreated and verify that communication os working.
lab grade exercise11Command line (CLI)
-
Login to Openshift server API using the assigned user account with
occommand if not logged in.
{login_command}-
Go to the assigned namespace-userx
oc project namespace-userx-
List the virtual machines
oc get virtualmachine-
Verify the communication is not working
virtctl ssh lab-user@exercise11-a \
-c 'ping -c 3 192.168.0.11'-
Check the virtual machine exercise11-a and exercise11-b are with IP configured
virtctl ssh lab-user@exercise11-a \
-c 'ip -4 addr show dev eth1'
virtctl ssh lab-user@exercise11-b \
-c 'ip -4 addr show dev eth1'-
Check the virtual machines are configured with static IP on CRD VirtualMachine with cloud-init
oc get vmi exercise11-a -n namespace-userx \
-o jsonpath='{.spec.volumes[?(@.cloudInitNoCloud)].cloudInitNoCloud.networkData}'
oc get vmi exercise11-b -n namespace-userx \
-o jsonpath='{.spec.volumes[?(@.cloudInitNoCloud)].cloudInitNoCloud.networkData}'-
The issue is with the
exercise11-bvirtual machine, which is incorrectly configured with a /32 subnet mask but should be using a /24 subnet mask. Since the IP address is set using cloud-init, the virtual machine must be recreated to correct the configuration. Before recreating the virtual machine, use the command to saveexercise11-b, removing some unnecessary fields.
oc get virtualmachine exercise11-b -o yaml |\
sed -e '/managedFields:/,/^[^ ]/d' \
-e '/creationTimestamp:/d' -e '/resourceVersion:/d' \
-e '/uid:/d' -e '/status:/,/^[^ ]/d' > exercise11-b.yaml-
Edit the IP on YAML file and change from /32 to /24.
vim exercise11-b.yaml-
Delete exercise11-b virtual machine
oc delete virtualmachine exercise11-b-
Apply the edited YAML file
oc apply -f exercise11-b.yaml-
Check the communication is working again
virtctl ssh lab-user@exercise11-a \
-c 'ping -c 3 192.168.0.11'